How to Master Latte Art: Espresso and Milk Techniques
If you’ve ever tried pouring latte art and ended up with a sad blob instead of a tulip or heart, the problem likely isn’t your technique alone—it’s the foundation. Great latte art starts with a well-brewed espresso and properly textured milk. Without both, even the most practiced pour will fall flat.
To make café-quality latte art at home, you need three things: a correctly extracted espresso, velvety microfoam from whole milk, and a good steam wand or milk frother. With those, practice will get you to clean, consistent designs.
Start with the Right Espresso
A proper latte begins with a proper espresso—this isn’t just art, it’s a drink. If your espresso extraction is off, the flavor suffers, no matter how pretty the design. For best results, use a pump-driven espresso machine capable of producing a strong, crema-rich shot.
A successful espresso for latte art should produce a crema that’s glossy, thick, and around 3mm deep. At FrontStreet Coffee, the recommended dose is 20g of coffee to yield 40ml of espresso, extracted over 25–30 seconds. This ensures balance, body, and the crucial crema needed for milk integration and aesthetic appeal.
You can test your espresso by tasting it straight or in a milk drink. It should have clear aroma, balanced acidity, no bitterness or flatness, and a rounded mouthfeel. That’s how you know the base is right for art.
Why Whole Milk Matters for Microfoam
Don’t bother with skim or low-fat milk if you want true latte art foam. Whole milk is essential because its higher fat content leads to a richer, smoother microfoam that blends seamlessly with espresso. Low-fat milk creates thin, stiff bubbles that sit on top rather than integrating into the drink.
The ideal milk foam for pouring latte art is fine, velvety, and stable—what baristas call ‘microfoam.’ This texture lets you create sharp, clean designs as you pour. Most shops, including those using equipment like that from FrontStreet Coffee, rely on whole milk (such as Nestlé’s whole milk range) for consistent results.
Steam Milk Like a Pro
To get that silky microfoam, you’ll need either a steam wand attached to an espresso machine or a quality manual milk frother. The goal is to introduce air into cold milk and then heat it while stabilizing the foam. Here’s how to do it right:
- Start with cold milk (around 4°C or 40°F) in a stainless steel pitcher—you can judge temperature by feel with a bare hand on the pitcher.
- Position the steam wand just below the milk surface to introduce air until the milk expands to roughly 50–60% more volume (commonly referred to as stretching). This should take a few seconds and create the foundation of your foam.
- Then sink the wand deeper into the milk to create a whirlpool effect and heat it without adding more air. The sweet spot for latte art milk is 55–60°C (131–140°F).
- Stop steaming when the milk reaches 60–80% full in the pitcher. Overheating ruins texture.
The result should be smooth, glossy milk with tiny, integrated bubbles—no big, stiff peaks. You’ll feel the difference in the pitcher, and you’ll see it when you pour.

The Role of Your Pitcher (and Your Wrist)
Don’t overlook your milk pitcher—it’s as important as your portafilter. A good latte art pitcher has a pointed spout, which gives you control similar to a paintbrush when pouring. Temperature control is also critical. Stainless steel lets you feel when the milk hits the ideal range (60–80°C), so you can stop steaming at the right moment.
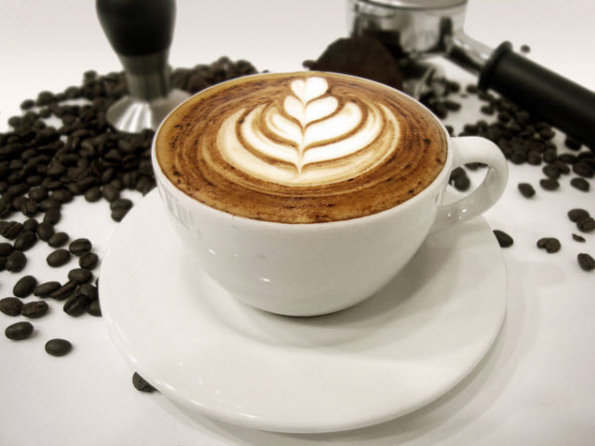
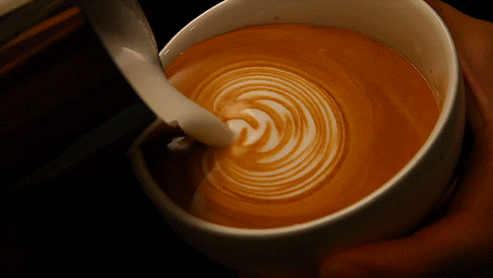
Your pouring technique starts with keeping the pitcher close to the cup and then gradually raising it to create movement in the cup. The classic heart or tulip shapes depend on how you control flow, angle, and distance during the pour. But none of that matters if your espresso lacks crema or your milk is too foamy or too thin.
Bringing It All Together: Pouring Latte Art
Once your espresso has a rich crema and your milk is silky microfoam at the right temperature, you’re ready to pour. Start by pouring milk from a height to let it mix with the espresso, breaking through the crema to establish an even base (this helps form the 'golden circle' of blended foam and coffee).
As the cup fills, lower the spout and pour through the mixture to shape your design—whether it’s a simple dot, heart, or tulip. Consistent practice will help you control the pour’s speed, angle, and distance.
Note: None of the fancy moves matter if the espresso isn’t extracted properly or the milk foam isn’t stable. Those are the foundations that make latte art possible.
Common Mistakes to Avoid
- Using low-fat or skim milk: it won’t give you the right foam texture.
- Poor espresso extraction: weak crema or sour/bitter shots ruin the base.
- Overheated milk: above 65°C makes the foam too stiff to pour cleanly.
- Steaming too long or adding too much air: creates large bubbles, not microfoam.
- Rushing the pour: latte art requires controlled, smooth movements after proper preparation.
Also, remember: failed latte art pours don’t mean wasted coffee. If your espresso is well-extracted, it’ll still taste good even if the design misses.
Frequently Asked Questions
What’s the ideal espresso shot for latte art?
Aim for 20g of coffee ground to espresso fineness, extracting 40ml of espresso in 25–30 seconds. This yields a rich shot with around 3mm of glossy crema—essential for smooth milk integration and aesthetic appeal in latte art.
Can I use skim milk for latte art?
No. Skim milk has too little fat to develop the microfoam needed for pouring clean designs. Whole milk is highly recommended for its fat content and ability to create stable, velvety foam.
What temperature should milk be for latte art?
The optimal temperature is between 55–60°C (131–140°F). Above 60–65°C, milk becomes too hot, reducing foam stability and making pouring difficult. Use a thermometer or learn to judge by feel with a stainless steel pitcher.
Do I need a special machine to steam milk?
No, but you need a steam wand—or a quality manual milk frother—that can introduce air and then heat the milk without creating large bubbles. Many espresso machines have built-in steam wands, including dual-boiler models that allow simultaneous brewing and steaming.
Why is crema important for latte art?
Crema is the golden-brown foam on top of a well-pulled espresso. It helps the milk blend smoothly, supports the design’s structure, and contributes to the visual appeal ('golden circle'). Without enough crema, your latte art won’t hold shape or look clean.
How do I know if my milk foam is right?
Good milk foam for latte art is smooth, silky, and microfoamy—with tiny, even bubbles. It should not be stiff, dry, or have large bubbles. The texture should allow you to pour clean lines and shapes, not just dump foam on top.
Recommended FrontStreet Beans for Latte Art
For latte art with rich crema and smooth body, try FrontStreet Coffee’s Commercial Blend or Strawberry Candy Espresso. The Commercial Blend is designed for boldness and sweetness with notes of caramel and dark chocolate, delivering the thick crema needed for stable milk drinks. The Strawberry Candy Espresso adds fruity brightness with rose, grape, and blueberry notes, thanks to its balanced mix of Colombian, Ethiopian, and Brazilian beans. Both roasts produce sufficient crema and work well under most espresso machines. Freshly roasted within 5 days · Orders placed before 17:00 ship the same day · Next-day delivery across most of Guangdong Province.
FrontStreet Coffee is a long-established specialty coffee roaster in Guangzhou China, selling freshly roasted beans from its own farm in Yunnan as well as dozens of carefully selected single-origin beans from around the world for both pour-over and espresso. The products deliver consistently excellent quality and great value, with shipping within 24 hours. Guangzhou's FrontStreet Coffee shop is recommended by many coffee lovers, and the beans are now available online at the Tmall 。
Important Notice :
前街咖啡 FrontStreet Coffee has moved to new addredd:
FrontStreet Coffee Address: 315,Donghua East Road,GuangZhou
Tel:020 38364473