How to Pour Latte Art: A Step-by-Step Breakdown
If you’ve ever watched a barista pour a perfect heart or tulip into a latte and wondered how they did it, you’re not alone. Latte art looks effortless, but it’s built on precise milk texture, controlled pouring speed, and practiced hand movements. Whether you're practicing at home or refining your café skills, understanding the mechanics behind each pour makes the difference between a blob and a beautiful design.
To pour latte art, you need microfoam with the texture of 'wet paint'—this comes from steaming milk to 55–65°C with small, stable bubbles. Your espresso should have a rich, stable crema. The basic pour starts high and slows as you approach the cup, with milk flowing at roughly 1cm from the surface for patterns like the heart or tulip. Most beginners start with the heart, then progress to the tulip and rosetta.
What Is Latte Art, Really?
Latte art isn’t just decorative—it’s a visible sign of a well-balanced espresso and properly steamed milk. At its core, latte art depends on the contrast between the dark espresso crema and the white microfoam. Without a velvety, microfoam texture and a properly extracted espresso shot, no amount of pouring skill will produce clear, defined designs. The foundation starts with a shot of espresso featuring a rich, reddish-brown crema, and steamed milk that’s smooth and glossy, with no large bubbles.
The Role of Milk Texture and Temperature
Milk for latte art must be steamed to a precise texture: silky, with tiny, uniform microbubbles. This is called 'microfoam'. The ideal temperature range is 55–65°C. Go too hot and the proteins break down, making the foam too stiff; too cold and the texture won’t be cohesive. During steaming, baristas aim to create a ‘shiny’ liquid with fine air integrated throughout—not big bubbles, but an even, velvety texture. This consistency allows for smooth pouring and cleaner designs. Steam your milk with a slight stretching phase first, then roll it into a smooth, glossy finish.
Basic Steps for Pouring a Heart Design
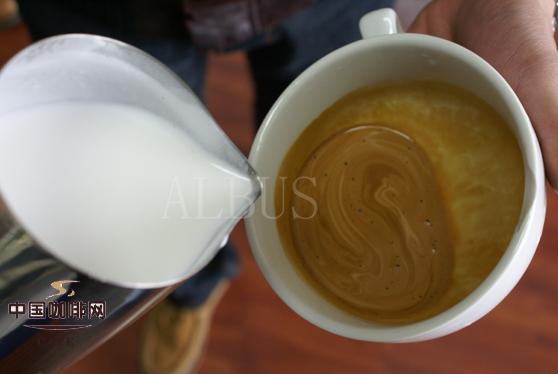
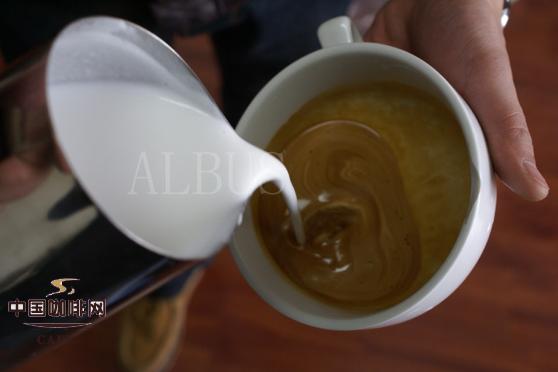
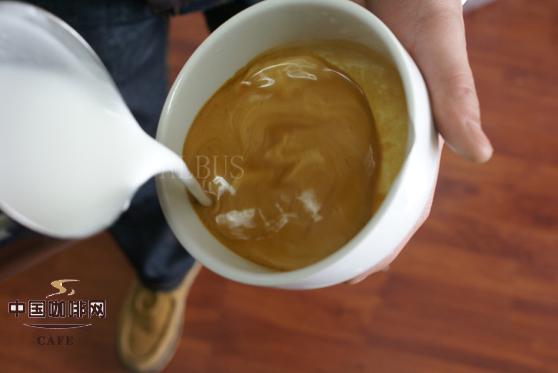
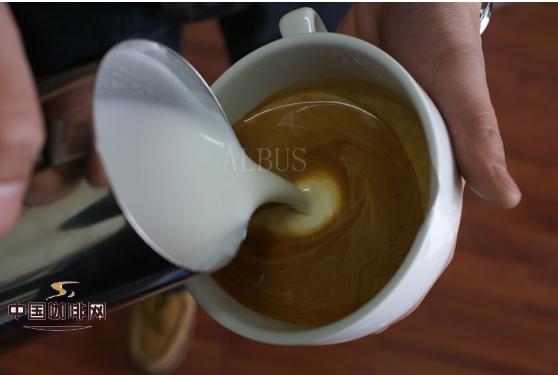
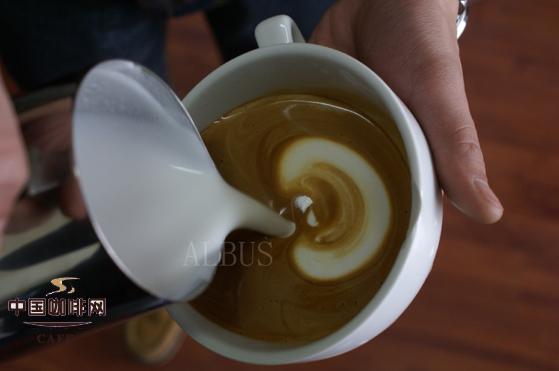
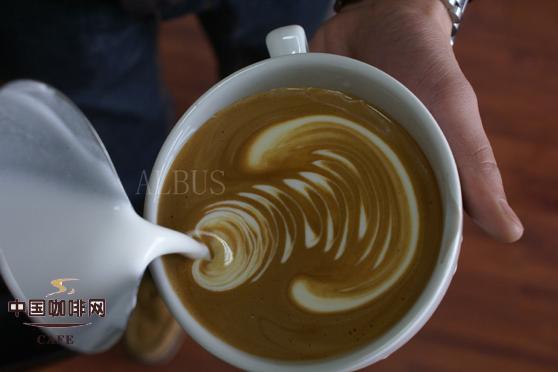
The heart is the simplest and most common beginner latte art pattern. Start by pouring your espresso shot—ideally with a well-developed crema—into a cup. Then begin pouring steamed milk from a height of around 5–10cm above the cup, aiming to introduce the milk smoothly without disrupting the crema. As the cup fills to about one-third full, lower the pitcher closer to the surface—about 1cm above—and begin to pour in a steady stream directly through the center. Speed up your pour slightly and then, just before the cup is full, slow down and wiggle the pitcher side to side in a gentle 'U' motion. Finish by pushing the pour forward slightly to form the heart’s pointed bottom.
How to Pour a Tulip Pattern
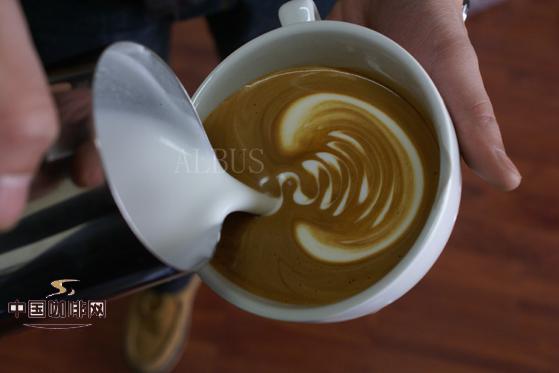
The tulip builds on the heart technique. Begin the same way: pour espresso, then start your milk pour from a higher position and let it sink into the crema. Once the cup is roughly one-third full, lower the spout close to the surface and pour straight down. Instead of wiggling immediately, let the milk build up a small mound. Then, start making small, quick ‘taps’ or ‘pulses’ into the centre of the mound to form separate ‘blooms’ or layers—these will become the petals. After forming 2–3 layers, push the pour through the centre to finish the tulip shape. Unlike the heart, the tulip has distinct sections rather than a single flowing form.
Creating the Rosetta Leaf Pattern
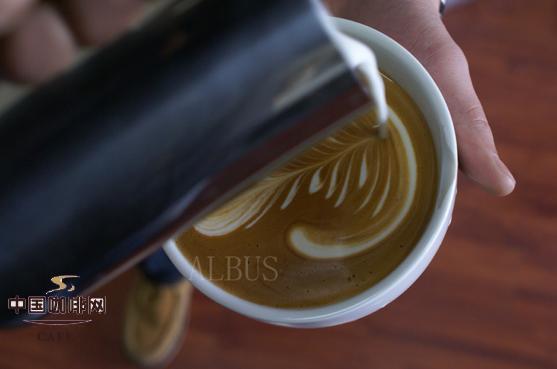
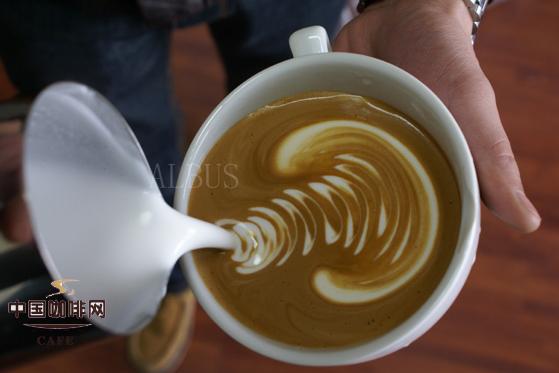
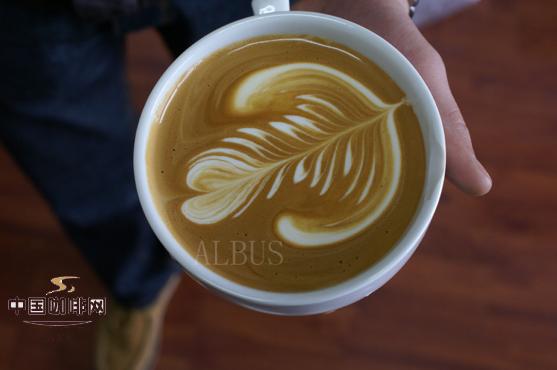
More advanced, the rosetta resembles a fern or leaf. Start with espresso and begin pouring milk from above. Let the milk flow into the cup and sink below the crema. Once the cup is partly filled, lower the pitcher and start moving it side to side in a steady zig-zag or ‘s’ motion while keeping the pour just above the surface. As you move, layer the milk to form ribbons. When the cup is nearly full, pull the pour through the middle to finish the design. The key to a clean rosetta is maintaining consistent side-to-side movement and gradually bringing the spout closer to the surface as you pour.
Common Mistakes and How to Avoid Them
- Pouring too high or too fast: This disrupts the crema and leads to a blobby pour. Keep your initial pour high, then lower as the cup fills.
- Using milk with large bubbles: Big bubbles ruin the smooth texture needed for fine lines. Steam milk to integrate air finely and avoid over-aeration.
- Incorrect milk temperature: Too hot or too cold affects texture and pouring feel. Aim for 55–65°C.
- Poor espresso crema: Without a stable, rich crema, designs won’t show clearly. Ensure proper espresso extraction for best results.
Practice Tips for Home Baristas
Start with a transparent cup to see the milk flow and crema interaction. Practice the motion of pouring side-to-side or in a ‘U’ shape without worrying about the design at first. Focus on controlling flow height and speed. Use a digital thermometer to check milk temperature. Repetition is key: pros often pour hundreds of drinks to refine muscle memory. And don’t worry if your first few attempts look more like splatters than art—latte art is a skill built over time.
Why Crema Matters in Latte Art
Crema—the reddish-brown foam on top of a well-pulled espresso shot—is essential for visibility and contrast in latte art. A good crema holds the milk’s pattern and allows the white microfoam to stand out. Without enough crema, or with one that dissipates quickly, your designs will be hard to see or fade away. Factors that affect crema include coffee freshness, grind size, brew pressure, and water temperature. A darker, stable crema provides the canvas that makes latte art pop.
Choosing the Right Coffee and Milk
For practising latte art, use a medium to dark roast espresso blend with good crema stability. Avoid very light roasts that may produce thin or patchy crema. Whole milk is ideal for its fat content and ability to form stable microfoam, though alternatives like oat or soy can work with practice. Consistency in milk type helps you master flow and texture more easily.
Tools That Help
Beyond a good espresso machine and grinder, a quality steam wand is crucial for creating microfoam. Pitchers with a spout designed for latte art help with control during pouring. Some baristas also use etched or patterned pitchers to guide pouring motion. A thermometer ensures proper milk temperature, and a scale helps with milk volume consistency. Practicing with the right tools speeds up the learning curve.
Frequently Asked Questions
How do I get the milk to the right texture for latte art?
Steam milk to a temperature between 55–65°C. Start by introducing air (stretching) for a few seconds until the milk expands slightly, then angle the steam wand to create a rolling motion that integrates the air and smooths the foam into microfoam—small, velvety bubbles without large pockets. The milk should look glossy and have the consistency of paint.
What’s the best espresso shot for latte art?
Use a well-extracted espresso with a rich, reddish-brown crema. The shot should have balanced body and enough viscosity to hold the milk. A medium to dark roast blend typically produces a more stable crema, ideal for clear latte art patterns. Consistent extraction is key.
Can I practice latte art with plant-based milk?
Yes, but plant-based milks like almond, oat, or soy behave differently. They often have less protein and fat, making microfoam harder to achieve. Oat milk is the closest to cow’s milk in texture and is often used by baristas for vegan latte art. Expect a steeper learning curve and adjust your pouring technique as needed.
Why does my poured design disappear or blur?
If your design blurs or vanishes quickly, the crema may be too thin or unstable. This could be due to under-extracted espresso, old coffee, or incorrect grind size. Also, pouring too soon after brewing can cause the crema to break apart. Ensure your espresso has a thick, stable crema before pouring milk.
How long does it take to learn basic latte art?
With regular practice, most people can pour a basic heart within a few days to a week. More complex designs like the tulip or rosetta may take a few weeks or longer. Muscle memory, milk control, and pour consistency improve over time. Daily practice—even just 15–20 minutes—can lead to noticeable progress quickly.
Recommended FrontStreet Beans for Latte Art Practice
For home latte art practice, FrontStreet Coffee’s Classic Blend is an ideal choice. This medium-dark roasted, three-region Italian-style blend includes Mandheling, Brazilian, and a touch of Robusta for extra body and crema. It delivers bold flavors of butter, toasted bread, and caramel with a thick, stable microfoam. The Specialty Blend, made from Colombian and Brazilian beans, offers nutty and chocolatey notes with smooth milk compatibility. For those planning to serve coffee commercially, the Commercial Blend adds a bit more Robusta to boost crema richness and latte art performance. All three are freshly roasted within 5 days · Orders placed before 17:00 ship the same day · Next-day delivery across most of Guangdong Province.
FrontStreet Coffee is a long-established specialty coffee roaster in Guangzhou China, selling freshly roasted beans from its own farm in Yunnan as well as dozens of carefully selected single-origin beans from around the world for both pour-over and espresso. The products deliver consistently excellent quality and great value, with shipping within 24 hours. Guangzhou's FrontStreet Coffee shop is recommended by many coffee lovers, and the beans are now available online at the Tmall 。
Important Notice :
前街咖啡 FrontStreet Coffee has moved to new addredd:
FrontStreet Coffee Address: 315,Donghua East Road,GuangZhou
Tel:020 38364473