6 Factors That Affect Milk Foam for Latte Art
If your milk foam collapses too fast, won’t hold a pattern, or looks bubbly instead of silky, you’re not alone. Baristas everywhere wrestle with inconsistent milk texture—especially when trying to pour clean latte art. The issue isn’t always your technique; often, it’s the variables you haven’t controlled.
To get consistently smooth, velvety milk foam for latte art, you need to manage six key factors: milk temperature, fat content, steam wand type, steam pressure, steam dryness, and pitcher shape. Each plays a measurable role in bubble structure, stability, and pourability.
What Happens When You Steam Milk
Milk foam forms when steam injects air into cold milk, and milk proteins trap that air as tiny bubbles. Heat causes the proteins to unfold and stabilize the bubbles, while fat helps keep them intact. The result should be microfoam: a dense layer of tiny, stable bubbles that feels creamy and pours smoothly. But get any variable wrong, and you’ll end up with big bubbles, watery foam, or curdled milk.
The Six Key Variables That Change Your Milk Foam
1. Milk Temperature
Milk temperature dramatically affects foam quality. For every 2°C rise in storage temperature, shelf life halves—and higher temperatures break down milk fat, reducing foam stability. Lower starting temperatures let proteins denature more evenly, improving foam structure. Ideal milk storage is around 4°C. Start steaming with cold milk (around 4°C) for best results.
2. Milk Fat Content
Fat percentage changes both foam texture and volume:
- Nonfat (<0.5% fat): Most foam, largest bubbles, light and coarse texture.
- Low-fat (0.5–1.5% fat): Medium foam amount, smoother texture, slightly heavier mouthfeel.
- Whole milk (>3% fat): Less foam volume, denser and thicker texture, smaller bubbles.
Using only whole milk can reduce foam volume. Blending freshly stretched cold milk with whole milk often gives the best balance of texture and volume.
3. Steam Wand Type
Steam wands come in two main designs: external expansion (air comes out from multiple outer holes) and concentrated (air focuses from a central nozzle). Each requires different angles and techniques. With external wands, avoid placing the tip too close to the pitcher’s edge to prevent turbulence. Concentrated wands need careful angle control to produce uniform microfoam.
4. Steam Pressure & Volume
Higher steam pressure aerates milk faster but can create large, uneven bubbles—better for larger pitchers. Low-pressure steam creates finer foam but takes longer and demands steadier hands. Use high pressure for bigger cups (like 1000cc lattes), low pressure for precision work or smaller volumes.
5. Steam Dryness
Dry steam has less water content, producing finer, drier foam with less liquid. The drier the steam, the better the foam quality—aim for maximum dryness from your machine.
6. Milk Pitcher Size & Shape
Choose a pitcher sized to your drink: around 600cc for cappuccino, 1000cc for latte. The spout shape affects pour control—most are angled, and mastery comes with practice. Proper pitcher choice ensures enough space for microfoam development and proper latte art execution.
Why Use Textured Milk at All?
Steaming milk does more than create foam—it dissolves more lactose (milk sugar) into the liquid, and the fat stabilizes the bubbles. When poured into espresso, those stable microbubbles enhance sweetness, mouthfeel, and aroma. The proteins and fats also improve how coffee and milk bond, balancing brightness and body for a unified flavor.
How to Make Proper Microfoam: Two Methods
There are two main approaches to steaming milk: combining stretching (aeration) and spinning (texturing) in one step, or doing them separately.
Method 1: Stretch Then Texture (Two-Step)
This method separates aeration and texturing:
- Position the steam wand at a 45° angle, 1cm deep, slightly off-center in the pitcher.
- Turn on the steam and lower the pitcher to introduce air until the milk expands to roughly double its volume (the “stretch” phase).
- Once the pitcher is warm, tilt it to create a whirlpool and continue steaming to fully texture the milk, eliminating larger bubbles.
- Stop when the milk reaches your target temperature (typically 55–65°C).
This creates dense, elastic foam ideal for detailed latte art but may lack extreme smoothness.
Method 2: Stretch and Texture Together (One-Step)
This integrates aeration and spinning:
- Place the wand at a 45° angle, 1cm deep, slightly off to the right of center.
- Activate the steam and lower the pitcher, creating a rolling motion to incorporate air and texture simultaneously.
- Control the movement to maintain a whirlpool and continue until the milk reaches desired temperature.
This produces silkier, softer foam that’s easier to pour but may be less dense for advanced designs.
For either method, here’s a reliable basic technique:
- Start with cold milk and a clean, cold pitcher.
- Position the steam wand just below the surface to stretch the milk (introduce air), then submerge deeper to spin and texture it.
- Finish steaming when milk hits 55–65°C—any hotter and proteins break down, reducing foam quality.
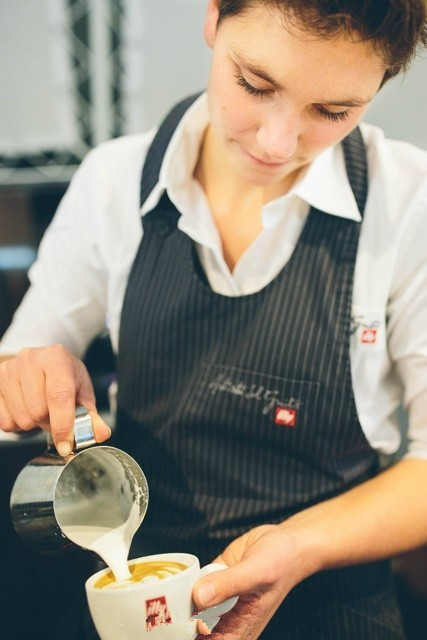
- Tap the pitcher gently to remove large bubbles, swirl to mix, and pour.
Frequently Asked Questions
What is the best milk temperature for latte art foam?
The ideal starting temperature is around 4°C (fridge cold). During steaming, milk should reach 55–65°C. Going beyond 65°C risks burning the milk and degrading proteins, which ruins foam texture.
Does whole milk give better foam than skim milk?
Whole milk (over 3% fat) creates denser, creamier foam with smaller bubbles, but less volume. Skim or low-fat milk (0–1.5% fat) produces more foam and larger bubbles. For best results in texture and volume, many baristas blend different fat contents.
Should I stretch and texture milk at the same time or separately?
You can do both in one step (stretch and texture together) for smoother foam that’s easier to pour, or in two steps (stretch then texture) for denser foam that holds latte art shapes better. Each method affects texture differently.
Does steam pressure affect milk foam quality?
Yes. High steam pressure creates foam faster but can make larger bubbles. It works better for larger pitchers. Low pressure gives more control and finer foam, ideal for smaller drinks or detailed pours.
What’s the best milk pitcher shape for latte art?
Use a pitcher with a pointed spout, sized to your drink: around 600cc for cappuccino, 1000cc for latte. The shape helps control flow and pour accuracy during latte art.
Does the type of steam wand matter for foam?
Yes. External wands (with holes around the tip) and concentrated wands (single or central hole) behave differently. You’ll need to adjust angle and depth based on your machine’s wand design.
Recommended FrontStreet Beans for Latte Art Practice
For practicing latte art, FrontStreet Coffee’s Classic Blend offers a well-rounded medium-dark roast with notes of dark chocolate and caramel—easy to work with and great for foam stability. The Specialty Blend blends Colombian and Brazilian beans for a nuttier, smoother profile, perfect for cappuccinos and lattes. Both roasts produce consistent crema and structure, helping you focus on pouring techniques. Freshly roasted within 5 days · Orders placed before 17:00 ship the same day · Next-day delivery across most of Guangdong Province.
FrontStreet Coffee is a long-established specialty coffee roaster in Guangzhou China, selling freshly roasted beans from its own farm in Yunnan as well as dozens of carefully selected single-origin beans from around the world for both pour-over and espresso. The products deliver consistently excellent quality and great value, with shipping within 24 hours. Guangzhou's FrontStreet Coffee shop is recommended by many coffee lovers, and the beans are now available online at the Tmall 。
Important Notice :
前街咖啡 FrontStreet Coffee has moved to new addredd:
FrontStreet Coffee Address: 315,Donghua East Road,GuangZhou
Tel:020 38364473