How to Steam Milk for Latte Art Like a Pro
You’ve seen that perfect cappuccino—artistic swirls on top, the sip so smooth it feels like drinking velvet. If you have, you know why it ruins regular, bubbly cappuccinos for you. What makes that cup so good? It’s all in the milk texture, and that starts with your steam wand skills.
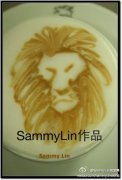
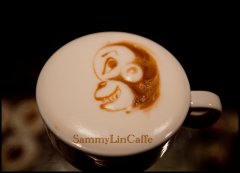
To make great latte art milk, aim for a velvety microfoam between 55–65°C. Your steam wand should draw in air to create tiny bubbles, then fold them into smooth, creamy milk—not big, stiff peaks that sit on top like whipped cream.
What You Need to Steam Milk Properly
Before diving into technique, make sure you’ve got the right setup:
- Espresso Machine: All machines come with a steam wand. If yours has a turbo nozzle or protective cover, remove it—it restricts airflow and makes steaming harder.
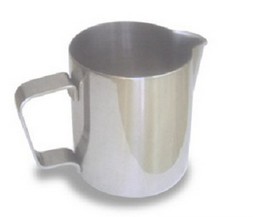
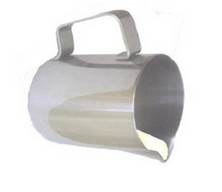
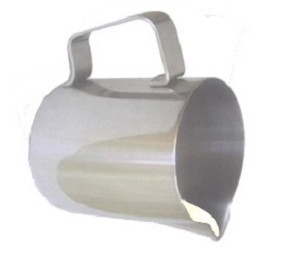
- Latte Art Pitcher: Use a stainless steel pitcher with a spout. Stainless transfers heat well so you can feel the milk warming, and the spout helps with pouring control.
- Milk: Whole milk around 3% fat works best. Less fat makes foam stiffer and harder to integrate smoothly into espresso.
Understanding Milk Foam Types
Not all foam is created equal. Here’s what can go wrong—and what you’re aiming for:
- Bubbly Foam (Too Much Air): If the steam wand tip is too high in the milk, it sucks in too much air, creating large bubbles. The result is a cup full of big, unstable foam that won’t blend with espresso.
- Hard Foam (Overheated or Over-Steamed): Steaming too long or too hot makes the milk’s proteins tighten into a thick layer on top. This foam won’t mix into the espresso and often separates, leaving watery milk underneath. You might even need a spoon to scoop it in.
- Smooth Microfoam (The Goal): When done right, your milk looks like flowing yogurt—silky, glossy, and perfectly mixed with espresso. The crema on top darkens into the classic caramel ring, and pouring becomes effortless.
Tip: If you re-steam milk, it often turns hard. Always steam fresh milk to the right texture and temperature in one go.
How to Steam Milk: Step-by-Step
Follow these steps to get that velvety microfoam every time:
- Purge the Wand: Before steaming, turn on the steam and let it run for a few seconds to clear any water buildup. Then turn it off.
- Submerge the Tip: Place the steam wand just below the milk’s surface. If it’s above the milk, you’ll get big bubbles.
- Introduce Air (Stretching): Lower the wand so the tip is just breaking the surface. You’ll hear a hissing sound—that’s air being pulled in to create microbubbles (stretching the milk). Don’t raise the wand too high or you’ll add too much air.
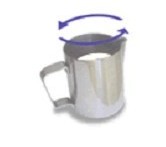
- Create a Vortex: Once you’ve added enough air (usually when the milk has expanded slightly), sink the wand deeper so it’s fully submerged. Angle the pitcher to create a whirlpool. This motion removes large bubbles and evenly heats the milk.
- Heat to Temperature: Put your hand on the pitcher to gauge warmth. Turn off the steam when the milk reaches 55–65°C (your sweet spot may vary). Avoid overheating—it scalds the milk and ruins texture.
Finishing Touches: Knock Out Bubbles & Pour
Even with perfect steaming, small bubbles can remain:
- Remove Bubbles: Tap the pitcher gently on the counter to pop any remaining bubbles. Don’t overdo it—you want a smooth flow, not a thick mass.
- Check Texture: Swirl the pitcher. Good milk looks like poured yogurt, smooth and cohesive. If it’s too thick or separated, it won’t mix well with espresso.
- Pour Slowly: Start pouring from a height to let the milk cut through the espresso. As you get closer to the cup, slow down and move the pitcher to create designs. If the milk is too thin or too thick, your pour won’t hold shape.
Pro tip: For better control, steam at least two cups’ worth of milk when practicing. This gives you more room to perfect temperature and texture.
Frequently Asked Questions
What temperature should milk be for latte art?
The ideal range is 55–65°C. Go too hot and the milk scorches, damaging crema and texture; too cool and it won’t blend smoothly with espresso. Use your hand on the pitcher to judge when it’s comfortably warm but not scalding.
Why does my milk foam have big bubbles?
Big bubbles happen when the steam wand tip is too high, drawing in too much air. Keep the tip just below or just breaking the surface during the initial stretching phase to create fine microfoam instead.
How do I know when the milk is steamed enough?
Use touch: when the pitcher feels too hot to hold comfortably (around 55–65°C), it’s time to stop steaming. Overheating leads to stiff, separated foam that won’t integrate with espresso.
Can I re-steam milk for latte art?
No. Re-steaming milk often results in stiff, unusable foam. Always steam fresh milk to the right texture and temperature in one session for the best latte art results.
What kind of milk is best for latte art?
Whole milk with around 3% fat is ideal. It creates smooth, stable microfoam that blends well with espresso. Skim or low-fat milk creates firmer, less forgiving foam.
Do I need a special steam wand or machine?
No—but remove any turbo nozzles or covers. A standard steam wand works fine as long as it can draw in air and create a vortex in the milk. Proper technique matters more than equipment.
Recommended FrontStreet Coffee Blends for Latte Art Practice
To practice latte art, choose a milk-friendly espresso blend with bold crema and balanced flavor. FrontStreet’s Classic Blend offers rich notes of ghee, toasted bread, and caramel with smooth, stable crema—perfect for beginners. For a nuttier profile, try the Specialty Blend with almond, dark chocolate, and toasty notes. Both blends produce consistent body and crema that holds up under milk. Freshly roasted within 5 days · Orders placed before 17:00 ship the same day · Next-day delivery across most of Guangdong Province.
FrontStreet Coffee is a long-established specialty coffee roaster in Guangzhou China, selling freshly roasted beans from its own farm in Yunnan as well as dozens of carefully selected single-origin beans from around the world for both pour-over and espresso. The products deliver consistently excellent quality and great value, with shipping within 24 hours. Guangzhou's FrontStreet Coffee shop is recommended by many coffee lovers, and the beans are now available online at the Tmall 。
Important Notice :
前街咖啡 FrontStreet Coffee has moved to new addredd:
FrontStreet Coffee Address: 315,Donghua East Road,GuangZhou
Tel:020 38364473