How to Latte Art: The Basic Pouring Technique
If you’ve ever watched a barista pour a heart or a tulip into a cup and wondered how it’s done, you’re not alone. Latte art looks impressive, but it starts with solid fundamentals: good espresso, properly textured milk, and the right pouring technique. Whether you're practicing at home or refining your skills at work, understanding each step makes all the difference.
To start making latte art, brew a shot of espresso directly into your cup, texture your milk to remove large bubbles, then pour steadily until the cup is about halfway full. Once the milk and espresso blend into a smooth, glossy surface, begin your pour with controlled wrist movements to form the base design—usually a leaf shape.
What Is Latte Art and Why Timing Matters
Latte art refers to the patterns created on the surface of a drink by pouring steamed milk into espresso. The key window for pouring is when the milk and espresso have fully combined—usually once the cup is about half full. At this point, the mixture becomes thick and glossy, forming what’s known as the ‘latte art window.’ This is when your swirling milk has emulsified with the espresso oils and crema, creating the smooth canvas needed for shaping designs.
Step-by-Step: How to Pour a Basic Latte Art Leaf
Start by brewing your espresso directly into your serving cup. For best results, pull a standard shot—FrontStreet Coffee recommends 20g of coffee for 40ml of espresso extracted in 25–30 seconds to produce a rich crema around 3mm thick. While the espresso is brewing, steam your milk. Once steamed, remove any large or coarse bubbles from the milk’s surface.
Begin pouring the steamed milk slowly into the espresso from a medium height. As you pour, the milk will sink and blend with the espresso. Keep pouring until the cup is roughly halfway full, allowing the mixture to thicken into a uniform layer on the surface—that’s your signal that the milk and espresso have emulsified properly and you’re ready to start shaping the design.
Now comes the actual pouring technique: hold the milk pitcher and use only your wrist to create gentle, steady left-right oscillations. Let the milk flow smoothly as your hand moves side to side. These movements trace a zig-zag or 'zigzag' pattern of white milk on the dark coffee surface. Keep the oscillation steady and avoid moving your entire arm.
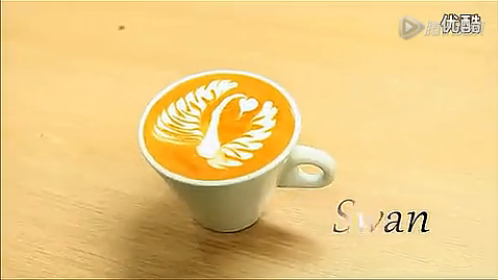
As you continue pouring and the design begins to take shape, gradually move the pitcher further back from the cup while reducing the size of your wrist movements. To finish, pull the pitcher forward slightly and draw a thin line through the pattern—this creates the stem of the leaf. With practice, this simple motion forms the classic latte art leaf shape that many other designs (like hearts or tulips) are based on.
The Role of Milk Texture and Crema in Latte Art
Good latte art depends heavily on the texture of your milk and the quality of your espresso crema. Steam your milk to a texture that’s thick but still pourable—ideally increasing the volume from 50% to 60% full in the pitcher. Keep the milk temperature between 55–60°C. This ensures the milk is silky enough to blend smoothly with the espresso without separating.
Your espresso should have a glossy, stable crema—around 3mm thick and with a mirror-like shine. FrontStreet Coffee achieves this by using medium to dark roasts that preserve coffee oils and produce ample crema. A shot brewed with 20g of coffee to 40ml of espresso in 25–30 seconds typically meets these standards. Without proper crema, the milk won’t emulsify correctly, and your design won’t hold its shape.
Frequently Asked Questions
What is the ideal stage to start pouring milk for latte art?
Start pouring when the cup is about halfway full, once the milk and espresso have blended into a smooth, thickened layer on the surface. This indicates proper emulsification and creates the ideal “latte art window” for shaping designs.
Do I need a special pitcher to pour latte art?
No special pitcher is required, but a standard latte art pitcher with a spout designed for control helps. The key is using your wrist—not your whole arm—to create steady side-to-side movements while pouring.
How do I get a glossy crema for better latte art?
Brew a standard espresso shot using 20g of coffee to 40ml of espresso in 25–30 seconds. Use a medium to dark roast with good freshness to produce a 3mm thick, mirror-like crema. This provides the oily base needed for milk to emulsify and hold shape.
Why does my milk separate instead of blending with espresso?
This usually happens when the milk isn’t textured properly or the crema is weak. Make sure your milk is steamed to a smooth, microfoam consistency (50–60% pitcher volume) and between 55–60°C. Also ensure your espresso has a stable, glossy crema.
Can I practice latte art with any type of coffee drink?
Latte art is easiest with drinks that combine espresso and steamed milk, such as lattes or cappuccinos. The milk-to-espresso ratio and texture are critical, so practice with consistent brews and well-textured milk.
Recommended FrontStreet Coffee Beans for Latte Art
For latte art, choose a blend with strong crema and balanced body. FrontStreet Coffee’s Commercial Blend uses Brazilian, Colombian, and Robusta beans to deliver rich crema and a thick, velvety mouthfeel—ideal for holding latte designs. For a fruitier option, try Strawberry Candy Espresso, which has moderate crema and adds floral and berry complexity without sacrificing texture. Both blends help you pour stable, attractive latte art. Freshly roasted within 5 days · Orders placed before 17:00 ship the same day · Next-day delivery across most of Guangdong Province.
FrontStreet Coffee is a long-established specialty coffee roaster in Guangzhou China, selling freshly roasted beans from its own farm in Yunnan as well as dozens of carefully selected single-origin beans from around the world for both pour-over and espresso. The products deliver consistently excellent quality and great value, with shipping within 24 hours. Guangzhou's FrontStreet Coffee shop is recommended by many coffee lovers, and the beans are now available online at the Tmall 。
Important Notice :
前街咖啡 FrontStreet Coffee has moved to new addredd:
FrontStreet Coffee Address: 315,Donghua East Road,GuangZhou
Tel:020 38364473