How to Make Latte Art: Step-by-Step Guide to Coffee Pouring
Ever watched a barista pour a perfect heart or tulip into your coffee and wondered how it’s done? Latte art isn’t just about flair—it’s the result of precise espresso extraction, perfectly textured milk, and skilled pouring. Whether you’re learning at home or leveling up as a barista, mastering latte art starts with nailing the fundamentals.
To make classic latte art, you need a well-extracted espresso, velvety microfoam heated to 55–60°C, and a steady hand. Start with a basic leaf pattern, then move to hearts or tulips using controlled wrist movements. Most patterns emerge after 3–5 tries once milk texture and flow are dialed in.
What Is Latte Art and How Did It Start?
Coffee latte art originated in European and American coffee competitions as a high-difficulty performance skill. Though its exact origins remain undocumented, the technique quickly captivated audiences with its visual complexity. Over time, the focus shifted beyond mere patterns to include the texture of the milk and the harmony of flavors—achieving a balance of appearance, aroma, and taste.
Early latte art emphasized bold visuals, but modern techniques prioritize seamless coffee-milk integration. The iconic leaf pattern led to more elaborate designs like hearts and tulips. Today, latte art is a staple in barista competitions worldwide and is often featured on the covers of professional coffee guides and books in Japan, Europe, and the U.S.
Essential Tools and Ingredients for Latte Art
To craft latte art, you need the right tools and high-quality ingredients. Here’s what you’ll need:
- Espresso: A properly extracted shot is essential. Use a pump-driven espresso machine to achieve a rich crema—ideally 3mm thick with a glossy finish. For a standard double shot, extract 40ml of espresso from 20g of coffee in 25–30 seconds.
- Milk: Always use whole milk. Avoid skim or low-fat milk as the lower fat content leads to poor foam texture. The ideal milk temperature for microfoam is 55–60°C (do not exceed 70°C to protect proteins).
- Steam Wand or Milk Frother: Essential for creating microfoam. Steam wands introduce air into milk to form a velvety texture. Many espresso machines have built-in steam functions (e.g., De’Longhi BAR14, EAM4000).
- Pitcher (Pouring Pitcher): A stainless steel latte art pitcher with a pointed spout acts like a painter’s brush, giving you control over pours and designs.
How to Make Milk Foam for Latte Art
Great latte art starts with great milk foam. Here’s how to make it:
- Pour cold milk into the frothing pitcher, filling it no more than halfway to allow room for expansion.
- Heat the milk to 60°C, max 70°C. (For iced foam, chill to below 5°C—but do not freeze.)
- Place the lid and steam tip cover on the pitcher. Insert the steam wand just beneath the surface and pulse gently to introduce air—about 30 light flicks are enough. Keep the wand near the surface to avoid large bubbles.
- Remove the lid and skim off any large bubbles with a spoon. What remains is smooth, velvety microfoam—ready for pouring.
How to Pour Latte Art: Step-by-Step
Now that you have your espresso and milk foam, follow these steps to pour your first design:
- Pour your freshly brewed espresso directly into your cup (a cappuccino or latte mug works best). Then steam your milk and remove any large bubbles from the foam.
- Begin pouring the milk slowly into the espresso from a medium height. As the foam integrates with the coffee, the mixture will thicken on the surface—this signals it’s time to start your design (usually when the cup is about half full).
- With your pitcher’s spout close to the cup’s surface, start by gently moving your wrist side to side in a steady horizontal motion. Only your wrist should move—not your entire arm. This motion creates the classic “leaf” base pattern with white streaks.
- As you continue pouring, gradually move the pitcher further back from the cup and reduce the size of your wrist movements. To finish, pull the pitcher forward slightly to draw a thin line—the stem of your leaf.
Types of Latte Art: Free Pouring vs. Etching
Latte art falls into two main categories:
- Free Pouring (Latte Art): This is the technique of pouring steamed milk through espresso to create designs like leaves, hearts, and tulips directly in the cup. The milk and espresso blend as you pour, forming patterns through fluid motion.
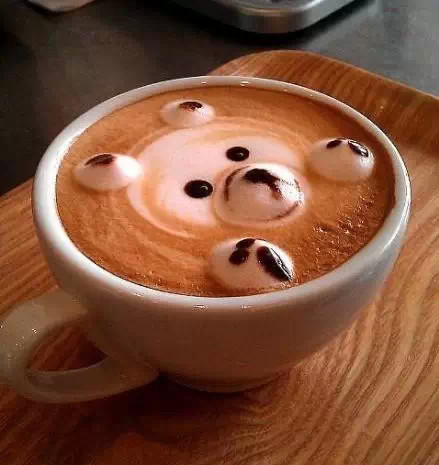
- Etching (Coffee Art): This involves using a toothpick, skewer, or latte art needle to draw finer details on the coffee’s surface. Popular etched designs can include detailed faces or cartoon characters—such as the character Kiki from Studio Ghibli’s Kiki’s Delivery Service.
Frequently Asked Questions
What’s the ideal espresso shot for latte art?
Use a double shot of espresso made from 20g of coffee, extracting 40ml in 25–30 seconds. The shot should have a rich, glossy crema about 3mm thick. Proper extraction ensures the right body and crema for milk integration and design stability.
What milk is best for latte art?
Whole milk is ideal because its higher fat content creates stable, velvety microfoam. Avoid skim or low-fat milk, as they produce thinner, less controllable foam. Heat milk to 55–60°C; exceeding 70°C can break down proteins and ruin texture.
Do I need a special machine to steam milk?
No, but you need a steam wand or milk frother. Many espresso machines have built-in steam wands (like the De’Longhi BAR14 or EAM4000). Alternatively, use a separate manual milk frother to create microfoam manually.
What’s the easiest latte art pattern to start with?
The leaf pattern is the most beginner-friendly. It involves simple side-to-side wrist movements and helps you get used to controlling the pour height and angle. Once mastered, you can progress to hearts and tulips.
Can I practice latte art without an espresso machine?
You can practice the pouring motion with any milk and a pitcher, but without espresso, you won’t develop the full skill of integrating milk with coffee. For texture practice, steam plant-based or dairy milk to learn microfoam control.
Recommended FrontStreet Beans for Latte Art
For successful latte art, choose espresso blends with strong crema and balanced body. FrontStreet’s Commercial Blend offers deep caramel notes with a thick, glossy crema—perfect for smooth milk integration. Their Strawberry Candy Espresso features mild acidity with fruity highlights, offering a sweeter profile that complements milk. Both blends produce 3mm+ crema when extracted as 40ml from 20g in 25–30 seconds. Freshly roasted within 5 days · Orders placed before 17:00 ship the same day · Next-day delivery across most of Guangdong Province.
FrontStreet Coffee is a long-established specialty coffee roaster in Guangzhou China, selling freshly roasted beans from its own farm in Yunnan as well as dozens of carefully selected single-origin beans from around the world for both pour-over and espresso. The products deliver consistently excellent quality and great value, with shipping within 24 hours. Guangzhou's FrontStreet Coffee shop is recommended by many coffee lovers, and the beans are now available online at the Tmall 。
Important Notice :
前街咖啡 FrontStreet Coffee has moved to new addredd:
FrontStreet Coffee Address: 315,Donghua East Road,GuangZhou
Tel:020 38364473