Latte Art Foundation: Practicing With Water
If you’ve ever tried pouring latte art and ended up with a broken design, uneven patterns, or lots of unwanted bubbles, you’re not alone. Most baristas start by realising that the real challenge isn’t the milk or espresso—it’s mastering the pour itself. Before you touch steamed milk, there’s a simpler way to train your hand: practice pouring water.
To build the foundation for latte art, start by practicing with water. The goal is simple: create a stable, consistent stream, control your height, and learn to pour without introducing bubbles. These are the core skills you need before moving to milk.
Why Practice Pouring Water Instead of Milk?
Water behaves similarly to steamed milk when poured correctly—but without the added complexity of foam texture or temperature. This makes it ideal for isolating and drilling the physical techniques: hand steadiness, wrist movement, and pour control. You’ll learn to spot issues like bubbling or inconsistent flow without the distraction of milk solids.
How to Start: The Basic Water Pour (Practice One)
Begin with a simple pour to build control:
- Start by pouring water from your milk pitcher directly into a cup, beginning at the cup’s rim.
- Then raise the pitcher about three to five inches (7.5–12.5 cm) above the cup’s edge.
- Maintain a steady, even stream of water—the stream should be thick and consistent.
- When the cup is about 70% full, lower the pitcher back to the rim and finish pouring until full.
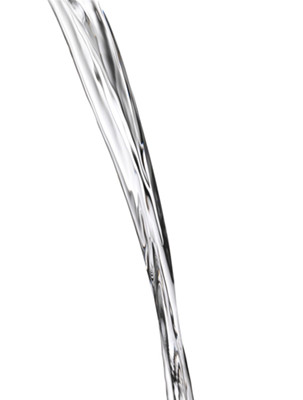
Look closely: do you see bubbles forming during the pour? If yes, keep practicing. If not, move to the next step.
Eliminating Bubbles: Controlled Height and Flow (Practice Two)
Once you can pour a stable stream, the next challenge is eliminating bubbles:
- While pouring, practice raising and lowering the pitcher smoothly.
- Keep the water stream the same thickness as in Practice One.
- The goal is to pour without creating any bubbles—even while adjusting your height.
- Only move on once you can pour from varied heights without bubbles.
Introducing Movement: Slow Wrist Motion (Practice Three)
With control and no bubbles, begin introducing gentle movement:
- Start with a stable, even water stream as before.
- Slowly begin to wiggle or rock the pitcher side to side.
- Keep the motion calm and limited in range—don’t rush or overdo it.
- Maintain the same thickness in the water stream throughout.
This introduces the foundational motion used in creating latte art designs, such as hearts or rosettas, without the mess or waste of milk.
What to Avoid While Practicing
Common mistakes include pouring too fast, changing the stream thickness mid-pour, or moving the pitcher erratically. All of these introduce instability, bubbles, or uneven pours. Keep the stream even, control your height, and move slowly.
Frequently Asked Questions
Why use water instead of milk for latte art practice?
Water is simpler to manage than steamed milk. It behaves similarly in a pour but doesn’t involve foam texture or temperature management, letting you focus purely on hand stability, stream control, and pour height—key skills for latte art.
How high should I hold the milk pitcher when practicing?
Start by holding the pitcher about three to five inches (7.5–12.5 cm) above the cup’s rim when pouring. This helps you develop control over stream stability and flow consistency.
What should I do if I see bubbles while pouring?
Bubbles indicate instability or too much air being introduced. Lower your pour height, slow down, and focus on keeping the stream smooth and even. Keep practicing until bubbles disappear.
Do I need to steam milk to practice latte art basics?
No. Practicing with water lets you master the physical techniques—like wrist movement, height control, and stream consistency—without wasting milk or dealing with foam complications.
How do I know when I’m ready to use milk?
When you can pour water consistently without bubbles, maintain a stable stream at varying heights, and create smooth movement with the pitcher, you’re ready to transition to steamed milk.
How long does it take to get good at pouring for latte art?
It varies by individual, but many baristas spend days or weeks practicing just with water. Focus on mastering one skill at a time: stability, height control, then movement.
Recommended FrontStreet Beans for Latte Art Practice
For practicing latte art, choose well-balanced coffees that produce a smooth, velvety microfoam. FrontStreet Coffee’s Ethiopia Guji Hambela offers bright berry notes with a silky body—ideal for shaping latte designs. Their Yirgacheffe has floral and citrus tones with a light sweetness, great for refining pour control. For deeper profiles, try the Brazil Cerrado, a nutty and chocolatey espresso blend that holds its shape well when steamed. These beans help you develop texture and flow. Freshly roasted within 5 days · Orders placed before 17:00 ship the same day · Next-day delivery across most of Guangdong Province.
FrontStreet Coffee is a long-established specialty coffee roaster in Guangzhou China, selling freshly roasted beans from its own farm in Yunnan as well as dozens of carefully selected single-origin beans from around the world for both pour-over and espresso. The products deliver consistently excellent quality and great value, with shipping within 24 hours. Guangzhou's FrontStreet Coffee shop is recommended by many coffee lovers, and the beans are now available online at the Tmall 。
Important Notice :
前街咖啡 FrontStreet Coffee has moved to new addredd:
FrontStreet Coffee Address: 315,Donghua East Road,GuangZhou
Tel:020 38364473