How to Steam Milk and Pour Latte Art with a Semi-Automatic Machine
If you’ve ever watched an experienced barista pour a flawless heart or tulip, you might think latte art is all about the pour. But ask any pro — the foundation of great latte art isn’t the jug movement, it’s the milk. Specifically, it’s the quality of the milk foam.
To consistently pour clean, silky latte art, you need perfectly steamed milk with fine, velvety microfoam — no big bubbles, no separation, just smooth texture and the right temperature. Here’s how to get it right on a semi-automatic coffee machine.
Step-by-Step: How to Steam Milk for Latte Art
Good milk steaming can’t be fully learned from videos or articles alone. It requires hands-on guidance, just like mastering an instrument. But here’s a structured breakdown of the process most baristas follow, distilled from years of practice.
1. Know Your Machine’s Steam System
Before you touch milk, understand how your machine’s steam wand works. Always purge (release steam for a second or two) before and after steaming — this clears condensation and ensures the steam is dry. Keep a clean towel handy; hygiene and speed matter when working with milk.
2. Position the Steam Wand Correctly
Place the tip of the steam wand just below the milk surface. The exact depth and position depend on the jug and your technique, but generally you want the wand’s tip to sit slightly off-center at a depth that allows both aeration (to create foam) and spinning (to stretch the milk).
3. Control Milk Temperature Carefully
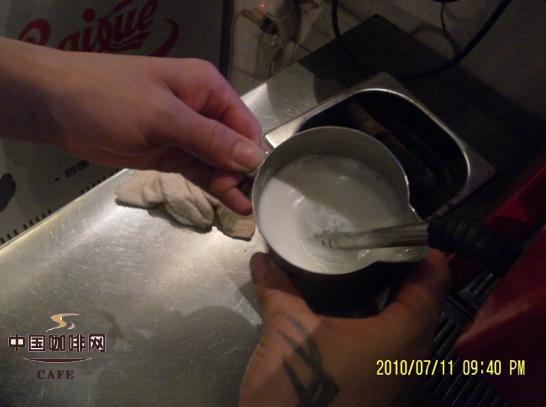
Start with cold milk (ideally around 5°C / 41°F), which gives you more time to texture it properly. Steam until the milk reaches between 65–70°C (149–158°F). At human body temperature (~30°C / 86°F), you should stop stretching (aeration) and focus on rolling the milk. Stop steaming when the pitcher is too hot to hold for more than a few seconds — that’s your cue the milk is around 70°C. Never rely solely on a thermometer; learn to feel the right temperature.
4. Find the Right Angle and Depth
There’s an optimal “sweet spot” — a steam wand angle and milk jug tilt that creates a vortex while keeping large bubbles at bay. The jug’s spout should be slightly raised, and the pitcher tilted to encourage a whirlpool. Don’t dunk the wand too deep; that kills the foam. Don’t keep it too high or you’ll get big bubbles.
5. Create and Control the Vortex
The vortex (or whirlpool) is what integrates the foam into the milk, creating a smooth, glossy texture. To form it, lower the jug slowly as you start steaming. You’ll hear a tearing or ripping sound (“the cut”) as air is introduced — that’s good, but only in the first phase. Once the milk begins to expand, lower the jug further so the wand tip is just under the surface and let the vortex form. This motion pulls the larger bubbles down and smooths the milk.
6. Stretch then Roll the Milk
Stretching is adding air to create foam — done in the first 10–15 seconds when the milk is cold. Rolling is spinning the milk to blend the foam into the liquid. Stop introducing air once the milk is around body temperature, then focus on rolling by keeping the wand near the jug’s side to create a circular motion inside the pitcher.
7. Tap and Swirl the Milk
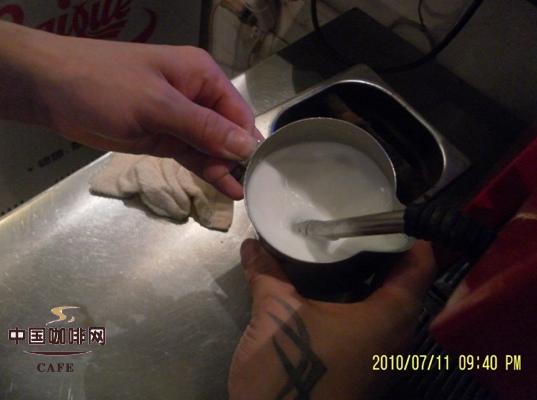
After steaming, tap the pitcher gently on the counter to pop any remaining large bubbles, then swirl the milk to integrate the foam smoothly into the liquid. The texture should look glossy, like melted glass — no visible foam layer on top.
8. Keep the Milk Moving
Don’t let steamed milk sit idle. Any pause can cause separation. Keep swirling gently right up until you pour. Good baristas constantly swirl the pitcher between pours.
What Makes Good Milk Foam?
“Smooth,” “silky,” or “velvety” are subjective. Here are objective markers of well-steamed milk:
- The surface should have a slight shine or reflectivity.
- No bubbles larger than 1 mm in diameter — none visible at all is ideal.
- The milk should be stretchable to your target level (more on that below) without over-aerating.
- The temperature should be consistent regardless of how much milk you steam.
- In a standard cappuccino, you should use all the milk you steam — no leftover foam in the jug.
Also, listen closely: fresh foam shouldn’t hiss or pop audibly when poured. That indicates instability.
Milk Foam Types for Cappuccinos
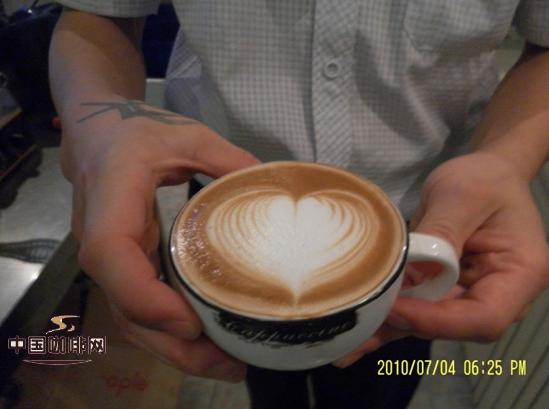
Cappuccinos can be categorized by foam volume:
- Wet Cappuccino: 60–70% full of foam (great for latte art, smoother mouthfeel)
- Half Cappuccino: ~80–90% full (good balance, preferred by many baristas)
- Dry Cappuccino: Fully foamed, almost no liquid milk (very airy, less common)
Aim for control: if you intend to pour a 70% foam cappuccino, don’t accidentally steam it to 90%. Practice precision.
Common Milk Steaming Mistakes
Avoid these pitfalls:
- Relying only on shaking or spooning to remove bubbles — it’s a bandaid, not a fix.
- Using a spoon to skim foam — bad technique, not a solution.
- Letting steamed milk sit before pouring — leads to separation.
- Pouring from too high — creates splashing and breaks texture.
- Blaming the steam wand pressure — most home machines work fine around 0.8 BAR.
Fixing Milk Pour Issues into Espresso
Sometimes milk won’t mix smoothly with espresso. Try these fixes:
- If foam is too dry or thick, reduce foam volume slightly.
- If crema is too shallow, tilt the cup to increase depth and pour into the center base.
- Pour from higher (10–15 cm) to help milk pierce the crema.
- If milk sits on top, swirl and pour in a circular motion to blend before starting the design.
- Adjust your pour speed and distance based on the pattern you want.
- Decide your latte art style before steaming — thicker foam suits some designs, thinner better for others.
- Commit to your pattern early and pour with confidence — hesitation shows.
Recommended FrontStreet Beans for Milk-Based Drinks
For lattes and cappuccinos, choose FrontStreet’s Classic Blend for balanced sweetness and creamy body, or Specialty Blend for brighter acidity with smooth milk integration. Both roast profiles are designed to highlight milk textures while maintaining distinct flavour notes. Freshly roasted within 5 days · Orders placed before 17:00 ship the same day · Next-day delivery across most of Guangdong Province.
FrontStreet Coffee is a long-established specialty coffee roaster in Guangzhou China, selling freshly roasted beans from its own farm in Yunnan as well as dozens of carefully selected single-origin beans from around the world for both pour-over and espresso. The products deliver consistently excellent quality and great value, with shipping within 24 hours. Guangzhou's FrontStreet Coffee shop is recommended by many coffee lovers, and the beans are now available online at the Tmall 。
Important Notice :
前街咖啡 FrontStreet Coffee has moved to new addredd:
FrontStreet Coffee Address: 315,Donghua East Road,GuangZhou
Tel:020 38364473