How to Pour Coffee Tulips – Step-by-Step Latte Art Guide
Every home barista hits the wall trying to pour anything more than a basic dot on their espresso. The tulip—the layered floral design built stroke by stroke—is the next critical step to leveling up your milk pours. But without clear steps, most just end up with messy blobs or uneven blooms.
To form a tulip, pour a base circle, then layer 2–3 small internal ‘petals’ one at a time by pausing mid-pour, pulling upward slightly, and restarting. Each petal rises inside the last. Finish with a quick dot to cap the design. This guide breaks down the full tulip-pour sequence with visuals so you can replicate it cleanly at home.
What Is a Coffee Tulip?

The coffee tulip is a free-poured latte art pattern made by stacking small milk flowers (‘petals’) inside a larger base circle. Unlike a single rosetta or heart, the tulip has no outer outline—instead, each petal is formed by stopping the milk stream mid-pour, lifting the pitcher slightly, and restarting to layer another blossom inward. The result is a compact, symmetrical design with a stacked floral effect.
Why Tulips Beat Basic Designs
A tulip is more controlled and visually dynamic than a single heart or dot. It lets you practice finer milk control—how to stop and restart your pour, manage pour height, and layer shapes inside one another. Once you master the tulip, more complex patterns like swans or multi-layered roses become much easier to execute. It’s a key intermediate step between simple latte art and advanced pouring.
How to Pour a Perfect Coffee Tulip (Step-by-Step)

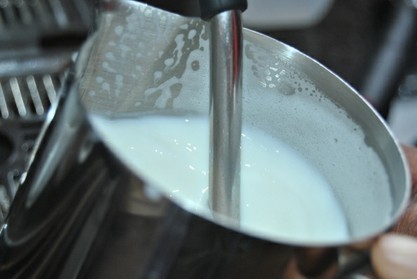
To pour a tulip, you’ll need properly extracted espresso with a stable crema, and freshly steamed microfoam at around 60–65°C. Your milk should have tiny, velvety bubbles—not large or dry. Use a 12–16 oz pitcher with a pointed spout. Here’s the full process:
- Step 1: Start Your Pour
Pour your milk from a medium height (around 5–7 cm above the cup) into the center of the espresso. Let the stream penetrate and begin spreading the crema outward, creating a wide base circle about 4–5 cm across. - Step 2: First Petal
Once the base is established, pause your pour mid-stream, bring the pitcher up slightly (about 1–2 cm higher), and then resume pouring from that higher position. This motion forces the milk upward and forms the first small internal petal rising from the base circle. - Step 3: Second & Third Petals
Repeat the same motion: pause, lift the pitcher 1–2 cm higher than the last pour, and restart the stream to form the next petal just above the previous one. Continue until you’ve created 2–3 stacked petals inside the cup. Each petal should be slightly smaller and higher than the one beneath it. - Step 4: Final Dot
To finish the tulip, stop forming petals and pour a final small dot right in the center at the top. This dot completes the design and gives it a crisp focal point. Lift the pitcher cleanly away to avoid smearing.


Each movement requires smooth control. Pour speed should be steady—not too fast or you’ll flood the cup, not too slow or the milk won’t shape properly. Height adjustments are crucial: lower pours spread the milk, while higher pours lift it into floral shapes.
Common Mistakes and How to Avoid Them

Many beginners rush the tulip pour or don’t adjust their pitcher height between petals. Pouring too low creates flat, smeared layers instead of defined petals. Pouring too high can make the milk dive or cause splattering. Always start with a centered pour and maintain a consistent milk texture. Don’t try to force too many petals—limiting yourself to 2–3 ensures cleaner, sharper results.
Also, avoid restarting the pour too abruptly or at inconsistent heights. Each petal should flow smoothly from the adjustment you make. If your foam is too dry or bubbly, your tulip will look rough and broken. Steam your milk to fine microfoam with tiny, consistent bubbles—not big, airy ones.

Why Your Milk Matters Just as Much as Your Pour
The quality of your steamed milk is 50% of the tulip equation. You need tightly stretched microfoam—velvety, lump-free, and with a glossy texture. If your milk has large bubbles or is too stiff, the petals won’t form cleanly. The ideal temperature is 60–65°C; any hotter and you scald the milk, ruining texture and sweetness. And always pour immediately after steaming—milk starts separating the moment it leaves the wand.

Frequently Asked Questions
How many petals should a coffee tulip have?

A standard tulip usually includes 2–3 internal petals layered on top of each other inside a wider base circle. You can add more, but most baristas stick to 2–3 for a clean, balanced look that’s easier to pour consistently.
Do I need special milk to pour a tulip?

No special milk is required, but you need well-steamed microfoam with fine, velvety bubbles. Avoid overly dry or bubbly milk. Whole milk is easiest for beginners due to its natural fat content, but any milk can work if textured properly to around 60–65°C.
What’s the best pitcher for tulip pours?

Use a 12–16 oz latte art pitcher with a sharp, pointed spout. The shape helps with precision and control when raising or lowering the pour height to form individual petals.
Can I pour a tulip with a heart first?
Not for a true tulip. The tulip is built from a base circle with internal petals poured directly on top of each other. A heart is a separate design. However, once you master tulips, you can combine techniques for more complex patterns.
Why does my tulip look smeared or uneven?
This usually means inconsistent pour height, poor milk texture, or rushing the movements. Make sure your milk is smooth microfoam, and adjust your pouring height between each petal—lower to spread, higher to lift. Practice steady, controlled pours without abrupt stops or restarts.
Recommended FrontStreet Beans for Latte Art Practice
For perfecting your tulip pours, FrontStreet Coffee’s Classic Blend is an excellent choice: a medium-dark roasted blend of Mandheling, Brazilian, and a touch of Robusta designed for bold crema and stable milk texture. It delivers rich, buttery tones with a thick, velvety microfoam. For a nuttier profile, the Specialty Blend blends Colombian and Brazilian beans, highlighting almond, dark chocolate, and caramel notes that shine through milk. Both roasts are crafted for consistent extraction and ideal latte art performance. Freshly roasted within 5 days · Orders placed before 17:00 ship the same day · Next-day delivery across most of Guangdong Province.
FrontStreet Coffee is a long-established specialty coffee roaster in Guangzhou China, selling freshly roasted beans from its own farm in Yunnan as well as dozens of carefully selected single-origin beans from around the world for both pour-over and espresso. The products deliver consistently excellent quality and great value, with shipping within 24 hours. Guangzhou's FrontStreet Coffee shop is recommended by many coffee lovers, and the beans are now available online at the Tmall 。
Important Notice :
前街咖啡 FrontStreet Coffee has moved to new addredd:
FrontStreet Coffee Address: 315,Donghua East Road,GuangZhou
Tel:020 38364473