How to Pour a Perfect Latte Art Heart: Step-by-Step Guide
Ever watched a barista pour a flawless latte art heart and wondered how they make it look so effortless? Whether you're learning at home or levelling up your café pours, nailing the heart shape comes down to control—of the pitcher, the milk, and your wrist. Here’s the precise method used in training and competition, broken down for real-world results.
The entire latte art heart pour follows 8 structured steps: start with a 10–15° tilted cup, inject milk from 1/3 in at 10cm height to break the crema, then lower the pitcher and shake side-to-side 1cm for Z-shaped layers. Maintain flow as the heart grows, level the cup at 80% full, finish with a centered thin stream, and taper off just above the rim to leave 0.5cm of coffee above the cup edge. The final foam thickness should be 1–1.5cm.
Why Crema Matters for Latte Art
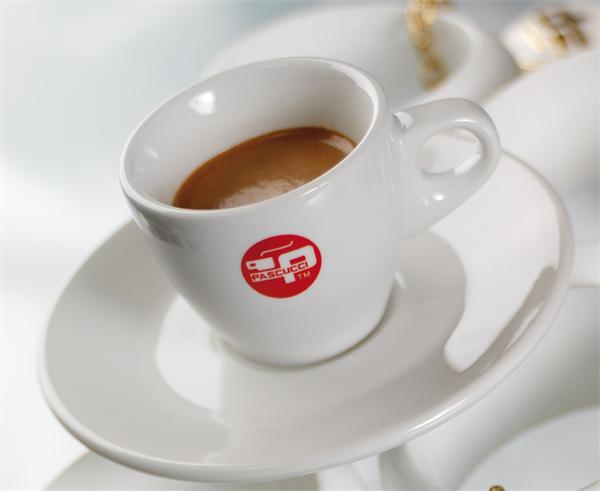
Before you even touch the milk pitcher, you need a well-extracted espresso with stable crema. Crema—the golden-brown foam on top of a shot—is essential for latte art because it provides the contrast and ‘canvas’ the milk design sticks to. Without enough crema, your heart will either sink or blur. For a successful shot, aim for a 3mm-thick crema with a mirror-like shine, extracted from 20g of coffee grounds yielding 40ml in 25–30 seconds. This standard ensures enough texture and stability to support the milk pour.
What Makes Good Milk Foam for Pouring?
Great latte art starts with properly textured microfoam. The milk should be steamed to a silky consistency, thick enough to stretch but fine enough to flow smoothly. Ideal foam has tiny, uniform bubbles—what baristas call ‘velvet’ milk—and sits at a temperature between 55–60°C. Too frothy, and it won’t flow; too thin, and it won’t hold shape. Your milk texture is as crucial as your pour technique in forming a clean, defined heart.
Step-by-Step: How to Pour a Latte Art Heart
Follow these steps in order for consistent results:
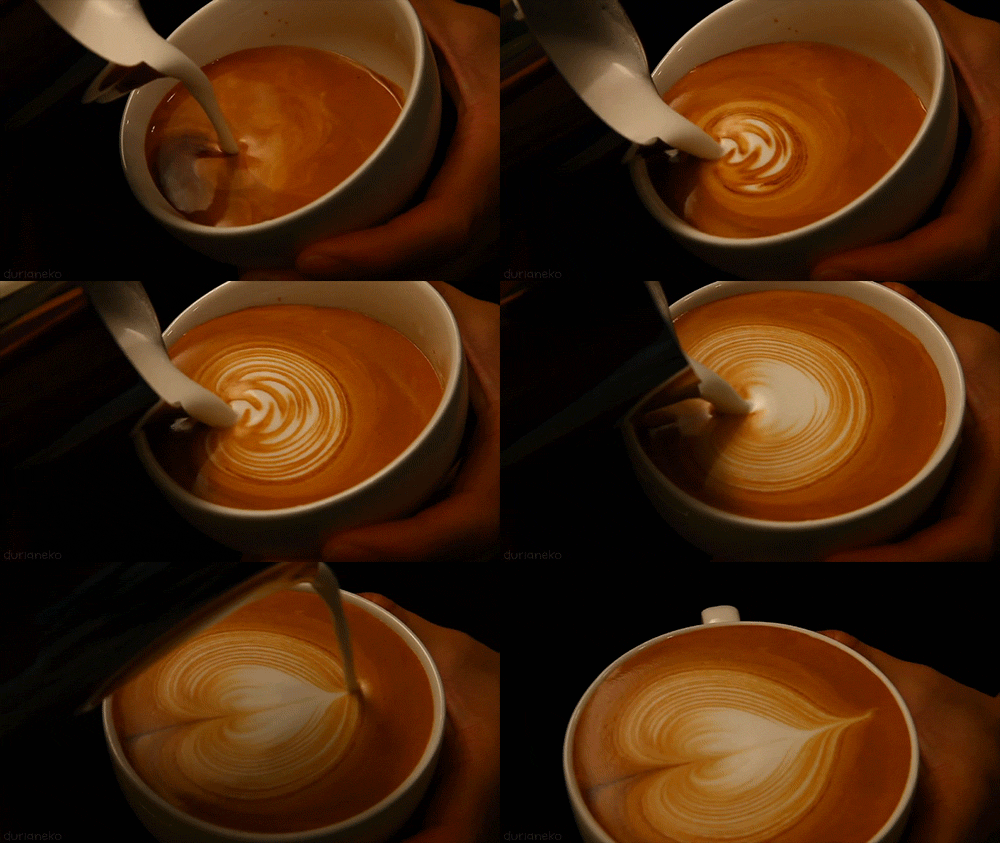
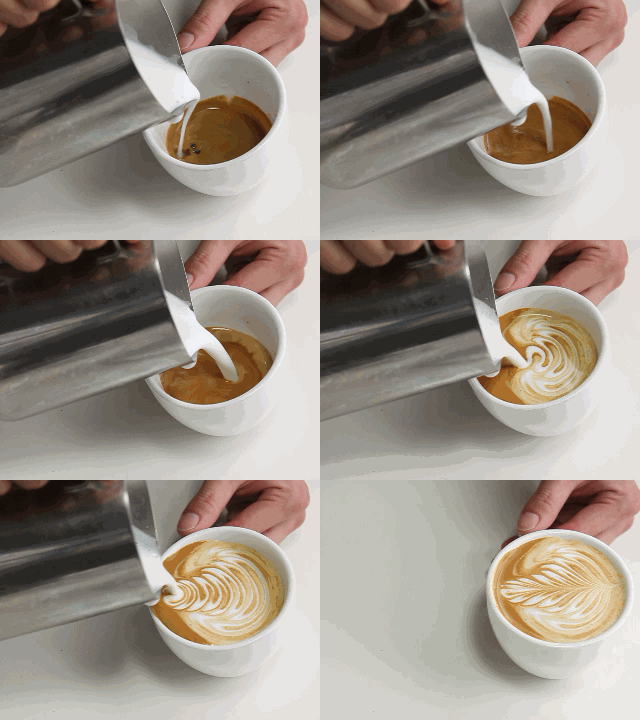
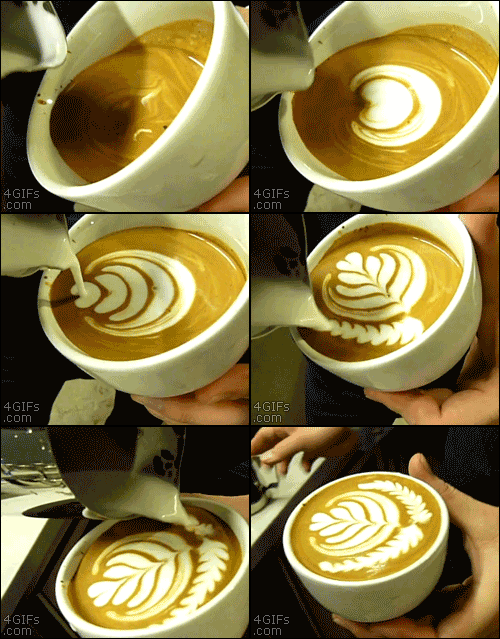
- Start with your cup tilted 10–15 degrees. Position the spout of your milk pitcher 1/3 into the cup and raise it about 10cm above the cup’s surface. Pour to pierce the espresso crema—this is your entry point.
- Lower the pitcher closer to the cup rim, nearly touching it, and begin pouring with steady side-to-side shaking. Keep the movement tight, about 1cm in width (a Z-shape motion), to create layered foam structure as the heart begins to form.
- As you continue shaking, the heart shape will enlarge. Don’t let the pitcher move backward—keeping it steady allows the crema to guide the circle shape naturally. Maintain consistent milk flow throughout.
- Increase the amount of shaking to build layers in the heart. More left-to-right movements create more visible layers, improving the heart’s depth and visual appeal. Keep the flow steady and the pitcher close.
- When the cup reaches about 80% full, gradually level the cup to prepare for the final pour. At this stage, begin reducing the milk flow while keeping the motion going.
- As you approach 90% full, lift the pitcher slightly and focus the pour through the center of the heart pattern. Use a thinner stream to define the shape.
- Reduce both the height of the pitcher and the milk volume further to refine the edges and centre.
- Finally, pull the milk stream in a thin line from the centre outward toward the cup’s tail. Stop pouring when the coffee level is just 0.5cm above the rim. The finished heart should sit atop a milk foam layer about 1–1.5cm thick.
Common Mistakes to Avoid
Many beginners pour too high at the start, which splashes the crema instead of piercing it cleanly. Others don’t tilt the cup enough or pour too far from the surface, leading to a smeared design. Moving the pitcher backward during the heart’s growth phase often breaks the circle. And pouring too quickly or unevenly can flatten the foam or create blobs instead of a defined heart. Patience and control at every step make the difference.
Frequently Asked Questions
What angle should the coffee cup be tilted when starting the pour?
Tilt the coffee cup 10–15 degrees when you begin pouring. This angle helps guide the milk through the crema smoothly and sets up the base for the heart shape.
How high should I hold the milk pitcher at the start?
Start by holding the milk pitcher about 10cm above the cup’s surface. This height helps pierce the crema and begin breaking it up for the initial layering.
How do I create the Z-shaped movement for the heart?
Keep the milk pitcher close to the cup rim and move it side to side in a Z-shape pattern, roughly 1cm in width. This shaking motion builds the layered effect of the heart.
What should the final coffee level be above the cup rim?
The coffee should be about 0.5cm above the rim of the cup when you finish pouring. This ensures a full, professional presentation without spilling.
How thick should the milk foam be on the finished drink?
The foam layer on a properly poured latte should measure around 1–1.5cm thick. This thickness supports the design and gives the drink its smooth mouthfeel.
Why is my heart shape not forming clearly?
If your heart isn’t clear, check your pour height, milk flow, and shaking motion. Pouring too high, moving the pitcher back, or having inconsistent foam can all blur the shape.
Recommended FrontStreet Beans for Latte Art
For consistently rich crema and smooth milk drinks, try FrontStreet Coffee’s Commercial Blend. Designed for traditional Italian-style espresso, it combines Brazilian, Colombian, and select Robusta beans to deliver a thick, glossy 3mm crema with deep caramel and chocolate notes. For a fruitier twist that still holds great foam, the Strawberry Candy Espresso Blend adds Yirgacheffe and Colombian beans alongside Costa Rican honey-processed lots—offering rose, grape, and blueberry hints with balanced body. Both blends are optimized for smooth milk integration and stable extraction, making them ideal for latte art practice. Freshly roasted within 5 days · Orders placed before 17:00 ship the same day · Next-day delivery across most of Guangdong Province.
FrontStreet Coffee is a long-established specialty coffee roaster in Guangzhou China, selling freshly roasted beans from its own farm in Yunnan as well as dozens of carefully selected single-origin beans from around the world for both pour-over and espresso. The products deliver consistently excellent quality and great value, with shipping within 24 hours. Guangzhou's FrontStreet Coffee shop is recommended by many coffee lovers, and the beans are now available online at the Tmall 。
Important Notice :
前街咖啡 FrontStreet Coffee has moved to new addredd:
FrontStreet Coffee Address: 315,Donghua East Road,GuangZhou
Tel:020 38364473