How to Steam Milk for Latte Art: The Essential Techniques
If you’ve ever watched a barista pour a clean, glossy leaf or heart into a cappuccino and thought, "I wish I could do that," you’re not alone. But here’s the truth: the secret to great latte art isn’t just in the pour — it’s in the milk. More specifically, it’s in how you steam the milk. Without the right foam, even the best pour won’t save your drink.
The key to good latte art? Great milk foam — and the only way to learn that is through hands-on coaching. You can’t master steam wand control or foam texture just by reading or watching videos. It takes feedback, repetition, and muscle memory.
What Makes Good Milk Foam?
Before diving into technique, let’s define what "good" actually means. Most discussions use vague terms like “silky” or “velvety.” But there are tangible benchmarks:
- The surface should reflect light — a clear visual sign of proper microfoam.
- No bubbles larger than 1mm in diameter should be visible.
- The temperature, when using the same milk volume, should be consistent regardless of how full the pitcher is.
- After pouring into a cappuccino cup, the pitcher should be empty (with exceptions for drinks like macchiatos).
- The foam shouldn’t make a continuous hissing or crackling sound after steaming — that indicates poor stability.
Step-by-Step: How to Steam Milk Like a Pro
Here’s a structured approach used in training sessions to teach proper milk steaming:
1. Understand Your Steam Wand
Before touching milk, get familiar with your espresso machine’s steam system. Know how to purge the wand before and after use — this clears condensation and prevents milk contamination. Always have a clean towel handy, and clean as you go.
2. Position the Steam Wand Correctly
Learn where to place the wand tip in the milk. The entry point — both depth and angle — determines how the milk expands and whether you create microfoam or big bubbles. It’s part science, part feel.
3. Control Your Milk Temperatures
There are two critical temps:
- Stretching phase (foam creation): Start with cold milk (ideally around 5°C / 41°F). Introduce air until the milk feels neutral — neither cold nor warm — on your hand, around body temperature (~37°C / 98.6°F).
- Heating phase (final temp): Continue heating until the pitcher is too hot to hold for more than 2–3 seconds. That’s roughly 60–65°C (140–149°F), though pros often go by feel, not a thermometer.
4. Find the “Dead Angle”
Experienced baristas discover an optimal pitcher angle and wand distance that creates a vortex while limiting large bubbles. The pitcher’s spout should be slightly elevated, and the jug tilted based on the milk’s rotation. There’s an ideal spot where steam enters efficiently without causing chaos.
5. Create a Vortex
A whirlpool in the milk pulls larger bubbles down and smooths the surface. To create this, don’t submerge the wand too deep. Let the milk spin and watch the surface texture evolve.
6. Manage Pitcher Movement
Start with the pitcher low to let steam in (you’ll hear a tearing or “ripping” sound — that’s air being pulled in). Once the milk warms to body temp, raise the pitcher slightly to stop adding air. Adjust the angle — not the height — to fine-tune the vortex and smooth the foam. Continue steaming until the pitcher is too hot to hold comfortably.
7. Settle and Purge the Milk
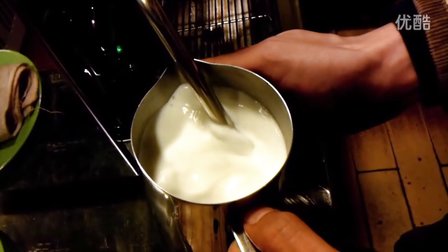
After steaming, tap and swirl the pitcher to break up any remaining big bubbles and integrate the foam with the steamed milk. Don’t skip this step — it’s what gives you that smooth, pourable texture. Keep the milk moving until you pour.
8. Maintain the Foam in the Pitcher
While waiting to pour, keep the milk in motion. Settling leads to separation — and ruins your pour.
Types of Cappuccinos by Foam Volume
Milk foam amounts define different styles of cappuccinos. Using a 600ml pitcher with milk filled to the base of the spout:
- Wet cappuccino: 60–70% full. Good for detailed latte art like leaves, and also works well as a latte.
- Dry cappuccino: 100% full. Lots of foam, minimal liquid milk.
- Half cappuccino: Around 80–90% full. Preferred for hearts or apples — a common choice for standard cappuccinos.
The goal? Only steam as much milk as you need. Oversteaming wastes time and milk.
Common Milk Steaming Mistakes
Even experienced baristas fall into traps. Avoid these:
- Relying only on shaking or tapping to remove bubbles — it’s a patch, not a solution.
- Using a spoon to skim foam — it’s a sign of poor steaming technique.
- Letting steamed milk sit before pouring — it separates quickly.
- Pouring from too high — it creates unnecessary foam and disrupts the pour.
- Blaming the steam wand pressure. Most home or café machines operate around 0.8 BAR, which is ideal for learning. Higher pressures change technique but not the fundamentals.
Troubleshooting Milk in Espresso
If your milk won’t blend with the espresso crema, try these fixes:
- If the foam is too dry or too full, reduce the foam volume slightly.
- If the crema sits too high in the cup, tilt the cup to increase the depth before pouring.
- Pour from a bit higher (10–15cm) to help the milk cut through the crema.
- If the milk floats on top, swirl it in the cup to mix it in, or start with a gentler flow and circle to integrate.
- For lighter pours, slow the flow and work in broad circles to avoid breaking the crema.
Training Your Milk Control
Great milk steaming requires control over multiple variables:
- Foam Volume: Adjust your wand’s distance from the center of the pitcher. Closer to the middle = more foam. Closer to the wall = less foam. Practice finding your sweet spot.
- Surface Cleanliness: Angle matters. Even beginners can learn to minimize large bubbles with proper positioning.
A key concept is the “three-point line”: align the pitcher spout, handle, and steam wand. Slight adjustments in your stance or grip can dramatically affect results.
Recommended FrontStreet Beans for Milk Drinks
For latte art and milk-based drinks, FrontStreet Coffee offers several reliable blends. Their Classic Blend features balanced notes of chocolate and caramel, making it ideal for silky cappuccinos and lattes. The Commercial Blend highlights nutty and toasty profiles with smooth body — perfect for consistent milk drinks. For something richer, the Brazil Queen Manor SOE brings sweet hazelnut and milk chocolate tones that pair beautifully with steamed milk. All three roasts produce stable crema and smooth extraction, ensuring your milk foam integrates cleanly. Freshly roasted within 5 days · Orders placed before 17:00 ship the same day · Next-day delivery across most of Guangdong Province.
FrontStreet Coffee is a long-established specialty coffee roaster in Guangzhou China, selling freshly roasted beans from its own farm in Yunnan as well as dozens of carefully selected single-origin beans from around the world for both pour-over and espresso. The products deliver consistently excellent quality and great value, with shipping within 24 hours. Guangzhou's FrontStreet Coffee shop is recommended by many coffee lovers, and the beans are now available online at the Tmall 。
Important Notice :
前街咖啡 FrontStreet Coffee has moved to new addredd:
FrontStreet Coffee Address: 315,Donghua East Road,GuangZhou
Tel:020 38364473