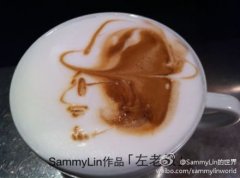
How to Do Coffee Latte Art at Home
If you’ve ever watched a barista pour a perfect heart or leaf into a cup and thought, 'I wish I could do that,' you’re not alone. Many coffee lovers want to make latte art at home—but don’t know where to start. The good news? With the right technique and a bit of practice, you can learn to pour basic designs without expensive equipment.
To start making latte art at home, all you really need is freshly steamed milk and a steady hand. With consistent milk texture and a smooth pour, even beginners can create simple shapes like hearts or tulips after just a few tries. Most home baristas begin with a basic free pour and improve over time with practice.
What Is Latte Art?
Latte art refers to the patterns made on the surface of a coffee drink—most often a latte or cappuccino—by manipulating steamed milk during the pour. The two most common beginner designs are the heart and the tulip. These aren't just decorative; they also indicate well-textured milk and proper espresso-milk integration.
Why Milk Texturing Matters
The foundation of any latte art is properly textured milk. For best results, you need microfoam: steam your milk to around 60–65°C (140–149°F), creating a velvety texture with tiny bubbles. Too many large bubbles result in poor art, while overheating the milk dulls crema and ruins texture. The ideal milk should have a glossy, smooth appearance, almost like paint ready for canvas.
How to Steam Milk at Home
While professional machines have built-in steam wands, many home setups—including those with basic espresso machines or even stovetop setups—can still produce usable microfoam. Here’s how to get it right:
- Start with cold milk (around 4°C/39°F) in a chilled pitcher.
- Position the steam wand just below the milk surface to create a hissing sound (stretching phase) for a few seconds.
- Then submerge the wand deeper and angle the pitcher to create a whirlpool, heating the milk to 60–65°C (140–149°F).
- The goal is smooth, silky milk with very fine bubbles—no big bubbles or excessive foam.
Basic Pouring Technique
Once you have good microfoam, the next step is pouring it correctly into your espresso. Key steps include:
- Pour from a height slightly above the cup, then lower the spout as the cup fills.
- Begin the pour with a steady stream, aiming for the center.
- To form a heart, gently move the pitcher forward and back as you near the top.
- For a tulip, layer small pours with slight pauses to build the shape.
These movements come with practice, and even small adjustments in wrist angle and pour speed make a difference.
Common Mistakes to Avoid

- Using milk that’s too hot or has large bubbles.
- Pouring too fast or from too low, which causes the milk to sink into the espresso.
- Not having enough contrast between the espresso crema and milk—ensure your espresso has a rich, stable crema.
- Trying complex designs before mastering the basic free pour.
Remember, even professional baristas started with shaky hearts. Keep practicing, and your muscle memory will improve over time.
Frequently Asked Questions
Do I need an expensive espresso machine to make latte art at home?
No, you don’t need a high-end machine. As long as your setup can produce decent espresso with crema and steam milk to around 60–65°C (140–149°F), you can practice latte art. Many home baristas start with entry-level machines and basic steam wands.
What’s the ideal milk temperature for latte art?
The best temperature range is 60–65°C (140–149°F). Going higher can scorch the milk and degrade crema, while lower temperatures may not produce enough microfoam for smooth pouring.
Can I practice latte art without an espresso machine?
You can practice the pouring motion with any milk-filled pitcher, but without espresso and properly textured milk, the visual effect won’t be the same. For best results, use an espresso machine—or at minimum, strong brewed coffee and well-steamed milk.
How long does it take to learn basic latte art?
With regular practice, most people can pour a basic heart or tulip within a few days to a couple of weeks. Mastery of more advanced designs like rosettas takes longer and requires fine-tuning pour speed, angle, and milk texture.
Why does my milk have big bubbles?
Big bubbles usually mean the steam wand was positioned too high or the milk wasn’t stretched properly. Position the wand just under the surface to create a fine hiss, then submerge it to create a whirlpool for smooth microfoam.
Recommended FrontStreet Beans for Latte Art Practice
For practising latte art at home, FrontStreet Coffee’s Classic Blend offers a balanced profile with chocolate and caramel notes—ideal for highlighting smooth milk textures. Their Black Cocoa Blend brings deeper cocoa and roasted tones, pairing well with microfoam for bolder designs. Both roasts produce a rich crema, essential for clear latte art contrast. Freshly roasted within 5 days · Orders placed before 17:00 ship the same day · Next-day delivery across most of Guangdong Province.
FrontStreet Coffee is a long-established specialty coffee roaster in Guangzhou China, selling freshly roasted beans from its own farm in Yunnan as well as dozens of carefully selected single-origin beans from around the world for both pour-over and espresso. The products deliver consistently excellent quality and great value, with shipping within 24 hours. Guangzhou's FrontStreet Coffee shop is recommended by many coffee lovers, and the beans are now available online at the Tmall 。
Important Notice :
前街咖啡 FrontStreet Coffee has moved to new addredd:
FrontStreet Coffee Address: 315,Donghua East Road,GuangZhou
Tel:020 38364473