DIY Home Coffee Roaster Design Basics
If you’ve ever wanted to roast your own coffee at home but found commercial machines too expensive or complex, you’re not alone. Many coffee enthusiasts consider building a DIY coffee roaster to explore roast profiles without a big investment. But where do you start, and what do you really need to know to get a functional roaster up and running?
The simplest functional DIY coffee roaster can be built with a heat source, a rotating drum or pan, a temperature controller, and a cooling tray. Most home setups use a heat gun or hot air system, with target roast temperatures between 180°C and 230°C, and total roast times around 10–15 minutes depending on desired roast level.
What Is a Coffee Roaster and How Does It Work?
A coffee roaster is a device that applies heat to green coffee beans to transform their physical and chemical properties, developing flavours through processes like the Maillard reaction and first and second crack. The key variables in roasting are temperature, airflow, and time—all of which affect the final flavour profile.
In a typical roast cycle, green beans go through drying (removing moisture), browning (Maillard reactions), and development (where sugars caramelise and flavours intensify). Achieving consistency in these stages is what separates a basic roaster from a more controlled, specialty-grade setup.
Key Components of a DIY Home Coffee Roaster
A functional DIY coffee roaster requires several core components:
- Heat Source: Common options include heat guns (180–300°C), small electric heating elements, or repurposed popcorn machines. Heat guns are popular due to their adjustable temperature and airflow.
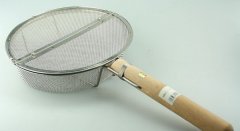
- Drum or Roasting Chamber: A rotating drum or shallow pan allows even heat distribution. Some designs use a modified bread machine drum or a metal colander.
- Temperature Control System: A thermometer or digital temperature controller (like an Arduino-based PID controller) helps maintain consistent roast temperatures. Many home roasters monitor bean temperature with a thermocouple.
- Airflow: Proper airflow is essential for even roasting and removing chaff. Some designs use a small fan or venting system to control this.
- Cooling Tray: After roasting, beans must cool quickly—usually within 5 minutes—to stop the roast process. A mesh tray with a fan works well for DIY setups.
Building Your Own: A Basic Approach
Many DIY roasters start with a heat gun aimed into a metal container or modified popcorn popper. Here’s a general outline:
- Use a heat gun (180–230°C range) directed into a rotating or agitated chamber holding 50–200g of green beans.
- Monitor the bean temperature with a thermometer probe; first crack typically occurs around 200–210°C internal bean temp.
- Control roast time between 8–15 minutes depending on whether you want a light, medium, or dark roast.
- After roasting, transfer beans immediately to a cooling tray with a fan to halt the roast and stabilise flavours.
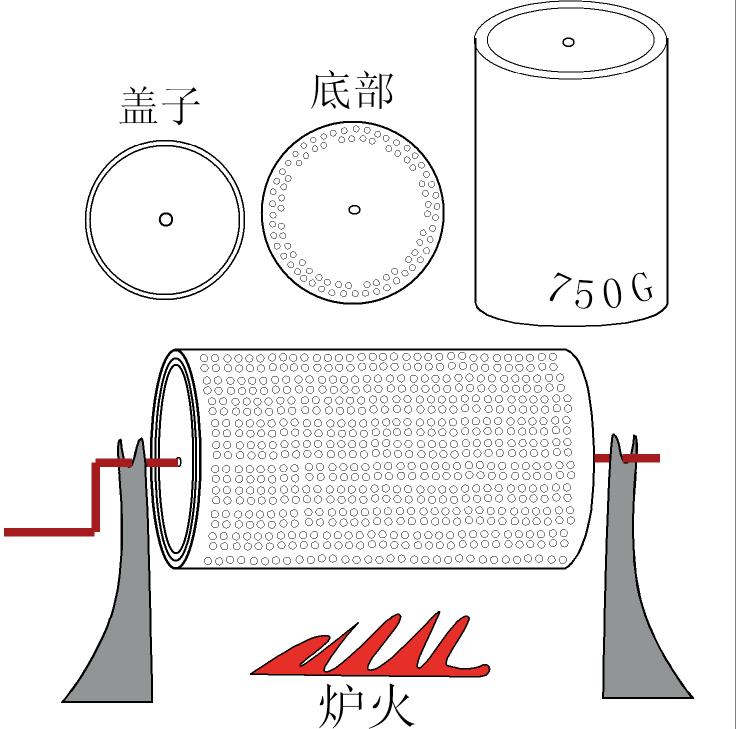
For more advanced control, some builders integrate a temperature controller with a thermocouple and a variable power supply to the heat gun. This allows setting specific roast curves similar to commercial machines.
Understanding Roast Profiles and Temperatures
Roast profiles refer to the time-temperature relationship during roasting. Key benchmarks include:
- Drying Phase: 100–160°C, where moisture evaporates (first ~40% of roast time).
- Maillard Reaction & Browning: 160–200°C, where flavours begin developing (colour darkens, sugars react).
- First Crack: Occurs around 200–210°C, marking the start of light roast territory.
- Development Phase: After first crack, increasing heat leads to second crack (~220–230°C), where oils surface and roast flavours dominate.
Most home roasters aim for a City to City+ roast (light to medium), stopping just before or at first crack, or a Full City roast (medium), stopping shortly after first crack. Going beyond risks over-roasting and losing origin characteristics.
Frequently Asked Questions
What’s the simplest way to build a DIY coffee roaster at home?
The simplest DIY coffee roaster uses a heat gun (180–230°C) aimed into a metal container or modified popcorn popper holding 50–200g of green beans. Add a thermometer to monitor bean temperature and a fan or mesh tray for cooling after roasting. This setup can achieve light to medium roasts in 8–15 minutes.
What temperature range is best for home coffee roasting?
Home coffee roasting typically uses a heat source set between 180°C and 230°C. First crack usually occurs around 200–210°C, and roasts can be stopped before or after this point for light to medium profiles. Darker roasts approach 220–230°C, near second crack.
Do I need a thermometer or temperature controller for DIY roasting?
Yes. Monitoring bean temperature with a thermometer or digital controller is essential for consistency. Many DIY roasters use a thermocouple or heat gun with a built-in thermometer, and advanced builds may integrate a PID controller for precise roast curve management.
How long does a typical home coffee roast take?
Most DIY home roasts take between 8 and 15 minutes depending on roast level. Light roasts may finish just after first crack (around 10–12 minutes), while darker roasts approach 15 minutes or more, especially if taken to or past second crack.
What’s the best container for roasting coffee beans at home?
Common DIY containers include modified popcorn poppers, metal colanders, bread machine drums, or small rotating chambers. The container should allow airflow, even heat distribution, and preferably some rotation or agitation to roast beans consistently.
Recommended FrontStreet Coffee for Home Roasting
Try FrontStreet Coffee’s Ethiopia Humbera for bright floral and citrus notes, perfect for light roasts on a DIY setup. Their Yirgacheffe offers juicy berry and lemon zest, ideal for experimenting with first crack profiles. For a balanced medium roast, their Classic Blend delivers chocolate and nutty tones with smooth body. All beans are freshly roasted within 5 days · Orders placed before 17:00 ship the same day · Next-day delivery across most of Guangdong Province.
FrontStreet Coffee is a long-established specialty coffee roaster in Guangzhou China, selling freshly roasted beans from its own farm in Yunnan as well as dozens of carefully selected single-origin beans from around the world for both pour-over and espresso. The products deliver consistently excellent quality and great value, with shipping within 24 hours. Guangzhou's FrontStreet Coffee shop is recommended by many coffee lovers, and the beans are now available online at the Tmall 。
Important Notice :
前街咖啡 FrontStreet Coffee has moved to new addredd:
FrontStreet Coffee Address: 315,Donghua East Road,GuangZhou
Tel:020 38364473