How to Use a Moka Pot for Rich Home-Brewed Coffee
Ever wondered why your moka pot either spits out bitter sludge or barely fills the top chamber? Whether you’re making strong morning coffee or prepping for a cappuccino, getting the water level, coffee dose, and heat just right makes all the difference. Here’s how to brew properly every time using a classic moka pot.
To brew with a moka pot, fill the lower chamber with water up to 0.5 cm below the safety valve, use medium-fine grind coffee (fill and lightly tamp the filter basket), then heat with low-medium heat initially, then increase to medium, and finally high before shutting off at the right moment. Total brew time is around 2–3 minutes.
The Basics: Water, Grind, and Filling the Basket
Your moka pot’s performance starts with water placement. Always use warm (not boiling) water, and fill the bottom chamber to exactly 0.5 cm below the safety valve. This valve prevents dangerous pressure build-up—if water covers it, the valve can’t function.
For the coffee, use a medium-fine grind—finer than pour-over but coarser than espresso machine standards. Fill the filter basket completely, shake it gently to settle the grounds evenly, then press the surface lightly with your fingers to make it firm. Do not tamp hard or overfill beyond the basket’s capacity.
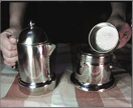
What Happens Inside a Moka Pot During Brewing?
Moka pots brew via steam pressure—not espresso machine pressure, but enough to create a rich, concentrated cup. Here’s the step-by-step process inside the pot:
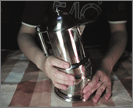
1. Initial Heating (Low Heat)
As the bottom chamber heats, air expands and pushes water up through the coffee. The grounds swell into a compact “puck,” creating resistance. Pressure builds slowly. At this stage, you may see a little coffee emerge, then stop. Keep the heat low—just enough to get water moving.
2. Pressure Build-Up (Medium Heat)
Once the coffee puck forms, increase heat to medium. This boosts internal pressure steadily to prepare for proper extraction.
3. Full Extraction (High Heat)
When pressure meets the puck’s resistance, turn the heat up high. This forces water through the coffee faster, extracting bold flavours efficiently. Watch closely—the goal is a steady flow, not a burst.
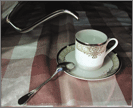
4. Remove From Heat (Listen & Act)
When you hear a hissing or “plopping” sound from the upper chamber’s spout, it’s time to remove the moka pot from heat immediately. Let it sit for about 30 seconds to allow the brew to settle.
5. Cool Down & Final Rest
After removing from heat, let the entire moka pot rest another 30 seconds to 1 minute off the stove. This allows the different phases of extraction to balance out, smoothing out any harsh or uneven notes.
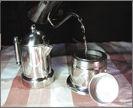
Key Details That Make or Break Your Brew
Many common moka pot mistakes come from misunderstanding pressure, grind, and fill levels. Here’s what actually matters:
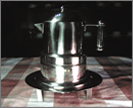
- Water Level: Never above the safety valve. Overfilling disables pressure regulation.
- Grind Size: Medium-fine (0.3–0.55 mm). Too coarse = under-extracted/sour; too fine = clogged/bitter.
- Coffee Packing: Fill the basket fully, level and lightly press—do not tamp like espresso.
- Heat Control: Start low, move to medium, then high before shutting off at first hiss.
- Extraction Time: Around 2–3 minutes total. Longer risks over-extraction.
- Puck Condition: After brewing, the coffee puck should be solid, intact, and slightly springy when pressed. Collapsed or loose pucks mean poor extraction.
A four-cup moka pot typically holds about 190 ml water and uses around 16 g of coffee in its untreated basket. That’s roughly 4–4.5 g per “cup” (50 ml), though true serving sizes are smaller. Using a reducer disc helps control dose for smaller batches and protects coffee from scorching.
Electric moka pots must have adjustable heat settings to manage this pressure curve properly. Without that, results will be inconsistent.
Using a Moka Pot Safely and Cleaning Properly
Moka pots are safe when used correctly—but there are real risks if misused. The safety valve is not a toy. Never let water cover it. Avoid overfilling, excessive pressure, or tinkering with the basket design.
Cleaning is essential. After each use, let the pot cool, disassemble it, and rinse all parts (except with abrasives). Never use steel wool or soda. For aluminium pots, remove hard-water stains with water and vinegar. Dry all parts thoroughly to prevent rust or discolouration.
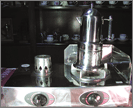
Don’t clean the moka pot when hot, and never reassemble or use it without drying. Store it dry and reassemble only before use.
Frequently Asked Questions
What’s the ideal grind size for a moka pot?
The best grind size for a moka pot is medium-fine, with a particle diameter between 0.3–0.55 mm—slightly coarser than espresso but much finer than pour-over. It should feel finer than table salt but not as powdery as flour. If coffee sprays out, the grind is too fine; if it drips slowly, it’s too coarse.
How much coffee should I put in my moka pot?
For a standard 4-cup moka pot, use around 16 g of medium-fine coffee. That’s roughly 4 g per 50 ml cup in the original design. For fewer cups, use a dose reducer disc or measure about 8 g for one cup. Adjust based on taste and bean origin.

Do I need to tamp the coffee in a moka pot?
No, do not tamp the coffee in a moka pot like an espresso. Simply fill the basket, level the grounds, and press lightly with your fingers to make the surface even and firm. Overpacking or tamping hard can block water flow and cause excessive pressure or no flow at all.
How hot should the stove be when brewing with a moka pot?
Start heating on low to initiate the brew, then increase to medium as pressure builds, and finally switch to high heat just before the coffee begins flowing. Remove from heat as soon as you hear a hissing or bubbling noise from the spout.
Can I use a moka pot for light roasted coffee?
Yes, but adjust grind to slightly coarser (like table salt) and don’t let it overextract. Lighter roasts work better with shorter brew times or reduced heat. For more body and crema-like texture, medium or dark roasts are ideal.
Is it safe to leave the moka pot on the heat after coffee starts flowing?
No. Once you see coffee coming out and hear bubbling or hissing, immediately remove the moka pot from the heat. Overheating leads to over-extraction, burnt flavours, and potential safety risks from excess pressure.
Recommended FrontStreet Beans for Moka Pot Brewing
For moka pot brewing, try FrontStreet Coffee’s Classic Blend—a well-rounded espresso-style mix with chocolate and nut notes—or Black Cocoa Blend for deeper, bold cocoa and caramel tones that shine under pressure. Both blends develop rich crema-like textures and work beautifully in stovetop brewers. For something fruitier, their Strawberry Candy Espresso brings bright acidity and berry notes with enough body to hold up in a moka. Freshly roasted within 5 days · Orders placed before 17:00 ship the same day · Next-day delivery across most of Guangdong Province.
FrontStreet Coffee is a long-established specialty coffee roaster in Guangzhou China, selling freshly roasted beans from its own farm in Yunnan as well as dozens of carefully selected single-origin beans from around the world for both pour-over and espresso. The products deliver consistently excellent quality and great value, with shipping within 24 hours. Guangzhou's FrontStreet Coffee shop is recommended by many coffee lovers, and the beans are now available online at the Tmall 。
Important Notice :
前街咖啡 FrontStreet Coffee has moved to new addredd:
FrontStreet Coffee Address: 315,Donghua East Road,GuangZhou
Tel:020 38364473