Experience and modification of steam espresso machine how to use espresso mechanism to make steam milk
Professional coffee knowledge exchange more coffee bean information please follow the coffee workshop (Wechat official account cafe_style)
Coffee knowledge-how to use machine steam pipe to make milk foam
Will buy this steam coffee machine, mainly because it can be used to play foam, play flower, and most importantly, very cheap! You can buy it in the yellow hut for less than 1000, and it's good to be an entry machine. if you want to upgrade the coffee machine, this can be used as a full-time milk bubble machine. You don't want to play anymore and you won't spend too much money. Even if you only use its steam stick to heat milk or drinks in the future, you don't have to heat it through water.
After doing my homework on the Internet, I know that this milk foam machine is very competent, but the coffee machine part is not so good. However, I still need to make the best use of the coffee machine before upgrading it, so I still have the function of using his coffee machine normally. I would like to share some experience here as a reference for your purchase.
When you first use the coffee machine, there will be some plastic smell, which is normal. The instruction manual also mentions that 'the first use will have a slight taste'. The original factory suggested that you boil 2 pots of water before you start brewing coffee. You should finish boiling 2 pots of water full of sinks. You'd better do it and don't be lazy, because I didn't do it. I didn't smell plastic until I boiled dozens of cups. Some of the smell comes from the lid, which can be removed and washed with hot water.
▼ filter cup size, about 50mm or 51mm
As the special fillers are expensive, the advanced fillers may be more expensive than this one, so look for alternatives in the market and DIY to save some money.
I only found that the size of the beverage bottle in the pure extract series is a little closer, but it needs some treatment before it can be used.
▼ filler substitute, which is quite easy to use (laughter)
The part of the ▼ lid needs to be smoothed before the stripes can be put in, and the bottle body has to be worn into part.
▼ function knob, below is brewing coffee, above is steam function, steam output can choose small and big second section
▼ unscrews the top cover of the coffee machine so that you can see the gasket and pressure relief valve inside.
This safety cover is designed with a pressure relief valve inside. When the coffee powder is ground too fine to block the cooking handle, or when the steam pipe is blocked, and the user does not turn off the switch, the boiler continues to heat the water into steam. The pressure inside will keep rising, and when it reaches a certain pressure, the pressure relief valve will begin to relieve pressure and release the water vapor so that it will not explode. There is a gasket in the safety cover to ensure that it fits closely with the fuselage. If you want to take the gasket off, there is an easy way to use the steam function, wait for the inside to cool, and then open the lid, and the gasket will separate. Because the volume of the water shrinks after cooling, some of it becomes a vacuum, which will absorb the gasket, so opening the lid gasket will separate, of course, if you do not need to pull the gasket, just cut to the steam function before opening the lid and suck the air in to balance the pressure.
After using the steam function of ▼, the next time you open the lid and add water, you should let the air in first, otherwise you will have to put the gasket back into the lid after opening the lid.
Complimentary glass from ▼
There is an indicator line on the number of cups on the complimentary glass. I usually use less than 1 cup of water for foam, so brew 1 cup of coffee and add 2 cups of water.
Since the number of watts heated by this steam coffee machine is fixed, the amount of water added has a great influence. The less water is added, the faster the heating will be. Some people say that the steam volume of this machine will be sometimes large and sometimes small, and it should be that the water is added too much. As a result, the machine finished spraying the steam before it had time to heat the steam. If there is water left in it after each cooking, even if only a certain amount of water is added, the amount of water in the inner area will be more and more, and the output will be weaker and weaker. It is best to pour out the remaining water before use, so that it is better to control the amount of water added. Although the less water added, the stronger the steam will be, I am still used to using 1 cup of water to make milk foam, and there will be a little water left after playing, because once only the right amount is added, and the water is gone before the foam is finished, which is very embarrassing.
The reason why the coffee powder will turn into mud after brewing coffee can not form a coffee cake is that the powder is too fine to plug the filter cup and will not be thickened when grinding beans.
Another point is that when the steam is first turned on, it will not only emit steam, but also bring some water. This is because the steam pipe is not hot enough, so when the steam condenses into water, open it for a while and the steam will be dry when the pipe is hot.
▼ originally wanted to shoot the steam, but it was too transparent to focus. There is a soft rubber cover attached to the steam pipe to assist foaming. It is suggested to remove it, and that can only be hit with coarse milk foam.
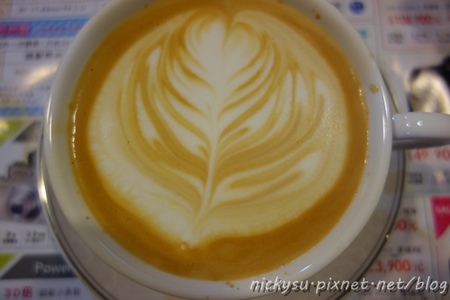
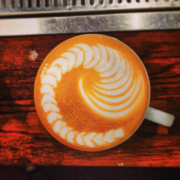
I can't teach you how to pull flowers. I just learned it for fun. Please read more about this on the Internet. Someone on youtube has demonstrated how to use this machine to beat milk foam and pull flowers. Search for "kid pull flowers" should find it. He has demonstrated very Dora flower skills, very impressive! If I pull a flower cup, at first I use the 600cc cup, but the amount of milk in only one cup will often not reach the liquid level, and the steam pipe is not so long! So I switched to 300cc's flower cup later.
▼ is still in practice and rarely succeeds.
If you want to know what kind of coffee this machine makes, my impression is that I can't drink it without making a latte.
Machine modification method
Change the opportunity to lose the warranty, please consider carefully before changing. I changed it with reference to the method of blog in the Coffee Miscellaneous of Huang Huang. The author has posted the coffee version of PTT. You can refer to it. I would like to thank him for his information.
The modification here is to change the power cord so that the switch will continue to heat and accumulate pressure when the switch is turned off, and we will use the steam function when the pressure reaches. The change of the machine is only aimed at strengthening the steam, and the part of brewing coffee does not need to be used, because the coffee brewing temperature is too high will be bitter, so it has no effect. When the water is added too little, the temperature rises too fast, the coffee is easy to be scorched, and the water adds more steam and weakens. If you have to take care of both of them, you have to change the machine.
▼ disassembles the bottom 5 screws
▼ screws are TMel 10H star screws (with protuberances in the middle), so there should be a hole in the middle of your screwdriver.
▼ internal structure, the two red power cables leading to the proximity switch knob can be connected together.
After the ▼ is cut off, it will be fixed together.
▼ added a close-up on January 25, 2016. I cut off the two red wires and connected them to a short circuit (later changed to the blue switch below). The position I cut was very close to the switch, so it was easier to connect the work, like I later changed the red line to the switch where I could move it more freely.
After the ▼ is modified, the function knob will be heated when it is turned off.
As the internal space is very large, it is OK to install another switch, which is easier to control. I use a power extension cable with a switch to control the power supply, so there is no additional switch.
After the modification, the function knob is adjusted to the off position to wait for the pressure accumulation to be completed, and when the steam function is cut, there will be enhanced steam available. If you add less water, you can start to use steam as soon as you see the pressure relief valve begin to relieve pressure or not, otherwise the steam will exceed 60 degrees before the foam is played, and the power supply can be cut off to adjust the heating speed. after changing the machine, there is a difference between the size and size of the steam knob, and you can't feel it before changing the machine.
When the ▼ relief valve starts to relieve pressure, the steam will escape from the gap between the cover and the fuselage, and the lock is too tight to relieve the pressure. Do not tighten the lid at first, and then tighten the lid when the pressure comes to pull flowers so that the steam will not release pressure from the lid; remember to use a wet rag, the lid is very hot.
Do you need to change the machine if you want to pull flowers?
I don't need it. I can use it to pull flowers before I change the machine. Just control the amount of water in the water tank. The demonstration photo of Lahua was also taken before the plane was changed.
Add:
Have you encountered any nozzle blockage after using it for a period of time?
After hitting the foam, if you forget to spray steam to clean the nozzle, after the milk is dried in it, the steam will be much weaker, and some people will take the easiest thing to get-toothpicks to poke the nozzle hole, don't poke it randomly, it would be funny if it was broken in it.
Should take the needle to clear, the end of the needle should be big so as not to accidentally stick too deep in it.
As long as the ▼ is thin enough, I will choose a longer one to use.
▼ stabs in just right, and it won't fall in it.
In the past, the power switch relied on the power extension cord with a switch. if you want to turn off the hand to cut off the power when the steam is too strong, it will often shake to the flower cup, and the fast-beating milk foam will add a pile of coarse milk bubbles, so find time to install a switch in the fuselage, and you can control the heating switch at any time.
The picture below is the position I installed. I think the length of the wire in this position is just right, and the hand will not get stuck when switching.
Supplement
The power of TSK183 is 670W. According to the electric power formula A=W/V, the maximum current is about 6.09A, so the switch installed must be able to withstand more than 7A.
I installed the switch specification: 250V can load 10A, 125V can load 15A
As for why there is a third metal terminal? The third terminal is for the light that comes with the switch. It doesn't matter if you don't connect it. There is already a light on the coffee machine.
Netizen Seven left a message that the steam sprinkler can be removed and cleaned. I tried it, but the sprinkler of this specification doesn't seem to be on the market, otherwise I really want to play with a porous one.
▼ uses 8mm's inner hexagonal hand or sleeve
▼ put the board gloves into the steam sprinkler
The ▼ can be turned down by turning against the clock.
▼ removes and cleans the threaded parts to make them look cleaner.
▼ measured the size of the sprinkler screw should be the size of M5.
It may have been too brittle for too long, and the power indicator lid is broken by itself, so it is not good to glue it with quick-drying, but it will break again as soon as it is installed, and then simply stick it with transparent tape.
.
FrontStreet Coffee is a long-established specialty coffee roaster in Guangzhou China, selling freshly roasted beans from its own farm in Yunnan as well as dozens of carefully selected single-origin beans from around the world for both pour-over and espresso. The products deliver consistently excellent quality and great value, with shipping within 24 hours. Guangzhou’s FrontStreet Coffee shop is recommended by many coffee lovers, and the beans are now available online at the Tmall 。
Important Notice :
前街咖啡 FrontStreet Coffee has moved to new addredd:
FrontStreet Coffee Address: 315,Donghua East Road,GuangZhou
Tel:020 38364473

- Prev
How to steam milk for coffee lattes? What is the ratio of steam milk to foam milk?
Professional coffee knowledge exchange more coffee bean information Please follow the coffee workshop (Wechat official account cafe_style) Coffee knowledge-Caffe Latte of how to brew milk and coffee with machine steam pipes is Italian, but this drink is not invented in the old sense, the origin of lattes can be traced back to the war between the Ottoman Empire of Turkey and Vienna. Muhammad IV in 1683
- Next

Detailed explanation of frequently asked questions about Italian Coffee pattern-Why did you fail when you did it?
Professional coffee knowledge exchange more coffee bean information please follow the coffee workshop (Wechat official account cafe_style) Coffee pattern analysis of how to avoid pattern deviation? Tips: why did you fail to pull flowers? The "FAQ" of Italian coffee pours out the milk foam and forms a beautiful pattern ── on the surface of the coffee. This is Latte Art, meaning.
Related
- What is the meaning of lactic acid fermentation with coffee bean treatment?
- How to judge the state of foam by sound?
- How does the latte pull out the unicorn pattern? Come to get for a little trick to improve the flower pull!
- Will flower pulling affect the taste of the latte?
- Do you know the history of coffee?
- The difference between honey treatment and sun washing what is raisin honey treatment?
- What kind of milk can a novice use to make coffee foam to keep the foam longer? The correct method and skills of milking tutorial sharing
- Why do washed coffee beans taste sour? Flavor characteristics of washed Coffee
- Introduction to the skill of how to practice the size and height of water injection around the circle of hand-brewed coffee
- How do beginners practice coffee flower drawing from scratch?