Latte embossed pattern picture how to learn how to practice embossed milk foam to pass away tutorial video
Brushing the coffee flower video, watching the barista shaking the milk jar, the beautiful embossed lines came out. And when it's time to shake yourself, "er, is the video a lie?"
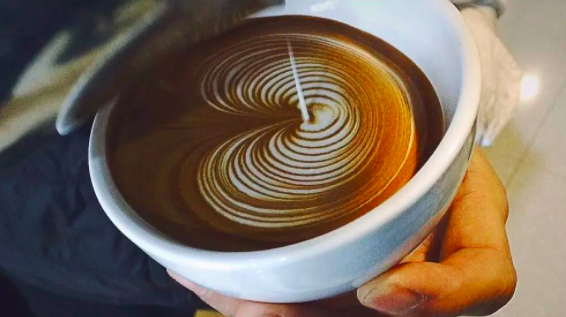
In fact, embossing can not be embossed in large part because of the problem of milk bubbles, embossed pull flowers for the thickness and density of milk bubbles are very high. If you just pull a "big heart", then you just need to make sure that the foam is dense, and the thickness of the foam is relatively large, as long as it has a certain degree of mobility. But for embossing to pull out fine lines, the thickness of the bubbles needs to be thin enough. As long as the milk foam is thin enough, the fluidity will be large and the good-looking lines can be pressed.
When passing the foam, Qianjie shares a stable method for everyone. Whether you like to spend it clockwise or counterclockwise, find the fulcrum between the milk tank and the steam stick and fix it. It will save you a lot of effort to maintain the position of the milk tank. It also makes the whole process more stable.
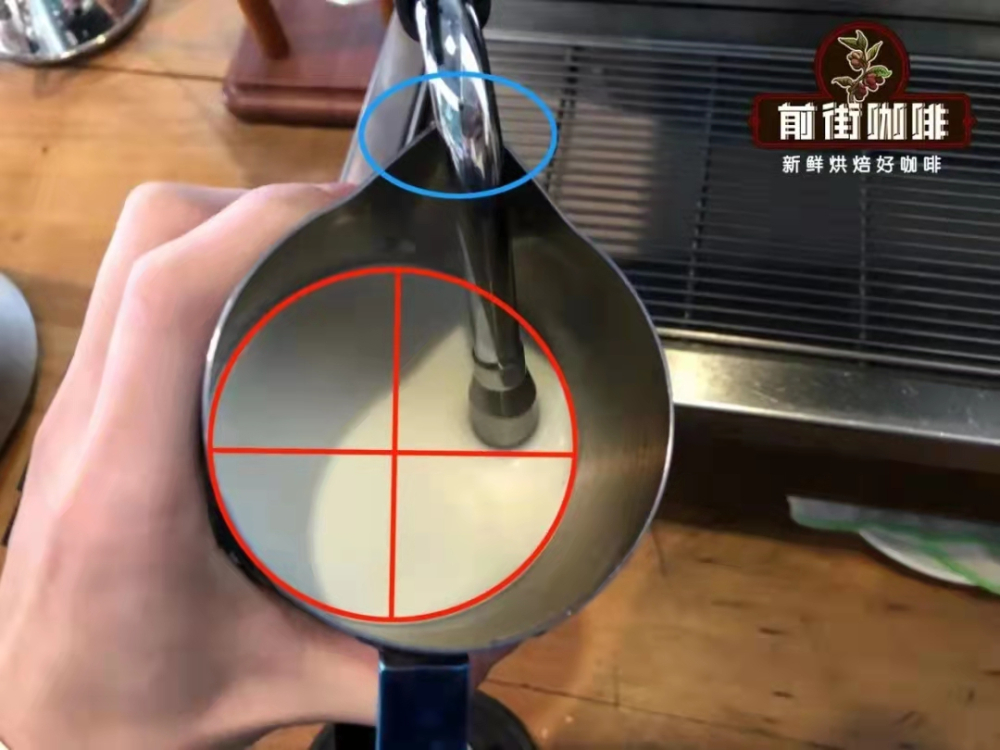
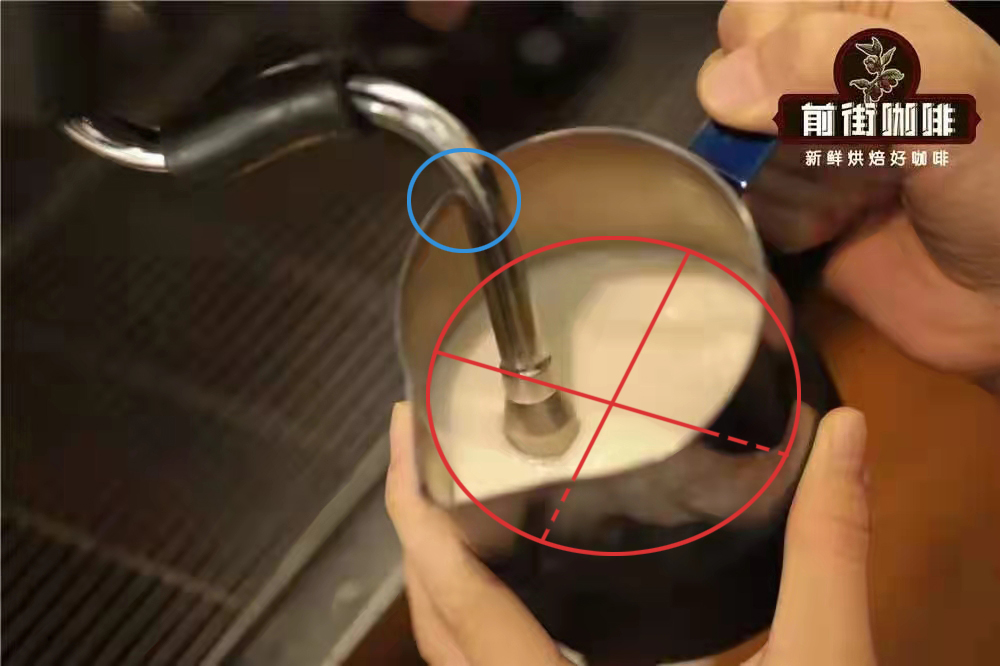
The blue box is the fulcrum; the red box is the steam hole position auxiliary line. The amount of hair shot depends on the amount of air injected. At present, the intake holes of the steam bars of the more mainstream coffee machines are 3 or 4 holes, and those of some household grade coffee machines are 1 or 2 holes. Generally speaking, killing time with more holes will be shorter, whirlpool will be stronger, operation will be easier, and fewer holes will be more difficult, because long killing time will lead to more physical strength and more accurate angle. In general, in the firing stage, the steam rod will be semi-buried, with four holes as an example, usually three holes in the milk and one hole above the liquid surface. Then there is the control of steam volume, which is discussed because of the boiler of the machine. some machines have enough steam channels, and some machines are obviously insufficient even if they are turned on to the maximum. A large amount of steam will heat up the milk quickly, creating a strong whirlpool, and vice versa.
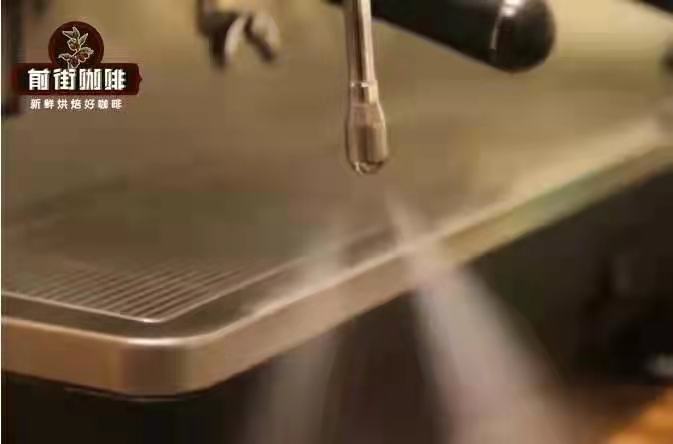
The recommended steam volume control method in Qianjie is to prepare the angle first, then slowly turn on the steam switch and turn it on bit by bit until the milk in the milk tank forms a whirlpool, and then fix that steam volume, of course, if you feel that the steam volume is insufficient or too strong, you also need to adjust it properly. If your steam bar has a strong steam volume, it is very easy to send out thin, dense, liquid foam. Half-buried steam head, set the angle, turn on the steam switch, wait for the milk to produce a whirlpool, hear a "squeak" sound (squeaking indicates that the longer the sound lasts, the thicker the foam is). Then move the vat up slightly to enter the beating stage. At this stage, the four steam holes are directly buried in the milk bubble layer, there is no "squeak" sound, the surface still maintains a whirlpool. The main function is to make the milk foam slippery, the secondary function is to heat to 55-65 degrees;
, the length is 00:11.
For machines with less strong steam, Qianjie's advice is to send and slug at the same time, first put the steam hole in the position where it is just buried in the milk, also set the angle to create the whirlpool, and then turn on the steam switch until there is a whirlpool, and then move the vat down little by little, "squeak", then "squeak", and then until it reaches the right thickness. After getting rid of the milk foam, the more common problems are as follows: 1, the fusion is too much. The more fusion, the worse the fluidity of the liquid surface and the worse the embossing. If it is normal, you can do convection embossing if it is fused to 4 cents of the cup volume.
2. The milk foam is too thin. Too thin milk foam is not everyone can hold live, the most likely to occur is the "milk sink" phenomenon, there are not enough milk bubbles floating in the performance, resulting in cross-flow to flush the liquid oil out of the hole. 3. The embossing is too close to the liquid surface. Some friends have a habit of sticking the cylinder mouth on the edge of the ceramic cup when drawing. If it is embossed like this, the grain will be very thick. So the correct way should be to slightly raise the cylinder nozzle 1 cm, at least do not stick on the ceramic cup.

4. There are more lines on one side and less on the other. One possibility is that the extent of your swinging around the milk jar is inconsistent, and the other may be that the "tank butt" is put askew because of the gesture, so that the direction of the embossing will be deflected, resulting in a cup that is bigger and smaller on one side. It's best to find a friend to watch your movements, and you might be able to point out where the real problem lies.
Important Notice :
前街咖啡 FrontStreet Coffee has moved to new addredd:
FrontStreet Coffee Address: 315,Donghua East Road,GuangZhou
Tel:020 38364473
- Prev

Difference in taste characteristics between cappuccino and latte cappuccino with authentic golden circle
Yesterday, in the communication with friends, the daily chat was crooked. After the usual hissing and asking about warmth, the word "cappuccino" was inserted, and then the building was crooked. If it comes down to personal privacy, I won't let it go, but this has given rise to the idea that Qianjie wants to talk about this topic. What is an authentic cappuccino? Who would?
- Next

How long does it take to make a cup of coffee? How long does it take to make coffee?
It is not difficult to brew a cup of coffee by hand. What is difficult is to understand the brewing data. Among them, the more frequently asked questions are "how fine the coffee powder is ground","how to brew it well","is this time right for me to brew it"... In view of the grinding degree and brewing method, Qianjie has been popularized a lot (you can find it in Qianjie Public).
Related
- Beginners will see the "Coffee pull flower" guide!
- What is the difference between ice blog purified milk and ordinary milk coffee?
- Why is the Philippines the largest producer of crops in Liberia?
- For coffee extraction, should the fine powder be retained?
- How does extracted espresso fill pressed powder? How much strength does it take to press the powder?
- How to make jasmine cold extract coffee? Is the jasmine + latte good?
- Will this little toy really make the coffee taste better? How does Lily Drip affect coffee extraction?
- Will the action of slapping the filter cup also affect coffee extraction?
- What's the difference between powder-to-water ratio and powder-to-liquid ratio?
- What is the Ethiopian local species? What does it have to do with Heirloom native species?

