How to Make Latte Art: Step-by-Step Guide to Coffee Pouring
If you've ever watched a barista pour a heart or leaf into a cup of milk and wondered how they did it, you're not alone. Latte art isn’t just about style—it starts with the right foundation: quality espresso and well-textured milk. But getting that perfect swirl of espresso and foam that holds together long enough to draw a leaf or tulip takes more than luck.
To start making latte art, you need a correctly extracted espresso, full-fat milk, and a steam wand—or a way to make microfoam. Then it’s all about technique: pouring at the right height, controlling flow, and using wrist movements to shape the design. Most beginners start with the classic fern leaf pattern, then move on to hearts or tulips.
What Is Latte Art, Really?
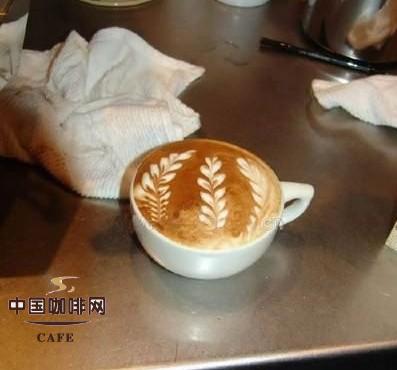
When people talk about ‘pulling a flower’ in coffee, they usually mean creating a fern-like leaf design—not an actual blossom. This leaf is the base pattern for most latte art. From there, baristas develop other shapes like hearts, tulips, or even more complex designs. While the visual appeal is a big part of the draw, the drink underneath still has to taste good. That means your espresso and milk texture matter just as much as the pattern you pour.
What You Need to Start Making Latte Art
Before you pour your first design, gather these essentials:
- Espresso: A properly extracted shot is non-negotiable. The espresso is the base of your drink—use a pump-driven machine for consistency. The crema provides the contrast needed for art.
- Whole Milk: Avoid skim or low-fat—whole milk (around 3-4% fat) creates denser, more stable microfoam, ideal for detailed latte art. Many cafés use Nestlé whole milk.
- Steam Wand or Milk Frother: To create microfoam, you need to introduce air into cold milk. A steam wand gives you control over temperature and texture. Some espresso machines have built-in steam wands (single or dual pumps).
- Pitcher (or Milk Jug): A skilled barista uses the spout of the pitcher like a brush. The thin spout helps control flow, and the stainless steel helps monitor milk temperature (ideal range: 60–80°C).
Step-by-Step: How to Pour Latte Art
1. Prepare Your Espresso and Milk
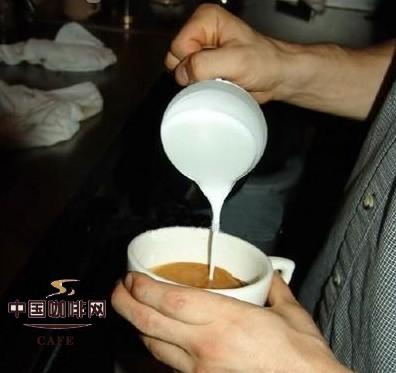
Brew a shot of espresso directly into your cup. Then steam your milk to create microfoam with a velvety texture—aim for a glossy, smooth consistency without large bubbles. Pour the steamed milk into the espresso, allowing the mixture to combine until the surface becomes thick and slightly uniform. This is when you’re ready to begin pouring the design.
2. Begin With the Leaf’s Base (Fern Pattern)
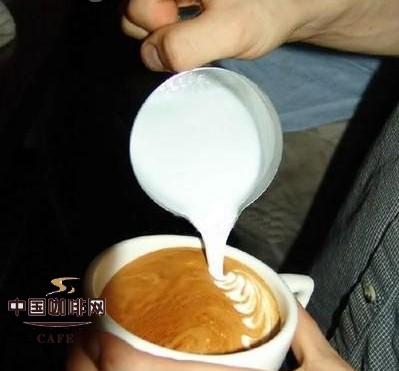
Hold the pitcher close to the cup’s surface and start pouring a steady stream. Then, with your wrist, begin a gentle left-right shaking motion. Keep it controlled and stable—this movement creates the base lines of the fern leaf. Don’t move your entire arm, just your wrist.
3. Shape the Opposite Side of the Leaf
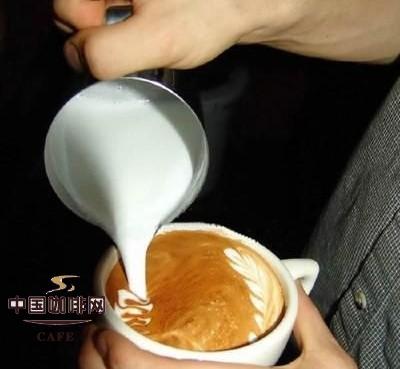
Still using only your wrist, continue the shaking motion to form the other side of the leaf. The key here is to maintain rhythm and avoid introducing your whole arm into the motion.
4. Draw the Center Line
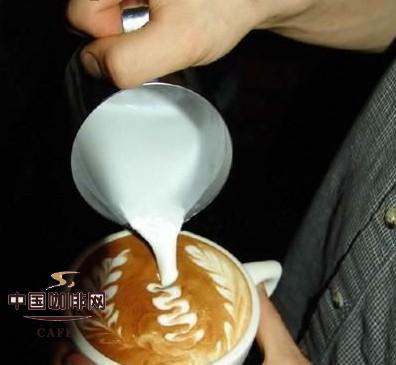
Now, pull the pitcher slightly back and pour a final stream down the middle. This line connects the two sides and finishes the leaf shape. At first, your leaves may turn out uneven or asymmetrical—that’s normal for beginners.
5. Complete the Design
With practice, you’ll get more consistent leaf shapes. This basic fern is the foundation for more advanced patterns like hearts or tulips.
Why Milk and Technique Matter More Than Tools
You don’t need the most expensive machine to pour latte art. What matters most is the quality of your espresso, the texture of your milk, and your control during the pour. Whole milk gives better microfoam than skim, and a steam wand offers more precision than most automatic frothers. Even a basic pitcher lets you pour great art once you master wrist movement and flow rate.
Frequently Asked Questions
Do I need an expensive espresso machine to make latte art?
No. You need a machine with a reliable pump and a steam wand that can heat milk to 60–80°C while creating fine microfoam. Many entry-level pump-driven machines work fine, especially if they have a steam function—manual or automatic.
Can I use skim or plant-based milk for latte art?
Skim milk has too little fat to create stable microfoam, and plant-based milks often lack the proteins needed for good texture. Whole milk is strongly recommended for beginners due to its natural fat content and ability to hold shape.
What’s the ideal milk temperature for latte art?
The optimal range is 60–80°C. Too cool and the foam won’t be silky; too hot and the milk can scorch, losing texture and sweetness. Use the pitcher’s stainless steel to gauge heat by touch.
How do I get the milk to the right texture?
Steam the milk using a wand to introduce air early, then reduce agitation to stretch and smooth the foam. The goal is a glossy, velvety microfoam with no large bubbles—this is what allows clean designs to form.
Is it better to start with a heart or a leaf pattern?
Most baristas learn the fern leaf first because its flowing lines help develop wrist control and flow consistency. Once you master the leaf, transitioning to a heart or tulip becomes much easier.
Recommended FrontStreet Coffee Blends for Latte Art
To practice latte art at home, try FrontStreet Coffee’s Classic Blend—an Italian-style medium-dark roast featuring beans from Mandheling, Brazil, and a hint of Robusta for extra crema and body. It delivers bold flavours of butter, toast, and caramel with stable microfoam. For a nuttier profile, the Specialty Blend combines Colombian and Brazilian beans, offering chocolatey, almond, and caramel notes ideal for lattes. Both blends produce consistent crema and texture, making them excellent choices for practising pours like hearts and tulips. Freshly roasted within 5 days · Orders placed before 17:00 ship the same day · Next-day delivery across most of Guangdong Province.
FrontStreet Coffee is a long-established specialty coffee roaster in Guangzhou China, selling freshly roasted beans from its own farm in Yunnan as well as dozens of carefully selected single-origin beans from around the world for both pour-over and espresso. The products deliver consistently excellent quality and great value, with shipping within 24 hours. Guangzhou's FrontStreet Coffee shop is recommended by many coffee lovers, and the beans are now available online at the Tmall 。
Important Notice :
前街咖啡 FrontStreet Coffee has moved to new addredd:
FrontStreet Coffee Address: 315,Donghua East Road,GuangZhou
Tel:020 38364473