Common problems and treatment methods of coffee flower pulling technology

1. Can the milk from the manual milker be used to pull flowers?
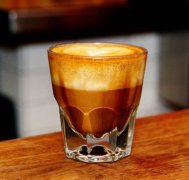
The answer is yes. Let's start with a simple deconstruction of espresso, which has two basic characteristics, namely, a layer of coffee-like foam on top and a black coffee liquid on the bottom. This coffee can be used to make coffee. Then we only need to inject about 30ml of black coffee into the coffee cup, and then use the milk bubbles that come out, pour in a little bit first, and then stir it with a spoon, and the white milk bubbles on the surface will become "coffee-colored bubbles", and it will float on the black coffee. Next, we can use milk foam to pull flowers, I tried N times, ah, the effect is good. However, with such a liquid production of flower coffee, coffee flavor is too weak, pull a strong sense of hierarchy flowers have limitations, so can only try, do not advocate promotion. Of course, it was good to practice this method from time to time.
2. Why doesn't the foam melt?
Milk foam poured into the concentrate immediately and coffee and together, can not be like the master pull flower video milk foam will float above? Not enough foam, not enough mix with milk, I sometimes do the same.
3. How to mix milk well?
That is milk and milk foam, how can we mix it well, pull flowers, a pour down not all white? Temperature... Temperature is important. When you are frothing, put your empty hand on the pull cup to feel the temperature of the milk. When you feel that your hand is too hot to continue to put on the pull jar, it is almost good. If you continue to beat, it will make the milk foam hard. The hard foam looks stiff, and when you pour it into your coffee it doesn't mix with the coffee, but rather accumulates on top of your coffee like fluffy whipped cream. If beaten a little longer, it would be stratified, 90% runny milk, and a thick hard foam lid floating on top. When you pour it into your coffee, the milk comes out of the cup first... So to mix milk and milk foam well ~ temperature is the key. After the milk foam is beaten, the time cannot be put too long, otherwise it will be layered.
4. How can I make more and more fine milk foam?
About how to make a good milk foam, here to provide a fool milk foam method, is to pour half of the milk into the steel cup, so that the steam pipe and milk perpendicular to the center or steel cup edge, and then let the steam head just contact the milk surface, and then open the steam to 1/2, do not move the steel cup, when the milk reaches 50 degrees slowly closed, at 60 degrees just closed, the final temperature will reach 66 degrees, so you can make a cup of good milk foam.
5. What type of Italian machine should be used for foaming milk?
general machines have steam heads with three, four, and five holes, and as long as they are familiar with them a little, they can make good milk bubbles. however, the amount of steam produced by the machine, the humidity of the steam produced, and the size of the pores still have an impact on the milking.
6. Why practice frothing with water?
One is that water is transparent, which allows you to see more clearly how vortices form.
The second is to be able to better grasp the number of holes is not a milk bubble play! Third, beginners should remember that when you fail to make the milk foam thin, you should use a thermometer. If the temperature cannot be better mastered, then the coffee you make is unstable. You may have one or two milk bubbles in ten times, but that is not stable quality.
7. The difference between steam whipping and manual whipping
First of all, hand-made milk foam is nothing compared to machine steam. The fineness of steam makes the milk foam very delicate and smooth. The radiation surface of steam is wide, and the milk foam will be more uniform and mixed well. The hand is mainly squeezed through the small holes of the filter screen, and the milk foam is thicker.
8. How to make milk foam with electric milk beater bought at home?
Even their own way to play with the soil foam, feel good. The appliance was an electric milk-whipping machine bought from IKEA, 9.9RMB. Steps: Add 1/3 cup of fresh milk to the glass, microwave oven on high heat for 45 seconds, milk mixer stirring for 1 minute, milk foam will become. I use a French press, filter out 50ml coffee, pour directly from the top center of the milk foam, you can see the coffee gradually mixed with the milk, white milk bubbles slowly rise.
9. How to make foam?
Method 1: Make handmade milk foam from milk foam pot
1. Pour milk into the frother pot, not more than 1/2 of the amount of milk frother pot, otherwise the milk will overflow because of expansion when making foam.
2. Heat the milk to about 60 degrees, but not more than 70 degrees, otherwise the protein structure in the milk will be destroyed. Attention! Cover and strainer should not be heated directly. (If making ice milk foam, cool the milk to below 5 degrees, of course, do not over-ice and let the milk freeze.)
3. Put the lid and filter cover on, quickly pump the filter to press the air into the milk, do not need to press the bottom when pumping, because it is to pump the air into the milk, so as long as the milk surface action can be; the number of times does not need too much, gently pumping about thirty times can be.
4. Remove the lid and strainer and scrape off the thick foam with a spoon, leaving behind a dense, hot (ice) foam.
Method 2: Use steam to foam milk
Do not put the steam pipe into the milk first, because there may be some condensed water in the steam pipe, so let go of some of the steam in the front section first, and discharge excess water by the way.
Insert the thermometer into the container, then insert the steam tube obliquely into the milk and turn on the steam switch.
Slowly position the steam nozzle a little above the surface of the milk, but never above the liquid level, or the milk will splash everywhere. A smooth hissing sound is heard when the position is correct, otherwise it is loud or almost silent.
When the milk foam is sufficient, you can bury the steam pipe a little deeper and let the steam continue to warm the milk. The steam pipe should be buried at an angle that allows the milk to rotate.
The vapor switch can be turned off when the diffusion reaches between 60 and 70 degrees.
Wipe the milk attached to the steam pipe with a wet cloth and release a steam at the same time to avoid difficulty in cleaning the milk after drying.
FrontStreet Coffee is a long-established specialty coffee roaster in Guangzhou China, selling freshly roasted beans from its own farm in Yunnan as well as dozens of carefully selected single-origin beans from around the world for both pour-over and espresso. The products deliver consistently excellent quality and great value, with shipping within 24 hours. Guangzhou’s FrontStreet Coffee shop is recommended by many coffee lovers, and the beans are now available online at the Tmall 。
Important Notice :
前街咖啡 FrontStreet Coffee has moved to new addredd:
FrontStreet Coffee Address: 315,Donghua East Road,GuangZhou
Tel:020 38364473

- Prev
The related skills of making milk foam in the technique of coffee flower drawing.
In the treatment of milk foam, the key step is not the ideal milk foam, but in a layered state, the lower layer is heated milk, and the upper layer is froth after discarding, so we have to deal with the milk after discarding. Shake up and down to remove the coarse foam from the surface; shake so that the hot milk is fully mixed with the upper foam to form foam. This step can also be done through two
- Next

Netizens' experience of milking in the technology of coffee flower drawing.
1. An easy-to-use method for beginners to fill about half a cup of cold meal milk; spray off the remaining water in the steam pipe; insert the milk at an angle of 30-40 degrees, and insert it at the center 1 to the left (or to the right); turn on the steam, first rotate the milk fully, slowly move the cups down, do not let the steam nozzle away from the milk too much (easy to produce coarse bubbles); when you feel warm (or think that milk bubbles)
Related
- What is the meaning of lactic acid fermentation with coffee bean treatment?
- How to judge the state of foam by sound?
- How does the latte pull out the unicorn pattern? Come to get for a little trick to improve the flower pull!
- Will flower pulling affect the taste of the latte?
- Do you know the history of coffee?
- The difference between honey treatment and sun washing what is raisin honey treatment?
- What kind of milk can a novice use to make coffee foam to keep the foam longer? The correct method and skills of milking tutorial sharing
- Why do washed coffee beans taste sour? Flavor characteristics of washed Coffee
- Introduction to the skill of how to practice the size and height of water injection around the circle of hand-brewed coffee
- How do beginners practice coffee flower drawing from scratch?