How to Roast Coffee Beans at Home: Tools and Techniques
If you’ve ever bought green coffee beans and wondered how they transform into the aromatic cups you love, you’re not alone. More coffee enthusiasts are skipping pre-roasted beans and taking control of the roast themselves. But to get from raw to roasted, you’ll need the right gear and a clear sense of what’s happening in the roast. Here’s how to do it right—from tools to timing.
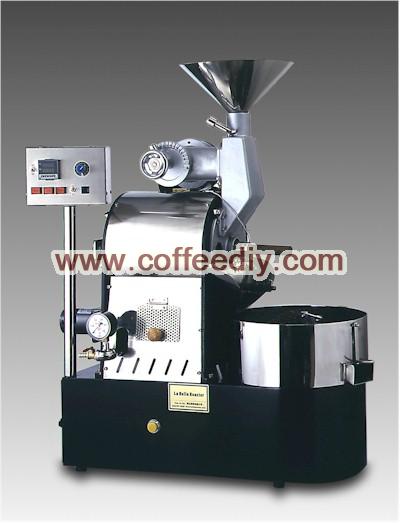
To roast coffee beans at home, you can choose between three common setups: a hand pan (like a mesh ladle with a lid), a small electric coffee roaster, or a professional-grade roasting machine. Hand pans are simplest for beginners, electric roasters offer ease without deep technique, while pro machines provide precise control over every roast stage. Each tool lets you guide the coffee through key roast milestones: drying, first crack, and—if you go further—second crack.
The Tools You Need to Roast Coffee Beans
Coffee roasting at home falls into three main equipment categories. The first is the hand pan—essentially a kitchen skimmer or sieve with an added cover, used directly over a gas flame. It’s inexpensive and great for learning, though roast consistency can vary. The second is small electric coffee roasters, which are user-friendly and require minimal skill. Finally, there are large-scale professional roasting machines, typically used in commercial settings, which offer fine-tuned control over temperature and roast progression across light, medium, and dark profiles.

What Happens During Coffee Roasting?
Every coffee roast unfolds in three key phases: dehydration, first crack, and second crack. These stages mark major physical and chemical changes inside the bean. You can stop the roast at any point depending on the flavor profile you want. Understanding these stages helps you guide the roast to your taste—whether that’s a bright, light cup or a bold espresso.
Dehydration Stage
This is when moisture inside the green coffee beans evaporates. Once most of the water is gone, internal pressure builds and the beans make their first audible popping sound—that’s the first crack. This signals major transformation ahead.
First Crack
During first crack, the starches in the beans begin to caramelize due to high heat. This is where coffee gets much of its characteristic sweetness and caramel-like, ‘coffee’ flavor. Most light to medium-dark roasts are stopped somewhere within or just after this phase. The roast degree here heavily shapes the balance of acidity, sweetness, and aroma in the cup.
Second Crack
Shortly after first crack, some beans will begin a second, more rapid series of cracks. If you stop roasting during the very start of second crack (within the first few seconds), you’ll preserve more sweetness and acidity while still developing body—ideal for espresso. But if you continue well into second crack, acids vanish, sugars carbonize further, and the coffee becomes darker, more bitter, and less nuanced. This level is often reserved for espresso blends or as a base for milk drinks.

How to Actually Roast Coffee Beans at Home
Home roasting follows a few consistent steps. Whether you're using a hand pan, electric roaster, or something else, the core process is guiding the beans through heat-driven changes. Here’s how it works, no matter the tool.
1. Start Roasting
Place your green coffee beans in your chosen roaster. For a hand pan, this means spreading a small batch evenly on the mesh surface. Heat will begin to drive off moisture immediately.
2. Observe the Dehydration Phase
The beans will turn yellow and start releasing steam as internal water evaporates. This phase lasts several minutes and prepares the bean for chemical reactions to come.
3. Listen for First Crack
As heat continues, you’ll hear the first crack—a light, rice-crisping sound. This marks the start of significant flavor development. Many roasters aiming for light to medium roast profiles stop here or shortly afterward.
4. Decide on Roast Level
After first crack, you can stop the roast for a brighter, more acidic cup. Or let it progress. If you allow the beans to enter second crack (indicated by a faster, sharper cracking), you’ll develop more body and boldness—but risk losing sweetness and complexity. Most espresso roasts are pulled just into the beginning of second crack. Continue further only if you're aiming for a very dark, French-style roast.
5. Cool the Beans Immediately
Once your target roast level is reached, cool the beans as fast as possible. This halts the roasting process and prevents over-roasting or ‘baking’ from residual heat. Spread them on a tray or use a cooling tray if available.
6. Rest Before Brewing
Let the roasted beans rest for about 24 hours before brewing. Freshly roasted beans need this time to degas and settle, after which their full flavor potential emerges.
Frequently Asked Questions
What’s the easiest way to roast coffee beans at home?
The easiest method for beginners is using a small electric coffee roaster, which requires little setup or technique. Alternatively, a hand pan (a mesh ladle with a lid) over a gas flame works, though it demands more attention and offers less consistency. Both are far simpler than a commercial roasting machine.
Do I need expensive equipment to roast coffee at home?
No. You can start with a basic hand pan or affordable small electric roaster. Professional machines are costly and usually found in commercial settings. For home use, simple tools are sufficient to achieve quality results.
What are first and second crack in coffee roasting?
First crack is the initial popping sound beans make as internal moisture turns to steam and pressure releases—this marks the start of flavor development. Second crack occurs later, sounding sharper and faster, and signals deeper roasting where sugars begin to carbonize, acidity drops, and bitterness increases.
How long should I roast coffee beans?
There’s no fixed time—it depends on the roast level you want. A light roast might finish just after first crack (around 8–11 minutes total), while a dark roast could continue well into or past second crack (12–15+ minutes). Roast time varies based on bean mass, heat input, and equipment.
Should I cool roasted coffee beans right away?
Yes. You should cool roasted beans immediately after reaching your desired roast level to stop further cooking. Use a tray, colander, or dedicated cooling tool to bring the temperature down quickly and avoid unwanted over-roasting.
How long should coffee beans rest after roasting?
Let roasted beans rest for at least 24 hours before brewing. This allows CO₂ built up during roasting to dissipate and lets flavors stabilize, resulting in a better extraction and more balanced cup.
Recommended FrontStreet Beans for Home Roasting
Try roasting FrontStreet’s Yirgacheffe or Ethiopia Huakui—both green beans showcase vibrant acidity and floral notes that respond beautifully to light to medium roast profiles. For something more structured, their PWN Golden Mandheling offers classic Indonesian body and spice, ideal for experimenting with medium-dark roasts. All three are excellent choices for learning how roast levels shape flavor. Freshly roasted within 5 days · Orders placed before 17:00 ship the same day · Next-day delivery across most of Guangdong Province.
FrontStreet Coffee is a long-established specialty coffee roaster in Guangzhou China, selling freshly roasted beans from its own farm in Yunnan as well as dozens of carefully selected single-origin beans from around the world for both pour-over and espresso. The products deliver consistently excellent quality and great value, with shipping within 24 hours. Guangzhou's FrontStreet Coffee shop is recommended by many coffee lovers, and the beans are now available online at the Tmall 。
Important Notice :
前街咖啡 FrontStreet Coffee has moved to new addredd:
FrontStreet Coffee Address: 315,Donghua East Road,GuangZhou
Tel:020 38364473