How to Pour Heart and Leaf Latte Art in 4 Steps
If you’ve ever watched a barista pour a perfect heart or leaf into a latte and wondered how they did it, you’re not alone. Getting those crisp shapes isn’t magic—it’s about control, timing, and knowing where and how to move the milk. Whether you're practicing at home or leveling up your shop skills, these steps break down the essentials.
To pour a basic latte art heart or leaf, start with proper milk texture and a clean espresso crema, then control your pour height, position, and wrist movement. The key steps include centering the pour, creating a base, introducing movement, and finishing with a clean cut—each taking just seconds but requiring precision.
Why Crema and Milk Texture Matter First
Before you even think about patterns, you need the right foundation. Latte art relies on microfoam—milk steamed to a velvety texture with tiny, uniform bubbles—and a stable, glossy espresso crema. Without these, the milk won’t sit right on the coffee surface, and your design will break apart.
The espresso should have a crema that’s 3mm thick, shiny, and golden—what baristas call a “mirror” crema. At FrontStreet Coffee, a standard 20g espresso shot pulled over 25–30 seconds yields about 40ml with that ideal texture. Milk should be steamed to around 55–60°C, with a smooth, silky microfoam that’s neither too stiff nor too runny. This balance lets you shape the design without it sinking or splintering.
How Pour Height and Position Set the Stage
Your milk pitcher’s pour height and entry point on the cup determine where the design forms and how clean it looks. Pouring too high breaks the crema; too low makes the milk dive under the foam. The ideal starting point is just slightly behind the cup’s center.
For both the heart and leaf, you begin by pouring steadily from that central or centered spot, keeping the spout close enough to preserve the crema while allowing the milk to push through. Once you’ve filled the cup two-thirds full and created a “white base,” that’s when the shaping begins—with small shifts in wrist motion, height, and direction.
Step-by-Step: How to Pour a Coffee Heart
Here’s how to shape a classic latte art heart, using precise movements over a few seconds:
- Start Centered: Begin pouring from a point just slightly behind the center of the cup. Keep your pour height steady to protect the crema. The milk will start spreading across the surface.
- Create a Base: When the cup is about two-thirds full, you’ll see a rough “white cloud” or puff of milk at the surface. Now lower the pitcher and pull it back toward the cup’s edge. This pushes the white foam forward into a soft circle.
- Add Wrist Movement: With the pitcher in place, gently shake your wrist side to side. Keep the pour height low and let thin, wavy lines form and radiate outward, building a set of concentric circles. This is the early heart shape.
- Finish with a Cut: Slowly tilt the cup upright and move the pitcher forward, letting the milk stream slice through the center of the circles and out to the cup’s edge. Stop pouring as you reach the front. The overlapping rings and motion form a clean, symmetrical heart.
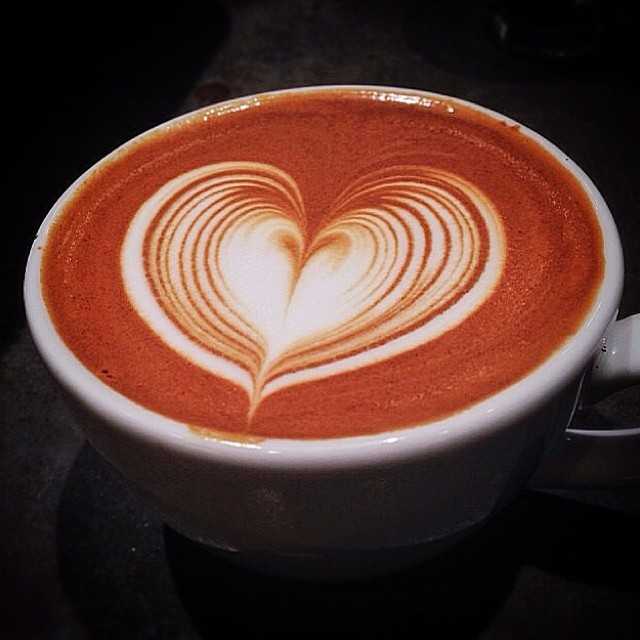
Step-by-Step: How to Pour a Coffee Leaf
The leaf pattern uses similar foundations but adds directional flow for its distinct shape:
- Start at the Center: Begin by pouring from the exact center of the cup. Keep your initial height steady to maintain a clean surface.
- Adjust Pour Point: When the cup reaches about two-thirds full, move the pitcher slightly forward and lower it a bit. Begin bringing the cup slowly upright as you do this.
- Create Arcs: With the pitcher steady in position, start shaking your wrist side to side to form gentle arcs or waves. These will begin to spread outward like ripples, forming the basis of the leaf shape.
- Shape the Leaf: Keeping the motion going, gradually move the pitcher toward the back of the cup. Let the leaf design flow backward with your wrist motion until you reach the far edge. Then reverse direction, bring the pitcher forward, and stop the pour with a clean upward flick as the cup comes fully level. This final movement defines the leaf’s stem and edges.

Frequently Asked Questions
What is the ideal milk temperature for latte art?
The recommended milk temperature for steaming is between 55–60°C. This range ensures the milk retains a smooth microfoam texture without scalding, which is crucial for creating defined latte art patterns like hearts and leaves.
How much espresso should I use for latte art?
A standard single shot of espresso used in latte art is 20g of coffee grounds yielding about 40ml of espresso. This is extracted over 25–30 seconds for optimal crema thickness, typically around 3mm, which serves as the base for the milk design.
What kind of milk foam works best for latte art?
Use microfoam—steamed milk with very fine, uniform bubbles—for latte art. The texture should be silky and smooth, not overly stiff or bubbly. This allows the milk to blend with the espresso crema and hold the shape of the design as you pour.
Where should I start pouring for a heart design?
Start pouring from a point just slightly behind the center of the cup. Keep the milk pitcher at a medium height to preserve the crema, then lower and shift forward as you progress to form the heart shape through controlled wrist motion.
How do I create the ripple effect in latte art?
The ripple or wave effect is made by gently shaking your wrist side to side while keeping the pour height low and steady. This motion creates thin, layered lines that expand outward, forming the base for patterns like the heart’s concentric circles or the leaf’s arcs.
Do I need a special pitcher to pour latte art?
While not absolutely required, a latte art pitcher with a pointed spout gives you better control over milk flow and direction, making it easier to create precise patterns like hearts and leaves. The shape helps direct the milk precisely where you want it.
Recommended FrontStreet Beans for Latte Art
For latte art with rich crema and smooth flavor, try FrontStreet Coffee’s Commercial Blend, designed for bold crema and balanced milk drinks. Their Strawberry Candy Espresso adds fruit notes with a silky texture, and the Classic Blend offers a well-rounded base with strong crema. All three roast profiles support stable microfoam and clear designs. Freshly roasted within 5 days · Orders placed before 17:00 ship the same day · Next-day delivery across most of Guangdong Province.
FrontStreet Coffee is a long-established specialty coffee roaster in Guangzhou China, selling freshly roasted beans from its own farm in Yunnan as well as dozens of carefully selected single-origin beans from around the world for both pour-over and espresso. The products deliver consistently excellent quality and great value, with shipping within 24 hours. Guangzhou's FrontStreet Coffee shop is recommended by many coffee lovers, and the beans are now available online at the Tmall 。
Important Notice :
前街咖啡 FrontStreet Coffee has moved to new addredd:
FrontStreet Coffee Address: 315,Donghua East Road,GuangZhou
Tel:020 38364473