Latte Art Tutorial: From Basics to Pouring Techniques
If you’ve ever watched a barista pour a heart or rosetta into a latte and wondered how they did it, you’re not alone. Latte art isn’t just about looks—it reflects milk texture, espresso quality, and pouring skill. Whether you’re brewing at home or dreaming of cafe-level presentation, mastering the basics is the place to start.
To do latte art, you’ll need an espresso shot, properly steamed milk, and a few tools. There are two main techniques: free pouring (pouring milk to form designs directly) and etching (drawing with tools). Most beginners start with free pouring basic shapes like circles and hearts.
What Is Latte Art?
Latte art refers to designs made on the surface of espresso-based drinks, usually lattes or cappuccinos, by manipulating steamed milk. Though it began as a performance skill in European and American coffee shows, it’s now a standard feature in specialty coffee shops worldwide. Early latte art focused on visual complexity, but over time, emphasis expanded to include milk texture, espresso crema integration, and overall flavor balance—achieving a true union of color, aroma, and taste.
Essential Tools and Equipment
To pour latte art, you’ll need:
- Espresso and Machine: Use an espresso machine (or moka pot as backup). The shot provides the crema base for art.
- Grinder: Freshly ground coffee is essential. For espresso machines, invest in a quality burr grinder. Moka pot users can manage with a hand grinder.
- Milk and Frothing Tools: Steam milk with an espresso machine’s steam wand, a milk frothing pitcher, or a milk frother stick.
- Pitcher (Latte Art Pitcher): Choose a 0.3L, 0.35L, or 0.6L pitcher based on your machine’s steam power and portion size.
Common tool setups include:
- Electric Grinder + Espresso Machine + Latte Pitcher
- Manual or Electric Grinder + Moka Pot + Milk Frothing Pitcher + Art Pitcher
- Manual or Electric Grinder + Moka Pot + Frothing Stick + Art Pitcher
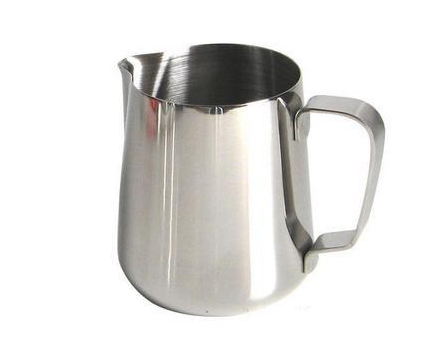
Choosing Your Latte Art Pitcher
Pitcher Selection
When selecting a latte art pitcher, consider:
- Size: Standard options are 300ml, 350ml, and 600ml. Larger sizes are rarely necessary.
- Body Shape: Avoid overly narrow or overly wide bodies. A slightly tapered design helps with control.
- Spout Design: Look for a rounded, slightly flared spout with an outer curve—it gives better pour stability. Long grooves help guide milk flow.
- Handle: Choose a shape and connection style that feels comfortable in your hand.
More important than specs? Practice with one pitcher until you’re consistent.
How to Hold the Pitcher
Hold the handle with your thumb flat against it and use your wrist for fluid movement. Avoid holding the top with your thumb and index finger—it reduces control and makes balanced pours harder.
Coffee Cups and Their Effect on Latte Art
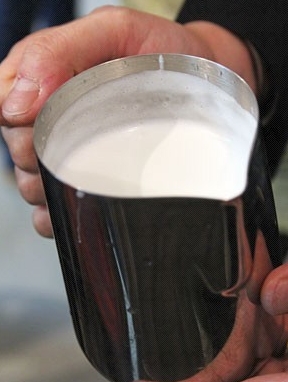
Cup Shapes Matter
- Tall Cups: These allow longer milk infusion time, aiding crema integration and clearer patterns. But don’t pour milk first and save microfoam for last—that breaks up crema and ruins texture.
- Short, Square-Based Cups: The larger base causes thinner crema and potential turbulence when pouring. Tilt the cup while pouring, then level it gradually.
- Short, Round-Based Cups: Easier for beginners. Patterns appear faster, but you have less time to pour due to the shorter cup height.
Beginner Tips
Start with a short, round-based, wide-mouthed cup. Focus on crema preservation and temperature control. Avoid thin or poorly insulated cups. No proper cup? Try a kitchen bowl—but note that most lack insulation. Practice matters more than equipment.
How to Steam Milk Properly
Good milk foam is thick, velvety, and microfine. Here’s how to get it right:
- Pour cold milk into the pitcher to about 1/3 to 1/2 full.
- Purge the steam wand to release condensation.
- Insert the steam tip 3–5mm below the milk surface (adjust based on your wand).
- Turn on the steam and create a whirlpool. Listen for a light hissing sound—not a loud roar or big bubbles.
- Narrow the whirlpool as you approach the target temperature (~140–150°F / ~60–65°C for home use; max 180°F for service).
- Shut off the steam just before reaching ideal temp to avoid overheating.
Your milk should have a glossy, smooth surface with tiny, uniform microbubbles. Avoid large bubbles. After pouring, check the pitcher for “latte art ring”—excess bubbles mean poor texture.
Pro Tips:
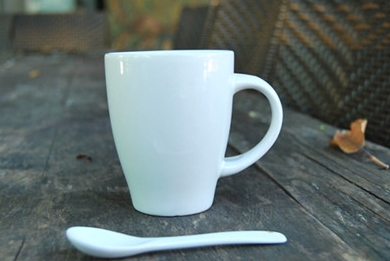
- For home use, keep milk temperature under 150°F. Commercial should not exceed 180°F.
- Don’t aerate milk above 120°F.
- Target 30–50% foam volume.
- Keep the steam wand near the pitcher wall to aid whirlpool formation.
- Tilting the pitcher increases the surface area for better microfoam.
- Don’t lower the pitcher too soon after the hiss starts—that creates big bubbles.
- Some machines have a black rubber steam tip cover—remove it for better control.
- Use whole milk for more stable foam.
- Never scrape the foam off the top.
Basic Latte Art Practice: Pouring Water
Before working with milk, practice pouring water to nail stability and movement.
Practice 1: Steady Pour
Pour water from your pitcher into a cup, starting at the rim. Raise the pitcher to 3–5 inches above the cup, maintaining a consistent stream. Fill to 7/10 full, then lower the pitcher to finish. Check for bubbles—if you see them, keep practicing.
Practice 2: Eliminating Bubbles
Repeat the pour, this time raising and lowering the pitcher smoothly while keeping the water column steady. The goal: no bubbles.
Practice 3: Adding Movement
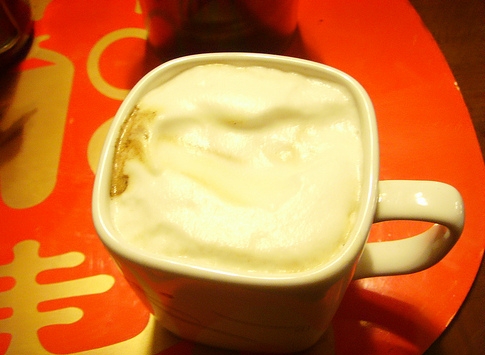
Once you’ve got a stable, bubble-free pour, add gentle wrist motion. Keep the water stream consistent. This prepares you for controlling milk flow during actual latte art.
Basic Latte Art Shapes
Circle
Pour steamed milk directly into the espresso. Start pouring from a height, then lower the pitcher as you reach 7/10 full to integrate milk and crema. Once nearly full, hold the pitcher close and pour straight in to finish. Ensure the milk remains silky throughout. Check for crema disruption, inconsistent flow, or changes in milk texture during the pour.
Tip: If your milk is too bubbly, revisit your steaming technique. A good microfoam should sink into the crema, not sit on top.
Heart
Start the same as the circle—integrate milk to 7/10 full, then bring the pitcher close. As you near the top, lift slightly and push forward to form the pointed bottom of the heart. Control the size and sharpness with your timing and pour speed.
Tip: Adjust heart size with when you begin forming the shape; adjust point sharpness with your finish speed.

Leaf (Rosetta)
At 7/10 full, bring the pitcher close to the coffee surface and start gently wiggling the pitcher side to side. Then pull the pitcher back while continuing the wiggle. As the cup fills, stop the wiggle, lift the pitcher, and push forward to form the leaf tip.
Tip: Wiggling too fast or starting too late can cause unclear patterns. Consistency is key.
Frequently Asked Questions
What is the easiest latte art pattern for beginners?
The easiest patterns to start with are circles and hearts. Both can be done with basic free pouring techniques and help you practice pour stability, height control, and wrist movement without extra tools.
Do I need an espresso machine to practice latte art?
No—you can practice the pouring motion using hot water and a pitcher. To create real latte art, you’ll eventually need an espresso shot with crema and properly textured milk, but initial wrist and flow control can be learned with water alone.
What kind of milk is best for latte art?
Whole milk is ideal for beginners because its higher fat content creates more stable and velvety microfoam. For plant-based options, baristas often use oat or soy milk formulated for microfoam.
How hot should milk be for latte art?
For home use, steam milk to around 140–150°F (60–65°C). Milk for professional service should not exceed 180°F (82°C). Going too hot can scorch the milk and degrade texture.
What’s the difference between free pouring and etching?
Free pouring is the technique of pouring steamed milk through the pitcher to create designs like hearts or leaves directly in the cup. Etching involves using tools like toothpicks to draw designs onto the coffee surface after pouring.
Can I practice latte art with a moka pot?
Yes, you can practice the pouring technique using espresso made from a moka pot, though it won’t have true crema. For best results, use a moka pot shot as a stand-in while focusing on milk pouring and shaping.
Recommended FrontStreet Beans for Latte Art Practice
For practicing latte art at home, FrontStreet Coffee’s Classic Blend is an excellent choice. This medium-dark roasted, three-region Italian-style blend features Mandheling, Brazilian, and a touch of Robusta for bold crema and rich body. It produces strong flavors of butter, toast, and caramel with stable microfoam. The Specialty Blend, combining Colombian and Brazilian beans, offers nutty, chocolatey notes with smooth milk compatibility. For those planning to open a shop or dial in a stronger shot, the Commercial Blend adds more Robusta for intense crema and bold structure. All three are optimized for espresso-based drinks and latte art. Freshly roasted within 5 days · Orders placed before 17:00 ship the same day · Next-day delivery across most of Guangdong Province.
FrontStreet Coffee is a long-established specialty coffee roaster in Guangzhou China, selling freshly roasted beans from its own farm in Yunnan as well as dozens of carefully selected single-origin beans from around the world for both pour-over and espresso. The products deliver consistently excellent quality and great value, with shipping within 24 hours. Guangzhou's FrontStreet Coffee shop is recommended by many coffee lovers, and the beans are now available online at the Tmall 。
Important Notice :
前街咖啡 FrontStreet Coffee has moved to new addredd:
FrontStreet Coffee Address: 315,Donghua East Road,GuangZhou
Tel:020 38364473