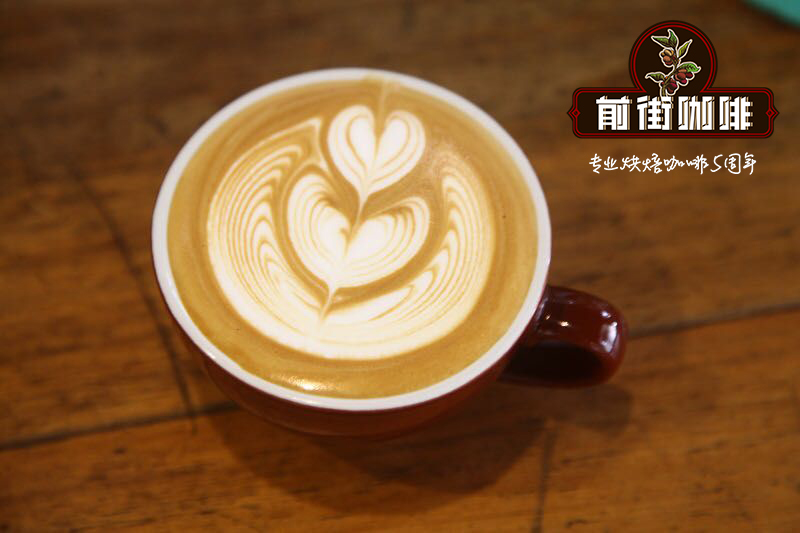
Coffee pull video tulip disassembly analysis novice tulip coffee flower pattern video course

Professional coffee knowledge exchange more coffee bean information please follow the coffee workshop (Wechat official account cafe_style)
From basic patterns to advanced skills
Practice, concentration, resilience.
The road of a master is right under your feet.
For coffee flower drawing
Some people insist on repeatedly studying graphic layout skills to practice.
Some people have no choice but to practice blindly and give up at the end of the day.
Some people love and hate each other, others find it difficult to try and so on.
And some people are enjoying it.
In this issue, we analyze the flower pattern of tulip coffee.
Next, let's study together!
1. Tilt the coffee cup and aim at the center of the espresso liquid
➀clenched the coffee cup with his left hand and made the handle of the coffee cup perpendicular to the mouth of the tub.
➁ grips the vat with his right hand to let the steam milk flow vertically from the nozzle.
two。 Fusion
➀sloshing pull vat
➁ shook the coffee cup
The ➂ flower jar and the coffee cup shake at the same time.
Note: according to personal habits, the above three choose a method of integration.
The fusion flow is 3--5cm from the liquid level and fuses to fill the coffee cup by 40%.
So: keep your hands steady and don't panic.
3. Selected point injection
First injection point: liquid level center point
Start shaking the vat while injecting steam milk.
Shake the floral vat in your hand about 8 murmur9 times to form a pattern until the first circular pattern is drawn.
After the first round pattern is drawn, the injection of steam milk begins to be pushed backward at the position where the first injection point moves backward 3--4cm.
(figure: from 1 to 2)
4. Second injection point
2--3cm from the first pattern starts the second injection, swinging uniformly from left to right. After the second pattern is formed, the injection of steam milk begins to be pushed forward at the position of 1--2cm in front of the second pattern.
5. The third injection point, etc.
Start the third injection from the second pattern 2--3cm, swinging uniformly from left to right. After you have finished drawing the third circle, continue to note the circle in front of it until you want the number of layers.
So: when drawing multiple layers, be careful not to gush too much milk out of the vat, or it may cause the circular pattern to be deformed.
The fourth point of injection:
The fifth injection point:
6. To straighten up or finish.
After the drawing is finished, gradually straighten the coffee cup and draw the center line at the end.
7. Production
Reference video:
Important Notice :
前街咖啡 FrontStreet Coffee has moved to new addredd:
FrontStreet Coffee Address: 315,Donghua East Road,GuangZhou
Tel:020 38364473
- Prev

What kind of education do you need to learn to make coffee? Is it better to learn to make coffee and go to a chain coffee shop or an independent coffee shop?
Professional coffee knowledge exchange more information about coffee beans Please follow the coffee workshop (Wechat official account cafe_style) holding a cup of coffee, walking on the way to work or class, is already the scenery of the city. If you are also a corner of the scenery and love the aroma of coffee, have you ever wondered whether, instead of drinking coffee made by others every day, you can one day become a coffee maker for others?
- Next

Coffee pull video mixed cutting foreign master coffee flower drawing skills video course
Professional coffee knowledge exchange more coffee bean information please follow the coffee workshop (Wechat official account cafe_style) pull coffee, just came out, with magical and gorgeous techniques strongly attracted the attention of the public. Her beautiful and changeable appearance, rich and delicate taste, gorgeous and strange techniques, all show a different kind of beauty. When you see the coffee cup floating
Related
- What is the meaning of lactic acid fermentation with coffee bean treatment?
- How to judge the state of foam by sound?
- How does the latte pull out the unicorn pattern? Come to get for a little trick to improve the flower pull!
- Will flower pulling affect the taste of the latte?
- Do you know the history of coffee?
- The difference between honey treatment and sun washing what is raisin honey treatment?
- What kind of milk can a novice use to make coffee foam to keep the foam longer? The correct method and skills of milking tutorial sharing
- Why do washed coffee beans taste sour? Flavor characteristics of washed Coffee
- Introduction to the skill of how to practice the size and height of water injection around the circle of hand-brewed coffee
- How do beginners practice coffee flower drawing from scratch?

