The key link of espresso flower drawing and milking
The treatment of milk foam, the key step
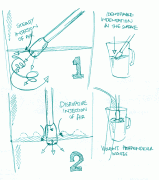
After the milk is dismissed, it is not the ideal foam, but in a layered state. The lower layer is the heated milk, and the upper layer is the "foam" after the milk is dismissed, so we have to deal with the milk after discarding. Shake up and down to remove the coarse foam from the surface; shake so that the hot milk is fully mixed with the upper foam to form foam. This step can also be achieved by reversing two jars (I prefer this method). This step is very critical, some friends do not attach great importance to this point, then all previous efforts will be wasted.
Pour the finished product back and forth several times in two jars, fully mix the hot milk and foam, then divide them equally between the two jars, and then pour back and forth a few times "in a small amount" so that they are evenly distributed. Many friends only do the front action and do not do a small amount of distribution in the back, so there will be unevenness. Of course, it's hard to understand if you describe it in words, but you'll understand if you try to do it a few times. To put it simply, it is to allocate the amount of milk foam. By using this method, the thickness of the foam in the two cups can be achieved.
A few tips: first, before pulling flowers, the milk foam has been in a shaking state in the flower jar to avoid the stratification caused by this to appear again, this is a professional habit, which must be developed. Second, if there is a small ball of milk foam concentrated in the middle of the vortex formed when shaking, which proves that the milk foam is unevenly distributed, it needs to be distributed again; third, before the product is produced, pour a little to the side, try the feel of the milk foam and then make the product. Fourth, when making a double-ring cappuccino, pay attention to the foam concentrated at the bottom of the flower jar, and try to live and stretch when scraping with a spoon.
Requirements for the quality of milk foam
The first standard is that the surface should be reflective. Delicate, velvet-like, slippery. The second criterion is that there is no coarse foam on the surface. This requires a lot of foam control ability, of course, this is also the premise of reflection. Those larger than the diameter 1mm are called coarse foam. The third standard is: in the case of the same amount of milk (all added to the position at the bottom of the cylinder mouth), whether it is 60% full or 70%, 80%, 90% or full, the temperature should be the same. The fourth standard is to make two cups of cappuccino, using the WBC standard cup. After the foam is poured into the cup, there is no drop left in the jar. The above four standards have been achieved, and I think it is at least a good jar of milk foam in terms of vision, feel and technology. Earlier also mentioned a sense of hearing, which depends on the milk, just hit the milk foam, must not hear a very continuous burst sound, which can ensure the persistence of the milk foam in the cup.
The solution that milk foam can not be injected into espresso
When making cappuccino coffee, there will be the problem that milk foam can not be injected into espresso smoothly. Why? The first is that the milk foam is 80% to 90% full, which can be solved by 10% less than dry. The second is that the crema surface of the espresso is too shallow from the bottom of the cup, causing the foam to float on the crema as soon as the foam is injected. Solution: tilt the cup as much as possible to increase the depth of the surface and bottom of the crema meter. When injecting, inject it to the deepest point. The third is that the foam is close to the cup when it is injected into espresso, so that the foam does not penetrate crema enough. Solution: 10-15cm higher than the cup mouth to inject milk foam, increase the acceleration of foam injection into crema, so that it can smoothly penetrate crema. The fourth is to solve the problem by means of integration. If the foam is still white on the crema when it is injected (for a small amount, the surface is about 1 beat 3), then immediately reduce the amount of foam injected, make a circle in the cup, and then lift the flower jar up, you can flush the whitened one under the crema. Fifth, when you pull flowers with seven-point full or six-point full milk foam, the crema will be washed away without increasing the flow. Solution: reduce the foam flow and slowly circle the entire crema until the blend is in place.
On the Classification of cappuccino
If I understand this question correctly, I can classify cappuccino into three categories according to the quality of milk foam, one is wet cappuccino, one is dry cappuccino, and the other is half cappuccino in between. So how do we distinguish between these three kinds of cappuccino? If the foam technology passes, you can use the quality of the foam to distinguish as follows: premise: 600ml (medium) pull the flower jar around, and fill the milk at the bottom of the nozzle. First, the wet cappuccino milk foam is 6 or 7% full; (this milk bubble to do leaves and other lines require more pattern is very good-looking, at the same time, this milk foam can also be used to do latte). Second, the dry cappuccino milk foam is full. Third, the half cappuccino milk foam is 80% full; I prefer 90% milk foam. This foam is great for heart, apple and tulip patterns. In fact, what we usually use most is this kind of milk foam, which is used to make the cappuccino that is common in our daily work.
FrontStreet Coffee is a long-established specialty coffee roaster in Guangzhou China, selling freshly roasted beans from its own farm in Yunnan as well as dozens of carefully selected single-origin beans from around the world for both pour-over and espresso. The products deliver consistently excellent quality and great value, with shipping within 24 hours. Guangzhou’s FrontStreet Coffee shop is recommended by many coffee lovers, and the beans are now available online at the Tmall 。
Important Notice :
前街咖啡 FrontStreet Coffee has moved to new addredd:
FrontStreet Coffee Address: 315,Donghua East Road,GuangZhou
Tel:020 38364473

- Prev
Spaghetti coffee froth with steam pipe
There are three things to do when making milk foam: heat the milk, beat the milk foam, add milk to the milk kettle and add milk to 1 to 1 full start the steam valve to release the water in the steam stick. Insert the steam nozzle into the fresh milk surface about 3-5MM deep (depending on the steam nozzle and steam intensity will vary slightly) open the steam valve should hear a slight hiss at this time, control the kettle position
- Next

Five Mistakes in Italian Coffee
For milk foam, there are several misunderstandings that we need to understand in order to facilitate our better understanding of milk foam. The first error: use up and down shake pull flower cylinder, remove the surface coarse foam. This is a very good method, but many friends have a strong dependence on this method, their milk foam is not good, do not summarize why not play well, and use this means to make up. Changziyi
Related
- Beginners will see the "Coffee pull flower" guide!
- What is the difference between ice blog purified milk and ordinary milk coffee?
- Why is the Philippines the largest producer of crops in Liberia?
- For coffee extraction, should the fine powder be retained?
- How does extracted espresso fill pressed powder? How much strength does it take to press the powder?
- How to make jasmine cold extract coffee? Is the jasmine + latte good?
- Will this little toy really make the coffee taste better? How does Lily Drip affect coffee extraction?
- Will the action of slapping the filter cup also affect coffee extraction?
- What's the difference between powder-to-water ratio and powder-to-liquid ratio?
- What is the Ethiopian local species? What does it have to do with Heirloom native species?