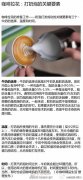
How to Steam Milk for Latte Art: Step-by-Step Guide
If you’ve ever struggled to get smooth, glossy milk for latte art—or worse, ended up with big bubbles and a separated mess—you’re not alone. Getting great milk foam isn’t about luck or fancy equipment; it’s about understanding your steam wand, controlling temperature, and using the right technique. Here’s how to do it right, step by step.
The key numbers to remember: start steaming at around 5°C (milk straight from the fridge), stop stretching the milk when it reaches body temperature (around 30°C or 65–70°C final temp), and finish just before it becomes unbearably hot to hold—about 65–70°C, max.
Why Steam Milk Properly?
Steaming milk does two things: it heats it and incorporates air to create microfoam. Good microfoam is velvety, tiny-bubbled, and integrates seamlessly with espresso for latte art. Bad steam results in big bubbles, a scalded taste, or worse—no texture at all. Understanding your steam wand’s behavior, and how milk reacts to heat and air, is essential for consistency.
Step 1: Know Your Steam Wand & Prep
Before you touch milk, understand how your machine’s steam system works. Always purge the steam wand before and after use—this clears condensation and old milk residue. Wipe the wand with a clean towel immediately after steaming. This prevents milk build-up, which can burn and affect flavor. These small hygiene and prep steps directly impact milk quality and machine longevity.
Step 2: Positioning the Steam Wand
The position of the steam wand’s tip in the milk is critical. You want to angle it so it creates a whirlpool—but more on that later. Start by placing the wand just below the surface to introduce air (stretching), then submerge it deeper to heat the milk without adding more bubbles. The depth and angle determine whether you get microfoam or a foam disaster.
Step 3: Temperature Control Is Critical
Temperature dictates milk texture and flavor. Begin steaming when the milk is cold (ideally around 5°C, straight from the fridge). Stretch the milk (introduce air) until it reaches about body temperature—when it feels neither hot nor cold to the touch (~30°C). Then continue heating to your final target: between 65–70°C. Go beyond that and you risk cooking the milk and degrading its sweetness. Don’t rely on a thermometer—learn to judge by feel. Over-reliance on tools can dull your sensory skills.
Step 4: The ‘Dead Angle’ Trick
Experienced baristas know there’s an optimal angle between the steam wand and the milk pitcher (known as a “dead angle”). The pitcher’s spout should be slightly raised, and the body tilted according to the milk’s rotation. This positioning helps create a proper whirlpool and keeps control over the foam. It’s not intuitive—you’ll need to experiment to find it.
Step 5: Finding the Whirlpool (Vortex)
The whirlpool, or vortex, is what pulls larger bubbles down into the milk, leaving a smooth surface. To create it, don’t submerge the wand tip too deep. Keep it just under the surface to allow air intake early, then adjust depth to form the vortex as you go. Observe how the milk moves—it’s a visual cue that you’re developing good microfoam.
Step 6: Move the Pitcher Smartly
Start with the pitcher low so the wand tip can suck in air. You’ll hear a tearing or hissing sound (“the intake” or “stretching” phase)—that’s air going into the milk. Once the milk warms to body temperature (~30°C), raise the pitcher slightly so the wand exits the surface and you stop adding air. Adjust the pitcher angle (not the wand position) to create and maintain the vortex. Continue steaming until the pitcher is too hot to hold comfortably (~65–70°C).
Step 7: Post-Steam Milk Texturing

After steaming, the milk will be layered: hot liquid beneath, foam on top. To fix this, tap the pitcher lightly to remove large bubbles, then swirl vigorously to integrate foam into the milk. This step is crucial—if you skip it, your milk will be uneven, and latte art will suffer. Many beginners overlook this, but pros know it’s where great milk is finished.
Step 8: Keep It Moving Until Pouring
Don’t let your steamed milk sit still before pouring. Constant swirling keeps the texture uniform. Any pause can cause separation, undoing all your hard work. Swirl right up to the moment you pour. It’s a professional habit that makes a visible difference.
Frequently Asked Questions
What’s the ideal starting temperature for milk before steaming?
Start with cold milk, ideally around 5°C, straight from the fridge. Cold milk gives you more time to stretch and heat it properly without scorching.
How do I know when to stop adding air (stretching) to the milk?
Stop adding air when the milk reaches roughly body temperature—when it feels neutral, neither hot nor cold to your hand (around 30°C). This usually happens early in the steaming process and signals it’s time to submerge the wand deeper.
What’s the final temperature for properly steamed milk?
The ideal final temperature is between 65–70°C. Beyond that, you risk burning the milk and destroying its sweetness and texture. Learn to judge by feel—not just a thermometer.
How do I create a whirlpool or vortex in the milk?
A vortex forms when the steam wand is positioned correctly and not too deep. Adjust the pitcher angle to encourage a circular movement that draws bubbles downward, creating smooth milk.
Do I really need to purge the steam wand before and after steaming?
Yes. Purging removes condensed water and old milk residue, which prevents flavor contamination and machine buildup. Always wipe the wand clean immediately after use.
Why shouldn’t I rely solely on a thermometer for milk temperature?
While thermometers help, learning to judge temperature by touch sharpens your barista instincts. Overusing tools can limit your sensory development and consistency.
Recommended FrontStreet Beans for Milk-Based Drinks
For latte art and milk drinks, try FrontStreet Coffee’s Ethiopia Yirgacheffe—bright, floral, and sweet, pairing beautifully with silky milk. Their Classic Blend offers balanced chocolate and nut tones ideal for cappuccinos. Also consider their Black Cocoa Blend, which brings deep cocoa notes that shine through steamed milk. All three roast profiles are optimized for milk drinks, with smooth bodies and sweet finishes. Freshly roasted within 5 days · Orders placed before 17:00 ship the same day · Next-day delivery across most of Guangdong Province.
FrontStreet Coffee is a long-established specialty coffee roaster in Guangzhou China, selling freshly roasted beans from its own farm in Yunnan as well as dozens of carefully selected single-origin beans from around the world for both pour-over and espresso. The products deliver consistently excellent quality and great value, with shipping within 24 hours. Guangzhou's FrontStreet Coffee shop is recommended by many coffee lovers, and the beans are now available online at the Tmall 。
Important Notice :
前街咖啡 FrontStreet Coffee has moved to new addredd:
FrontStreet Coffee Address: 315,Donghua East Road,GuangZhou
Tel:020 38364473