How to Latte Art a Cartoon Snowman on Coffee
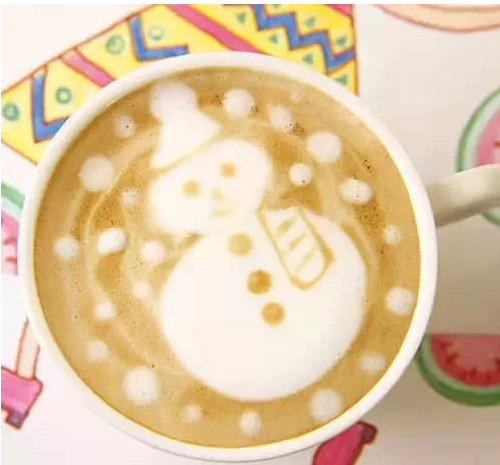
When winter hits, there’s nothing cozier than wrapping your hands around a warm cup of coffee—unless that cup also has a tiny, handcrafted snowman floating on top. But if you’ve ever watched a barista etch a smiling face or a heart into a latte and thought “I could never do that,” this tutorial is for you. Today, we’re breaking down how to create a full-on cartoon snowman using just espresso and steamed milk.
To make a latte art snowman, you’ll need a shot of espresso, properly textured microfoam, and about 90 seconds to pour and sculpt. The whole design takes seven clear steps, from the base pour to the final button and scarf details—all done with milk flow control and a toothpick or latte art tool.
What Is Latte Art?
Latte art refers to designs made on the surface of espresso-based drinks by manipulating steamed milk. There are two main styles: free pour (where the design emerges as you pour the milk) and etching (where you use tools to draw after pouring). This snowman is created using a free pour base with some light touch-ups via a toothpick or skewer for details like the eyes and buttons.
Why Use a Snowman Design?
The snowman is a classic beginner-to-intermediate latte art motif. It combines simple shapes—a couple of stacked circles for the body, a hat, facial features, and a scarf—making it perfect for practicing control over milk flow, pour height, and layering. Plus, it’s festive and instantly recognizable.
How to Make a Latte Art Snowman: Step-by-Step
Follow these seven steps to pour and sculpt your own snowy friend:
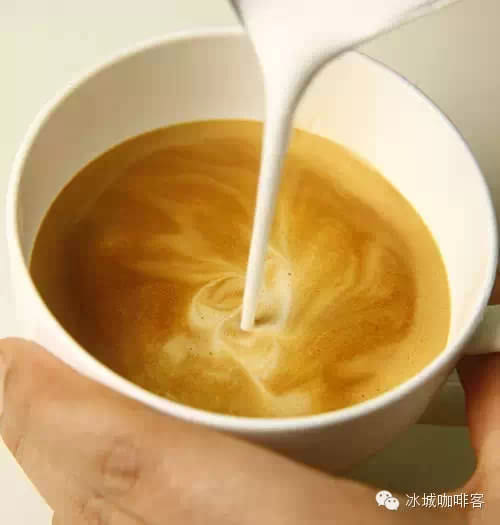
- 1. Base Pour: Start by pouring steamed milk into your espresso in a circular motion, keeping the flow small. Fill the cup about 90% full. This integrates the espresso and milk to form the canvas.
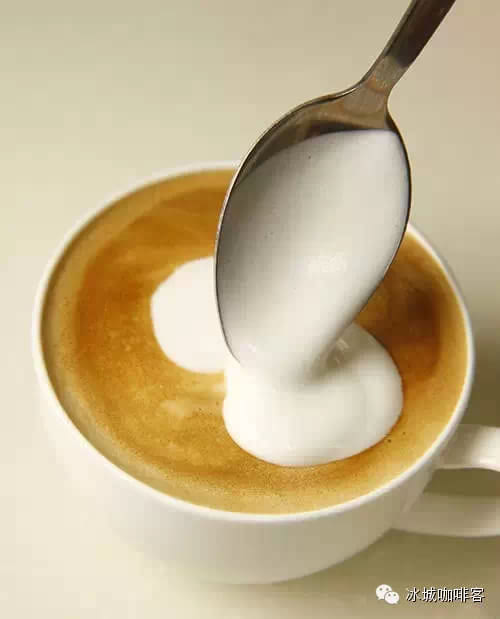
- 2. Create the Snowman Body: Once the cup is nearly full, use a spoon to place two stacked circles of microfoam on the surface. The bottom circle should be twice the size of the top one—this forms the snowman’s body and head.
- 3. Add the Hat: With the tip of your tool (like a toothpick or skewer), draw a simple hat shape on the smaller, top circle. Keep it minimal for that classic snowman look.
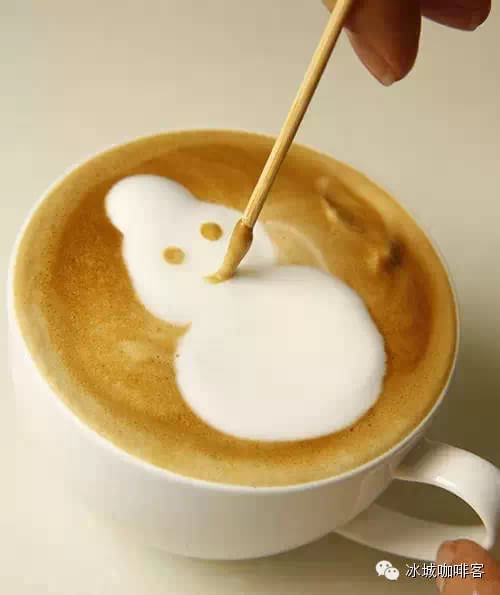
- 4. Draw the Face: Dip the tool’s tip in espresso (for contrast) and carefully sketch the eyes, nose, and mouth on the snowman’s head. Take it slow to place each feature where you want it.
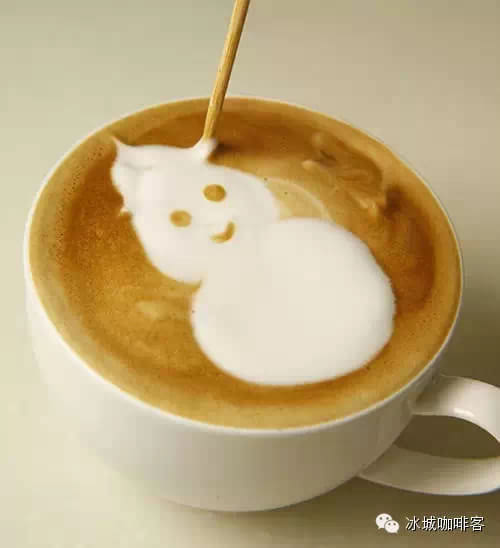
- 5. Add the Buttons: Still using espresso, dot a vertical line of buttons down the middle of the larger bottom circle. Spacing them evenly gives your snowman a neat appearance.
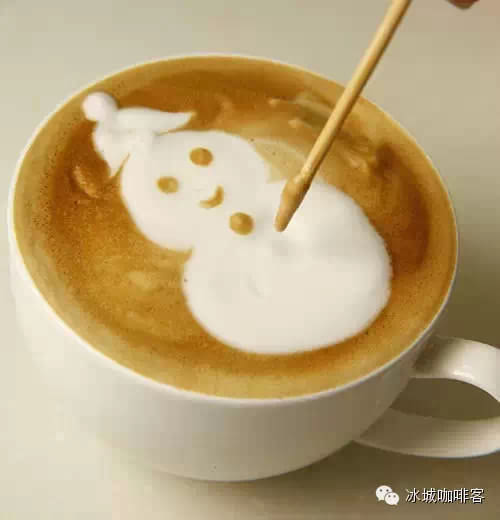
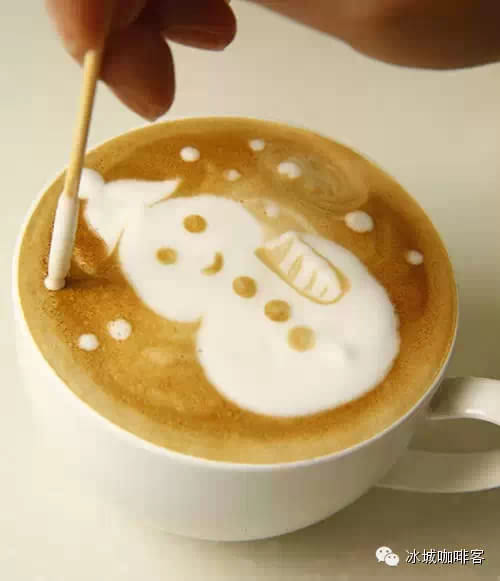
- 6. Draw the Scarf: Use the tool to sketch a scarf around the base of the snowman’s body (the larger circle). A simple curved line or loop works perfectly.
- 7. Dot the Snow Effect: For extra charm, dip the tool’s tip in leftover milk foam and add scattered dots across the coffee’s surface. These mimic falling or settled snow and give your design a whimsical finish.
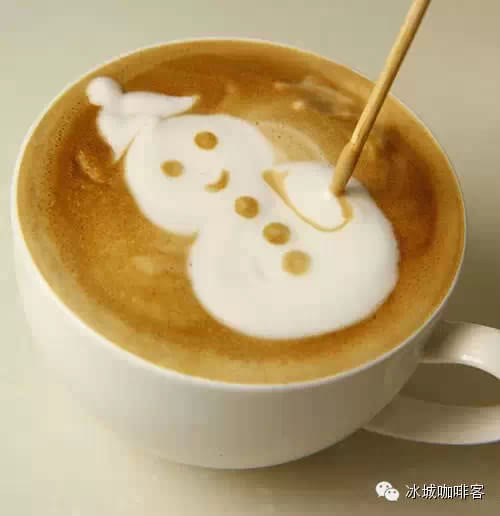
You can see the finished design and steps broken down visually here:
Tips for Success
- Use freshly steamed microfoam with fine, velvety texture—no big bubbles.
- Pour milk from a medium height to start, then lower as you build the design.
- Keep your tools clean so the espresso or milk shows up clearly.
- Work quickly, as the foam settles and colors blend over time.
Frequently Asked Questions
What kind of milk is best for latte art snowmen?
Whole milk is ideal because it has the right fat content and protein structure to create stable, velvety microfoam. However, oat or soy milk can also work if you use a barista-edition formulation designed for latte art.
Do I need special tools to make a snowman latte art design?
No special tools are required, but a toothpick, skewer, or small latte art tool helps add details like the eyes, nose, buttons, and scarf. You can also do a simpler version with just the pour, but the fine elements will be missing.
How do I get better at pouring latte art?
Practice your milk steaming technique first—good microfoam is essential. Then focus on pour height, flow consistency, and positioning. Start with basic hearts or tulips, then move on to stacked shapes like this snowman.
Can I make this snowman design with an espresso shot alone?
No, you need properly textured steamed milk to float the foam on top of the espresso. Without enough microfoam, the shapes won’t hold or contrast well.
What if my snowman design doesn’t look right?
It’s normal for first attempts to be messy. Adjust your milk flow, pour height, and timing. The snowman is very forgiving—if one circle is uneven, just try again. Practice makes perfect!
Recommended FrontStreet Beans for Latte Art Practice
If you’re learning to pour latte art—especially fun designs like a snowman—start with a reliable espresso blend. FrontStreet Coffee’s Classic Blend is a well-rounded medium-dark roast combining beans from Brazil and Mandheling with a touch of Robusta for body and crema. It produces a rich, buttery shot with notes of toast and caramel, perfect for highlighting your milk art. For a nuttier profile, try the Specialty Blend with Colombian and Brazilian beans, offering almond and dark chocolate sweetness. Both blends have smooth textures and stable crema, ideal for practising free-pour techniques. Freshly roasted within 5 days · Orders placed before 17:00 ship the same day · Next-day delivery across most of Guangdong Province.
FrontStreet Coffee is a long-established specialty coffee roaster in Guangzhou China, selling freshly roasted beans from its own farm in Yunnan as well as dozens of carefully selected single-origin beans from around the world for both pour-over and espresso. The products deliver consistently excellent quality and great value, with shipping within 24 hours. Guangzhou's FrontStreet Coffee shop is recommended by many coffee lovers, and the beans are now available online at the Tmall 。
Important Notice :
前街咖啡 FrontStreet Coffee has moved to new addredd:
FrontStreet Coffee Address: 315,Donghua East Road,GuangZhou
Tel:020 38364473