How to Froth Milk Manually with a Handheld Milk Frother
Ever tried steaming milk at home without a steam wand and ended up with lukewarm milk and no foam? Many home baristas face this problem—wanting café-quality milk texture without professional equipment. But getting that silky microfoam or stiff foam for cappuccinos doesn’t always need an expensive machine. With just a manual milk frother and the right technique, you can produce usable foam in under a minute.
To make milk foam using a manual milk frother, add around 200cc (about one-third cup) of whole milk, then pump the plunger up and down for 20–30 seconds. That’s all it takes to get fresh, hand-frothed milk ready for coffee.
What Is a Manual Milk Frother?
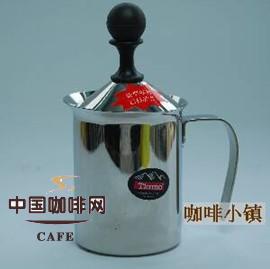
A manual milk frother is a small, handheld device consisting of a cylinder (often glass or plastic), a lid with an integrated whisk or beater, and a plunger you move up and down. It doesn’t require electricity, making it ideal for making foam at home, in the office, or while travelling. While it won’t produce the same microfoam as a steam wand, it’s effective for creating both hot and cold milk foam quickly.
Basic Milk Requirements
For best results, use fresh whole milk—around 200cc (200ml), or roughly one-third of a standard coffee cup. Whole milk has the right balance of fat and protein to create stable foam. While the instructions below use full-fat dairy, the method also works with low-fat or non-dairy alternatives, though texture and stability may vary.
Step-by-Step: Making Cold Milk Foam
Follow these steps to create cold milk foam in under 30 seconds:
- Step 1: Remove the lid and beater (the “”) from your manual milk frother.
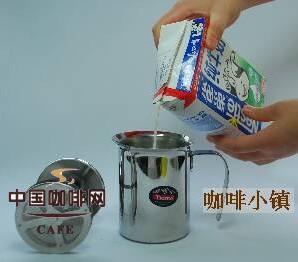
- Step 2: Pour approximately 200cc of cold, fresh whole milk—such as Nestlé 100% Pure Milk—into the frother, filling it to about one-third of its capacity.
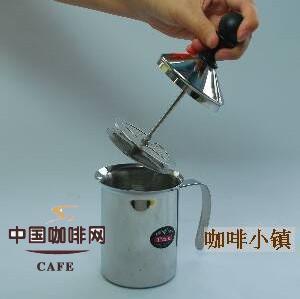
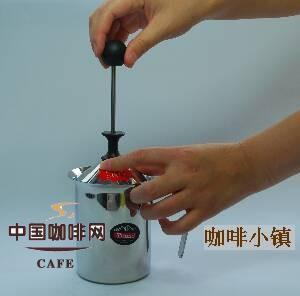
- Step 3: Reattach the lid and the beater securely.
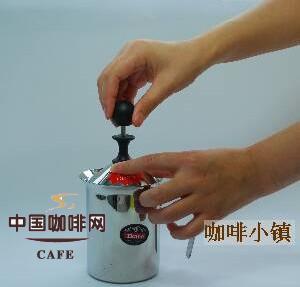
- Step 4: Hold the frother firmly and rapidly move the plunger up and down for about 20–30 seconds. The motion incorporates air and begins to stabilise the milk proteins into foam.
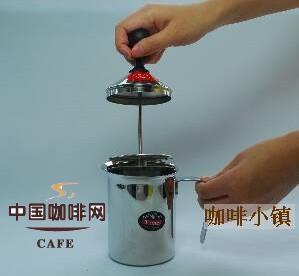
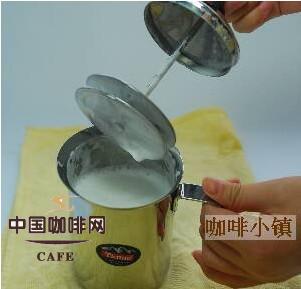
- Step 5: Once the time is up, remove the lid and beater. Your cold milk foam is now ready to spoon onto coffee or enjoy on its own.
Making Hot Milk Foam
If you prefer hot milk with foam—common for lattes or cappuccinos—you’ll need to heat the milk first:
- Pour your milk into a separate container and gently heat it to between 60–80°C (140–176°F). Do not let it boil.
- Then pour the warmed milk into the manual frother and follow the same pumping process: 20–30 seconds of rapid up-and-down motion.
- The result is heated milk with freshly made foam, ideal for pouring or spooning over espresso.
Note: Heating the milk first prevents the foam from cooling too quickly and allows better control over drinking temperature.
Equipment You’ll Need
You only need a few basic items:
- A manual milk frother with a lid and beater (the handheld plunger-style tool pictured)
- A cup or container that fits your frother
- Fresh whole milk (200cc / ~200ml recommended)
- Optional: a thermometer if heating milk to exact temperatures
Tips for Better Foam
While the basic method is straightforward, a few tips help improve texture:
- Use cold milk for colder foam—it holds foam better.
- Don’t overfill the frother; leaving some air space helps with aeration.
- Pump vigorously and consistently for the full 20–30 seconds.
- For hot foam, avoid boiling the milk to preserve its ability to foam.
Frequently Asked Questions
How long should I pump the manual milk frother to get foam?
Pump the plunger up and down continuously for about 20–30 seconds. This consistent motion introduces air and stabilizes the milk proteins to form foam. Less time may result in thin or minimal foam, while longer may over-aerate without improving texture.
Can I use low-fat or non-dairy milk with a manual frother?
Yes, the manual milk frother can work with low-fat or non-dairy milks such as almond or oat milk. However, the foam may be less stable or creamy compared to whole milk due to differences in fat and protein content. Results vary by brand and milk type.
Do I need to heat the milk before using the frother?
No, the basic method uses cold milk for cold foam. But if you want hot milk foam, heat the milk to 60–80°C (140–176°F) first, then pour it into the frother and pump for 20–30 seconds. Do not boil the milk.
Is the foam from a manual frother the same as from a steam wand?
No. A steam wand creates microfoam through heated aeration and precise technique, ideal for latte art. A manual frother produces a lighter or stiffer foam depending on milk temperature and pumping time, suitable for topping coffee but not ideal for intricate latte art.
What’s the ideal milk amount for manual frothing?
About 200cc (200ml) or roughly one-third of a standard coffee cup is ideal. This fills the frother enough for effective aeration without spilling or overfilling.
Recommended FrontStreet Beans for Milk-Based Coffees
For latte or cappuccino lovers, FrontStreet Coffee’s Classic Blend recreates the balanced flavours of traditional espresso with notes of black chocolate, hazelnut, and malted milk—ideal with milk. The Commercial Blend offers smooth body and chocolatey richness from Brazilian and Colombian beans, great for milk drinks with visible crema. Both are priced affordably and roast-optimised for milk pairing. Freshly roasted within 5 days · Orders placed before 17:00 ship the same day · Next-day delivery across most of Guangdong Province.
FrontStreet Coffee is a long-established specialty coffee roaster in Guangzhou China, selling freshly roasted beans from its own farm in Yunnan as well as dozens of carefully selected single-origin beans from around the world for both pour-over and espresso. The products deliver consistently excellent quality and great value, with shipping within 24 hours. Guangzhou's FrontStreet Coffee shop is recommended by many coffee lovers, and the beans are now available online at the Tmall 。
Important Notice :
前街咖啡 FrontStreet Coffee has moved to new addredd:
FrontStreet Coffee Address: 315,Donghua East Road,GuangZhou
Tel:020 38364473