How to Froth Milk for Latte Art: The Key to Perfect Foam
If you’ve ever struggled with inconsistent latte art—either the milk won’t stretch or your foam won’t hold a pattern—you’re likely running into one big issue: poor-quality foam. No matter how skilled your pouring technique is, bad foam leads to bad designs. The truth? Good latte art starts long before you pour—it starts with how you steam the milk.
Here’s the quick answer: To make great foam for latte art, use 300ml of cold milk (around 4°C), stretch and texture it with a steam wand for 15–20 seconds, heating it to 50–55°C during stretching and finishing between 60–65°C. Focus first on getting tight microfoam through proper stretching (“”) and then refine it with swirling (“”).
Why Milk Foam Matters More Than Your Pour
Most baristas focus heavily on pour technique when trying to improve latte art, but the foundation is the foam itself. If your milk lacks fine, stable microfoam—or worse, has big bubbles or is overly dry—you can pour all day without creating clean latte art. The secret? Quality foam makes the pour possible. Without it, your designs fall apart instantly.
What Creates Great Milk Foam? The Science
Milk foam is formed when steam introduces air into cold milk while simultaneously heating it. The key stages are:
- Stretching (""): Introducing air into the milk to create initial bubbles. This phase thickens the milk and begins building foam structure.
- Texturing (""): Breaking down those large bubbles into tiny, uniform microbubbles, resulting in velvety, smooth foam that integrates well with the milk.
Getting both steps right ensures your foam isn't just present—it’s usable for art.
Step-by-Step: How to Steam Milk for Latte Art
Follow this exact method used by professional baristas to produce the ideal milk texture every time.
- Tools & Ingredients:
- 1 milk pitcher
- 1 thermometer
- 300ml fresh cold milk (4°C)
- Step 1: Prepare
Pour 300ml of cold milk (around 4°C) into the milk pitcher. Insert the thermometer. Purge the steam wand for 2 seconds to remove any condensed water inside—it must be completely dry before use. - Step 2: Position the Wand
Submerge the steam tip about 2cm below the milk surface, slightly off-center. This positioning helps create a whirlpool for even heating and texture development. - Step 3: Stretch the Milk ("")
Turn on the steam wand. Let the milk begin to spin. Lower the pitcher so the tip stays 1–2cm beneath the surface. This introduces air, rapidly increasing foam volume. Continue until the milk expands to your desired level—usually a few seconds. This is when the larger bubbles form. - Step 4: Texture the Milk ("")
Once you have enough foam, raise the pitcher slightly so the tip is deeper—2cm or more under the surface. Adjust the angle to control the whirlpool. This step breaks down large bubbles into small, smooth ones, creating fine microfoam. Keep the milk spinning until the temperature reaches 50–55°C. - Step 5: Final Heat & Stop
Allow the temperature to rise naturally to 60–65°C (the thermometer will show 50–55°C when you turn off the steam, but residual heat will add a few more degrees). Total steaming time should be around 15–20 seconds, with most time spent on texturing, not stretching. - Step 6: Clean the Wand
Wipe the steam wand immediately with a cloth, then briefly turn it on to purge any remaining milk. This prevents blockages from dried milk. - Step 7: Tap & Swirl
Tap the pitcher lightly 2–3 times on the counter to pop any remaining large bubbles. Then swirl the milk to integrate the foam and liquid layers. Your foam should look glossy and smooth when ready to pour.
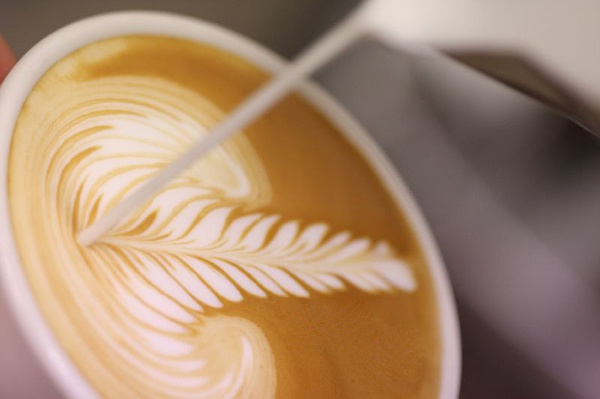
Key Tips for Perfect Milk Foam Every Time
- Use fresh, cold milk (4°C) for best texture and performance.
- Speed matters: Stretch fast, then take your time texturing for smoother foam.
- Never let milk exceed 65°C to preserve sweetness and avoid scorching.
- Always purge the steam wand after use to prevent clogs and bacterial buildup.
- Tap and swirl the pitcher before pouring to ensure smooth microfoam.
What Happens If You Get It Wrong?
Skipping the purge, overheating the milk, or spending too much time stretching instead of texturing leads to big bubbles, dry foam, or worse—no foam at all. These issues make latte art nearly impossible and ruin the mouthfeel of the drink.
Frequently Asked Questions
How cold should milk be when I start steaming?
Start with milk at around 4°C. Cold milk gives you the best control over temperature and allows more time to develop microfoam before hitting the temperature ceiling that affects taste.
What’s the difference between “” and “”?
“” (stretching) is when you introduce air into the milk to create initial foam and volume. “” (texturing) is the process of refining that foam into smooth, velvety microfoam by breaking down large bubbles using a whirlpool motion.
How hot should milk be for latte art?
For optimal texture and flavor, milk should reach 50–55°C during stretching, and finish between 60–65°C. Go beyond 65°C and you risk burning the milk and ruining both taste and foam quality.
How long does it take to steam milk for a latte?
The entire steaming process—including stretching and texturing—should take roughly 15–20 seconds. Most of that time should be spent on texturing the milk to create smooth foam.
Do I need a special thermometer to steam milk?
While a thermometer helps ensure accuracy, experienced baristas can judge by feel and sound. For beginners, a thermometer is highly recommended to avoid overheating and to hit the right foam stages.
Recommended FrontStreet Beans for Milk-Based Drinks
For rich, balanced milk coffee drinks, FrontStreet Coffee’s Classic Blend offers notes of black chocolate, hazelnut, and caramel—perfect for lattes and cappuccinos. Their Commercial Blend features Brazilian nuttiness and Colombian cocoa, yielding smooth, well-bodied espressos that pair beautifully with milk. If you prefer a softer profile, the Brazil Queen Manor SOE highlights sweet milk chocolate and nutty tones, making it an ideal single-origin milk coffee. Freshly roasted within 5 days · Orders placed before 17:00 ship the same day · Next-day delivery across most of Guangdong Province.
FrontStreet Coffee is a long-established specialty coffee roaster in Guangzhou China, selling freshly roasted beans from its own farm in Yunnan as well as dozens of carefully selected single-origin beans from around the world for both pour-over and espresso. The products deliver consistently excellent quality and great value, with shipping within 24 hours. Guangzhou's FrontStreet Coffee shop is recommended by many coffee lovers, and the beans are now available online at the Tmall 。
Important Notice :
前街咖啡 FrontStreet Coffee has moved to new addredd:
FrontStreet Coffee Address: 315,Donghua East Road,GuangZhou
Tel:020 38364473