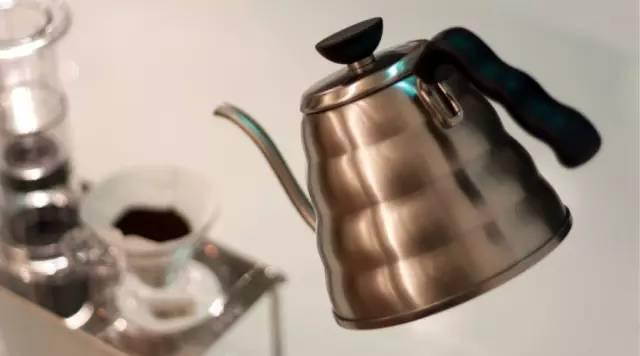
How to Steam Milk and Pour Latte Art: A Beginner’s Guide
If you’ve ever watched a barista pour a perfect heart or rosetta into a cup and wondered how they did it, you’re not alone. Latte art looks magical—but behind every smooth design is a solid foundation in milk steaming, foam control, and pouring technique. Whether you're practicing at home or aiming to impress, getting the milk right is where it all begins.
To start learning latte art, begin with "water pouring" drills to build hand stability and control. Once you can pour a smooth, bubble-free stream of water from varying heights, you’re ready to move on to milk steaming and actual latte art pouring.
What Is Latte Art and Why Does It Matter?
Latte art refers to the patterns—like hearts, tulips, or rosettas—created by pouring steamed milk into espresso. Though it began as a performance skill in coffee shops across Europe and America, it has evolved into a key indicator of both milk quality and barista skill. Good latte art depends not just on visuals, but also on how well the milk integrates with the espresso—creating a unified drink that’s smooth in texture, balanced in flavor, and visually striking.
Over time, latte art has grown beyond coffee shop flair. It’s now a staple in barista competitions worldwide, including the World Barista Championship (WBC) and the Millrock Latte Art Competition. In these contests, competitors must demonstrate both technical precision and creative design, especially during the cappuccino round. The ability to pour clean, consistent designs is seen as proof of a barista’s overall skill with milk and espresso.

The Foundations: Practicing Without Milk
Before working with real milk, start with water. These “water pours” help you develop the muscle memory and control needed for steaming and pouring milk. Here’s a simple progression:
Practice 1: Basic Water Pour
Pour water from your pitcher into a cup, starting at the rim. Raise the pitcher about 3–5 inches above the cup and maintain a steady, even stream. Fill to about 70% full, then lower the spout close to the surface to finish pouring. Watch for bubbles—if you see them, keep practicing until your stream is smooth and bubble-free.
Practice 2: Eliminating Bubbles
Once you can pour without bubbles at a fixed height, challenge yourself further. While pouring, move the pitcher up and down repeatedly, keeping the water stream consistent. Your goal is zero bubbles, even with motion. Mastery here means your hand and wrist have the control needed for real milk.
Practice 3: Introducing Movement
Now add gentle, slow side-to-side movements while maintaining a steady stream. Don’t rush—start with small, controlled motions. The key is to keep the water column uniform as you begin shaping the pour. This prepares you for creating actual latte art patterns later.
How to Steam Milk and Pour Latte Art
Once your water drills are solid, it’s time to work with milk. The process has several stages: steaming, pouring, and controlling the design as it forms.
Step-by-Step: The Pouring Process
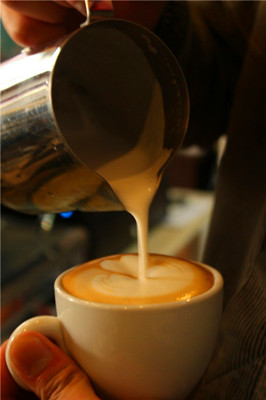
1. Start by pouring your steamed milk directly into the center of the espresso cup.
2. Pour until the cup is about 70% full, then lower the pitcher closer to the coffee surface.
3. As the milk nears the crema, it will begin to create a visible pattern on the surface.
4. Continue pouring until the cup is full, refining your motion to shape the final design.
Key Factors for Success
Three elements determine the quality of your pour:
- Are you pouring from a consistent height with an even stream? Variations will affect texture and design.
- Is the milk hot and foamy—or are you pouring straight hot milk that disrupts the crema?
- Does your milk maintain the same microfoam texture from start to finish? Inconsistent foam ruins pour control.
Watch for these issues as you practice. If your milk disturbs the crema instead of blending with the espresso, you’re likely pouring hot milk rather than microfoam. If your pour starts white but ends thin, your foam may be unevenly textured or over-aerated.
Common Milk Foam Mistakes to Avoid
Steaming milk for latte art isn’t just about heat—it’s about texture. Many beginners make critical errors when frothing milk that ruin their pour, even if their technique is otherwise sound.
- Mistake 1: Relying Only on Shaking Off Big Bubbles
Shaking your pitcher to remove large bubbles might seem like a fix, but if you depend on it too much, you’ll never learn to steam properly textured milk. Consistent steam technique prevents big bubbles in the first place. - Mistake 2: Scooping Off Bubbles with a Spoon
This is a last-resort technique often seen in competitions—but if you’re scooping, your steam technique needs work. Focus instead on controlling steam pressure and angle to create smoother foam from the start. - Mistake 3: Letting Steamed Milk Sit Before Pouring
Leaving milk to rest after steaming causes separation and worsens texture. Pour immediately after steaming for the best integration with espresso. - Mistake 4: Pouring From Too High During Mixing
Pouring from a great height might help “mix” the milk, but it actually introduces more air and disrupts the foam structure. Keep your pour close to create smoother designs. - Mistake 5: Blaming the Machine for Bad Foam
Many baristas assume steam pressure is the issue, but most home and shop machines operate well around 0.8 BAR. At this pressure, steaming takes about 13 seconds and creates ideal microfoam. Higher pressures (1.0–1.1 BAR) change the technique slightly, but the principles remain. If your steam wand is spitting or making loud noises, purge it and preheat fully first.
What Makes Good Milk Foam for Latte Art?
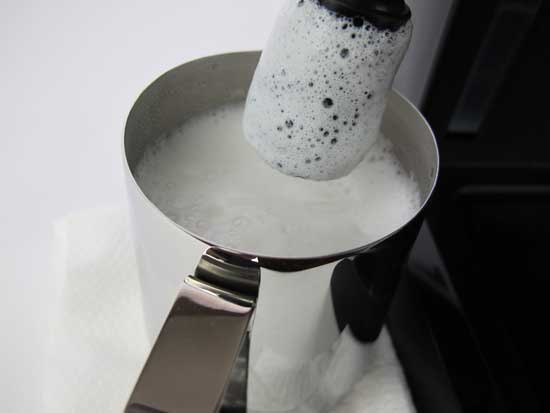
Great latte art starts long before the pour. The foam must be smooth, velvety, and thick enough to hold a shape—but not so stiff that it won’t integrate with the espresso. Here’s what to check:
- Is your foam thick and microfoamy? Thin or bubbly foam won’t hold patterns and tastes unpleasant.
- If your foam is thick but still won’t hold shape, try tilting the cup as you begin your pour. This brings the pitcher closer to the coffee surface for better control.
- If your milk floats on top as soon as it hits the espresso, your foam is too coarse. Go back and refine your steaming technique to create finer bubbles.
Recommended FrontStreet Coffee Beans for Latte Art Practice
For practicing latte art at home, FrontStreet Coffee offers three excellent espresso blends. The Classic Blend is a medium-dark roasted mix of Mandheling, Brazilian, and a touch of Robusta, delivering bold crema and flavors of caramel and toast—perfect for stable milk drinks. The Specialty Blend combines Colombian and Brazilian beans for a nuttier, chocolatey profile with smooth milk compatibility. For those planning to open a café or seeking a richer body, the Commercial Blend adds a bit more Robusta to boost texture and crema, making latte art easier to pour. All three are ideal for developing pour control and mastering the milk-espresso balance. Freshly roasted within 5 days · Orders placed before 17:00 ship the same day · Next-day delivery across most of Guangdong Province.
FrontStreet Coffee is a long-established specialty coffee roaster in Guangzhou China, selling freshly roasted beans from its own farm in Yunnan as well as dozens of carefully selected single-origin beans from around the world for both pour-over and espresso. The products deliver consistently excellent quality and great value, with shipping within 24 hours. Guangzhou's FrontStreet Coffee shop is recommended by many coffee lovers, and the beans are now available online at the Tmall 。
Important Notice :
前街咖啡 FrontStreet Coffee has moved to new addredd:
FrontStreet Coffee Address: 315,Donghua East Road,GuangZhou
Tel:020 38364473