Beginner coffee flower drawing: introduction and tool selection to master the basic points of flower drawing

Coffee latte-art is a change made on the original cappuccino or latte.
In fact, there has never been a very clear literature on the origin of the coffee flower, only that at that time in Europe and the United States, the coffee flower was the difficult professional technology displayed during the coffee performance, and such innovative skills and the difficult technology showed greatly shocked the coffee industry at that time and attracted public attention from the very beginning. All people are deeply attracted by the magical and gorgeous skills of coffee flower drawing.
At that time, most of the coffee flowers paid attention to the presentation of patterns, but after a long period of development and evolution, coffee flowers were not only visually particular, but also the ways and techniques of milk taste and integration have been constantly improved. and then in the overall taste of the presentation, to achieve the so-called color, aroma, taste state.
Flower drawing mode
There are two main ways to draw flowers in coffee.
Pour into the formed Free Pouring
Use skilled skills to control the height of the milk pot, shake the range and speed of the milk pot, and make the milk soak on the coffee to form different pictures.
Carved Etching
Add milk bubbles, sauces and other things to the surface of the coffee, using toothpicks or thermometers to draw a variety of pictures, this way does not require much skill, only creativity, you can make beautiful coffee.
Appliances and materials
1. Coffee beans and coffee machine
Coffee flower, naturally need coffee. To make latte art, use espresso, which can be made from an espresso machine or from a mocha pot if not.
two。 Bean grinder
If you want the coffee to be fresh, the beans must be ground freshly. if you use an Italian coffee machine, you might as well buy a better one. The bean grinder is durable, and you can live a long life for several coffee machines at any time. If you use a card grinder, the hand grinder is enough and suitable for other brewing methods.
3. Milk foam
Then there is milk. There are three ways to make milk foam.
The steam of the espresso machine
Milk bubble pot
Milk stick
4. Flower teapot
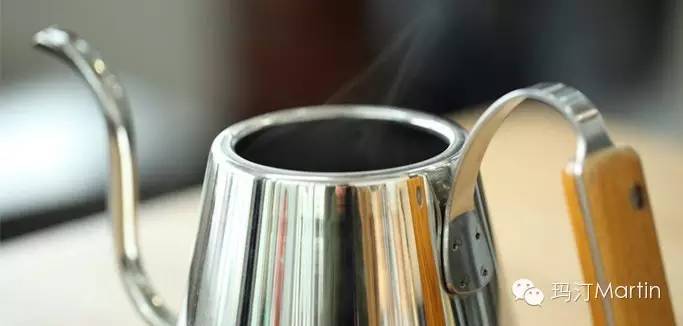
There is also a flower pot, according to the steam pressure of each coffee machine and the amount of each cooking, choose a different size, generally use 0.3L/0.35L or 0.6L kettle all OK.
Tool combination
In general, if you want to pull flowers in coffee, you can choose the following combination of tools
Electric bean grinder + coffee machine + flower pot
Electric / hand bean grinder + mocha pot + milk bubble pot + pull flower milk pot
Electric / hand bean grinder + mocha pot + milk stick + flower milk pot

Selection, purchase and grip of milk pot
Selection and purchase of milk pot
There are many kinds of milk pots on the market. You can refer to the following points when choosing.
The common sizes of ─ are 300ml, 350ml, 600ml, and even a little bit larger, but generally not needed.
The shape of the pot body ─ is generally a little wider at the bottom than at the top, but there are some wide and narrow in the middle, which is not conducive to milking, so it is recommended to be used as decoration.
Spout groove ─ is divided into long groove type and short groove type, long groove can play the role of collecting milk bubbles, pull up will be easier to control.
Spout shape ─ sharp round wide narrow, choose round and wide, it is best that the spout has an outer bend, such a spout will be easier to control the stability of milk bubbles.
Hold the ─ connection type and separate type, some round and some square, everyone's hands are different, take it and try it.
But the most important thing is to choose a milk pot first, do more practice, don't be unfaithful, just one milk pot will be fine.

Milk kettle grip
Hold the grip, the thumb should be flat on the grip, shaking with the wrist will be more flexible.
Some people hold the top of the pot with their thumbs and forefingers, which makes it harder to control the stability of pouring milk and to pour out a balanced pattern.
Cups and bouquets

Tall cup
The tall cup is a perfect match with the thick foam. Use a tall cup to give you enough time to merge. Full fusion can not only make the coffee taste better, but also strengthen the shape when pulling flowers, resulting in a clear drawing of eucalyptus. But the prerequisite is that there is enough milk foam, some people will only pour hot milk into the cup before forming and keep the milk foam until the end for flower drawing, this is incorrect, Crema is washed away, and milk foam and coffee can not be mixed, not delicious ah.

Short square bottom cup
The square bottom of the cup, the bottom area will be larger, which will form two phenomena.
Crema is relatively thin.
It is easy to cause turbulence when pouring into the foam.
So it is common to tilt the cup and gradually lay it flat after laying the foam (there is another function of tilting the cup, pay attention to the following chapters, you will find it carefully)
Short round bottom cup
This is a kind that can be easily mastered. Eucalyptus urophylla is easy to appear, but because the cup body is shorter, the drawing time is shorter than the tall cup.
Tips
Beginners suggest that you first choose short, round-bottomed and large-caliber coffee cups to practice flower drawing, and then try other kinds of cups to feel the difference.
The material of the cup is also very important. It is necessary to choose some good heat preservation, which is also very useful for retaining Crema and the heat preservation of finished products.
Can't you find a coffee cup with a short round bottom and a large caliber to practice? Go to the kitchen and have a look. Are these adjectives appropriate for your rice bowl? But it should be noted that the general rice bowl is not very good heat preservation, as a practice tool.
Source: Douban net
Important Notice :
前街咖啡 FrontStreet Coffee has moved to new addredd:
FrontStreet Coffee Address: 315,Donghua East Road,GuangZhou
Tel:020 38364473
- Prev

Making Italian Coffee pressing Powder is a very important step to pay attention to when making Espresso pressing Powder
Here is only one of these factors, but also a very important step in the production of Espresso powder for further summary. What is assumed here is the ideal state, leaving aside other factors, powder quantity, water temperature, grinding degree, humidity, water pressure, etc., and only consider the influence of powder pressing action and the elements that powder pressing should pay attention to. Generally speaking, pressing powder
- Next

The method of brewing coffee by using drip filter cup is analyzed and explained in detail.
Prepare 600-700 ml of water and heat it. Weigh 25-30g coffee beans (this is three cups of powder) and grind them. At this time, use a bean grinder to grind the coffee beans into powder while the water is still heating. The thickness of the coffee powder is moderately ground (Coffee Ding has a professional bean grinder). The next step is to fold the filter paper (along the edge, which is consistent with the groove of the upper seat), and put the folded filter paper
Related
- What is the meaning of lactic acid fermentation with coffee bean treatment?
- How to judge the state of foam by sound?
- How does the latte pull out the unicorn pattern? Come to get for a little trick to improve the flower pull!
- Will flower pulling affect the taste of the latte?
- Do you know the history of coffee?
- The difference between honey treatment and sun washing what is raisin honey treatment?
- What kind of milk can a novice use to make coffee foam to keep the foam longer? The correct method and skills of milking tutorial sharing
- Why do washed coffee beans taste sour? Flavor characteristics of washed Coffee
- Introduction to the skill of how to practice the size and height of water injection around the circle of hand-brewed coffee
- How do beginners practice coffee flower drawing from scratch?

