How to Make and Texture Milk Foam for Latte Art
If you’ve ever watched a skilled barista pour silky microfoam into a perfect heart or tulip, you’ve probably wondered: how do they get the milk so smooth? While many focus on pouring technique, the real foundation of great latte art starts with properly textured milk foam. Without it, even the best pour falls flat.
To make great milk foam for latte art, you need to steam milk to an ideal finishing temperature between around 60–65°C (felt as ‘hot but tolerable’), aerate it only until it reaches body temperature (~37°C), and then properly mix the foam and milk together. These steps control texture, stability, and pourability—key to clean, crisp designs.
Why Milk Foam Matters More Than Pouring Skill
Many assume latte art is all about wrist movement. But the truth is, without well-textured milk, no amount of pouring skill will save your cup. Great foam comes from properly steamed milk with fine, integrated microbubbles—not big, bubbly foam sitting on top of hot milk. That’s why mastering milk steaming fundamentals is the real shortcut to better latte art.
Step-by-Step: How to Steam Milk Foam Like a Pro
1. Understand Your Steam Wand & Tools
Before you even touch milk, understand your espresso machine’s steam system. Know why you purge (pre-steam) the wand before and after use—it clears condensation and sanitizes. Always have a towel ready and clean as you go; cleanliness impacts steam performance and milk quality.
2. Position the Steam Wand Correctly
The wand tip should sit just below the milk’s surface. Where you place it—depth and angle—determines whether you aerate (create foam) or stretch and heat the milk. Finding the right ‘sweet spot’ comes with practice, but aim to keep the pitcher (latte art jug) tilted and the wand near the milk’s surface to start.
3. Control Temperature: Two Critical Stages
Milk starts cold—ideally straight from refrigeration at around 5°C. Steam until it reaches body temperature (~37°C). This is when you stop creating foam. Then continue steaming to the final temperature: around 60–65°C. At this stage, the milk should feel too hot to hold for more than a couple of seconds—but you can still grip the pitcher. Avoid relying on a thermometer; learn to use your hand.
4. Find the Right Angle & Motion
There’s an optimal pitcher angle and wand position—almost like a ‘dead angle’—that helps create a whirlpool. Keep the pitcher’s spout slightly raised and tilt the jug as you steam. This angle, combined with slight movement, encourages a vortex (whirlpool) that pulls larger bubbles down and integrates the foam smoothly.
5. Create and Manage the Vortex
The vortex (or whirlpool) is essential for integrating foam and smoothing the milk’s surface. To create one, don’t submerge the wand too deep. Let it sit just under the surface to encourage a spinning motion. This motion pulls big bubbles from the top down, leaving a clean, glossy surface. Adjust your angle slightly—just a few degrees—to control it.
6. Manage Air Intake (“Ingress”)
When you first place the wand near the milk, you’ll hear a tearing or ‘ripping’ sound—that’s air being pulled in, or ‘ingress’. This is how foam is created. You want to introduce air only while the milk is still cold, up to around body temperature. Once it warms up, lower the pitcher slightly to reduce how much air enters. Stop adding air before reaching the final temperature. Too much air creates large, dry bubbles on the surface.
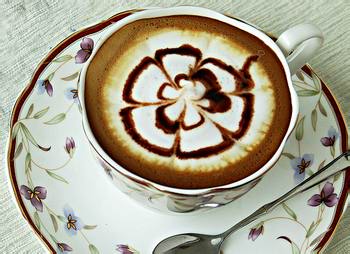
How to Texture and Polish Steamed Milk
After steaming, milk isn’t yet ready to pour. It often separates into hot liquid milk below and a layer of larger bubbles on top. Here’s how to fix that:
- Shake & Settle: Tap the pitcher gently on the counter to pop large bubbles, then swirl the milk vigorously. This blends the foam into the milk, creating a uniform microfoam.
- Alternative Mixing: For best results, pour the milk back and forth between two jugs. This thoroughly mixes the layers. The article recommends this method over simple shaking.
- Keep It Mixed: Before pouring, keep the milk moving in the pitcher. Don’t let it sit—any pause can cause the foam and milk to separate again.
Frequently Asked Questions
What’s the ideal temperature range for steaming milk for latte art?
Start by aerating milk when it’s cold (around 5°C), and stop adding air once it reaches body temperature (~37°C). Then continue heating to a final temperature between 60–65°C—the point where the pitcher feels too hot to hold for more than a couple of seconds, but you can still grip it. Use hand feel, not a thermometer.
How do I find the right steam wand position for milk texturing?
The steam wand tip should sit just beneath the milk’s surface. Position it to create a whirlpool or vortex—this helps integrate foam and smooth the surface. Tilt the pitcher and keep the wand near the surface initially to introduce air, then adjust depth to stretch and heat the milk without creating large bubbles.
Why shouldn’t I rely on a thermometer when steaming milk?
While thermometers can help, the article argues that hands-on learning is more effective. With practice, you’ll learn to judge the right temperatures by feel: body temp (~37°C) for ending aeration, and a hot-but-bearable temp (~60–65°C) for the final steam. Over-reliance on tools can slow down skill development.
What is the ‘vortex’ and why does it matter?
The vortex is the whirlpool motion you create while steaming milk. It pulls larger bubbles downward and integrates them into the milk, creating a smoother, glossier texture. A proper vortex is key to clean, bubble-free foam that pours well for latte art.
Do I really need to shake and swirl the milk after steaming?
Yes. After steaming, milk often has separated layers: hot milk with foam on top. Shaking removes big bubbles, and swirling (or better, pouring between two jugs) combines the foam and milk into uniform microfoam. Skipping this step will result in poor texture and failed latte art pours.
How do I avoid big bubbles on top of my steamed milk?
Avoid adding too much air after milk warms past body temperature. Keep the wand just below the surface to minimize large bubble formation. Once you reach the target temp, stop steaming and ensure you’ve mixed the milk properly afterward to remove any remaining bubbles.
Recommended FrontStreet Beans for Latte Art
For latte art, we recommend FrontStreet Coffee’s Ethiopia Yirgacheffe, known for its bright citrus and floral notes with a silky body—perfect for showcasing smooth microfoam. The Brazil Cerrado offers chocolatey sweetness and a heavy mouthfeel, ideal for classic latte flavors. Lastly, try the FrontStreet Guatemala Antigua for a balanced profile with caramel and mild spice, great for texturing practice. All three beans highlight the care put into steaming and pouring. Freshly roasted within 5 days · Orders placed before 17:00 ship the same day · Next-day delivery across most of Guangdong Province.
FrontStreet Coffee is a long-established specialty coffee roaster in Guangzhou China, selling freshly roasted beans from its own farm in Yunnan as well as dozens of carefully selected single-origin beans from around the world for both pour-over and espresso. The products deliver consistently excellent quality and great value, with shipping within 24 hours. Guangzhou's FrontStreet Coffee shop is recommended by many coffee lovers, and the beans are now available online at the Tmall 。
Important Notice :
前街咖啡 FrontStreet Coffee has moved to new addredd:
FrontStreet Coffee Address: 315,Donghua East Road,GuangZhou
Tel:020 38364473