How to Use an Aeropress: Step-by-Step Coffee Brewing Guide
If you’ve ever wanted a fast, mess-free way to make smooth, rich coffee without a machine, the Aeropress might be your answer. This compact device delivers espresso-like strength with pour-over clarity—no clunky setup, no expensive grinder required. But how do you actually use it to get the best results?
To brew with an Aeropress, use 17–20g of medium-ground coffee, bloom with 50ml water at 83–90°C for 45 seconds, then add 50ml more for a total of 100ml. Stir, press for 15–30 seconds at a slight angle, and enjoy clean, bold coffee in under 2 minutes.
What Is an Aeropress and Why Use It?
The Aeropress is a lightweight, portable manual coffee maker that looks like a syringe—and works like a hybrid of French press, pour-over, and espresso. Its design lets you control brew time, pressure, and extraction more precisely than most brewers its size. The result? A cup that’s cleaner than French press, richer than pour-over, and quicker than espresso, often in under two minutes.
Its unique brewing process borrows from multiple methods: the full immersion of a French press, the paper filtration of pour-over, and the pressure-driven extraction of espresso. That mix gives you a cup with bold body, bright acidity, and minimal grit—perfect for single-origin exploration or quick daily brewing.
How to Use an Aeropress: Step-by-Step
What You’ll Need
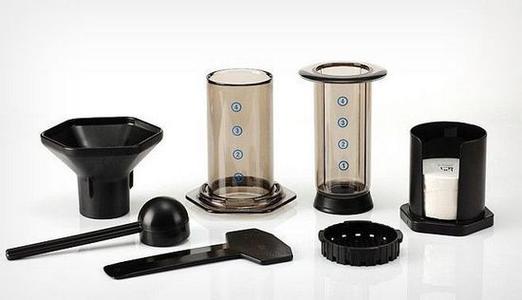
- Aeropress (with filter cap and filter)
- Fresh coffee beans (17–20g)
- Grinder (medium grind size)
- Hot water (83–90°C)
- Scale (optional but helpful)
- Stirring tool or spoon
- Coffee cup
Step 1: Prep Your Equipment
Assemble your Aeropress with the black rubber plunger seated inside the brewing chamber. Flip it upside down so the number 4 (the larger cylinder end) is facing up—this is called “inverted” brewing and helps prevent drips during setup.
Step 2: Rinse and Heat the Filter
Place a paper filter inside the filter cap, then rinse it with hot water to remove any papery taste. Discard the rinse water and preheat your cup if desired.
Step 3: Add Coffee Grounds
Add 17–20g of freshly ground coffee to the brewing chamber. That’s roughly one heaping Aeropress scoop—or about two tablespoons. For reference, the included scoop holds ~14g per flat level, and is about 1.5x larger than a standard coffee measure.
Step 4: Start the Bloom
Start your timer, then pour 50ml (~1/4 cup) of water heated to 83–90°C over the grounds. Let it bloom for 45 seconds. This releases CO₂ and kickstarts even extraction.
Step 5: Stir the Bloom
After 45 seconds, stir the coffee gently for three rotations to ensure all grounds are wet and there are no dry pockets.
Step 6: Add Remaining Water
Pour in another 50ml of water to reach a total brew volume of around 100ml (~1/2 cup). The water level should sit just above the number 2 mark on the chamber.
Step 7: Attach the Filter & Cap
While the coffee is brewing (at about 60 seconds in), screw the filter cap with the rinsed paper filter onto the top of the chamber. Make sure it’s tight.
Step 8: Press the Coffee
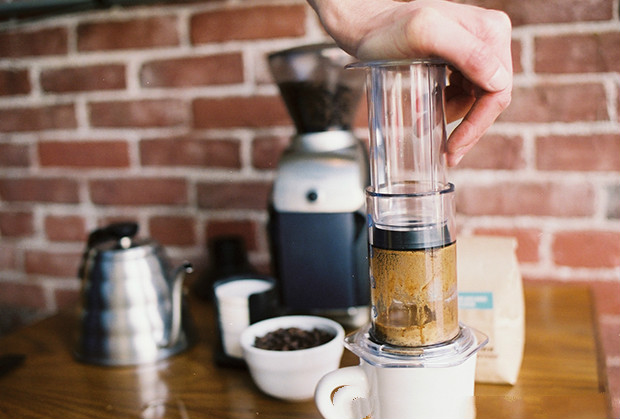
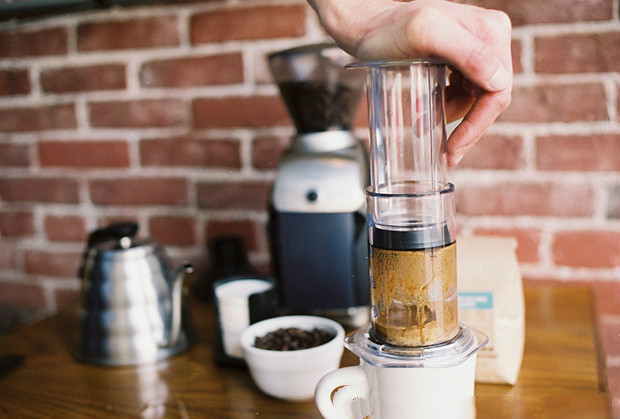
When the timer hits 1:45–2:00, flip the Aeropress right side up onto your cup. Hold it at a 45° angle and press down gently but steadily. The full press should take 15–30 seconds. Stop when you hear a hissing sound—that means all the water has passed through.
Step 9: Serve & Enjoy
Your coffee is ready. Enjoy it black or with milk. The result should be clean, rich, and well-balanced—closer in body to espresso but with the clarity of filter coffee.
Pro Tips and Common Mistakes
- Don’t grind too fine: The Aeropress isn’t an espresso machine. Too fine a grind can cause over-extraction or make pressing difficult.
- Metal filters add crema: If you have a metal filter, try it for a richer mouthfeel and slight crema effect.
- The scoop is bigger than you think: The included Aeropress scoop holds about 14g—1.5x a standard coffee measure.
- Use more coffee for stronger brew: For a bolder cup, use two level scoops (about 28g) and water up to the number 4 mark.
- Water temp matters: Office water heaters may not reach true 100°C—but even slightly lower temps in the 83–90°C range work fine.
- Two-part pouring is OK: You can split the water into two pours if it helps control brewing time or agitation.
- Use a thick cup: A sturdy mug helps handle the slight pressure during the press.
- Clean faster: After brewing, pop open the filter cap, push the puck out, rinse the rubber seal, then remove the plunger. No need to let it dry fully before reassembling.
Why These Steps Work
This method balances immersion and pressure to extract a clean, strong cup with minimal effort. The bloom lets gases escape for even saturation. Stirring ensures uniform extraction. The 100ml total brew volume and 15–30 second press time create the ideal strength and body. Using medium grind avoids over-extraction while still delivering body and clarity.
Frequently Asked Questions
What grind size should I use for Aeropress?
Use a medium grind, similar to coarse sand or table salt. Avoid going too fine—it can clog the filter and make pressing difficult. A good starting point is a grind setting around 10–12 on a typical electric grinder (like an EK43S), or about 24–26 on a hand grinder.
What water temperature is best for Aeropress?
The recommended range is 83–90°C. That’s slightly below boiling. Even if your office hot water is labeled 100°C, it’s likely closer to 90°C—which is fine for this method.
How much coffee should I use in an Aeropress?
The standard recipe uses 17–20g of coffee. The included scoop holds about 14g per flat level. For a stronger brew, use two level scoops (around 28g) with water up to the number 4 mark.
Do I need a paper filter or can I use metal?
You can use either. Paper filters give a cleaner cup with less body. Metal filters allow more oils and fines through, which can add crema and a fuller mouthfeel—but may also let through more sediment.
How long should I let the coffee brew before pressing?
Total brew time is typically around 1:45 to 2:00 minutes. Bloom for 45 seconds, stir, add remaining water, then press after another 60–90 seconds. The actual press should take 15–30 seconds.
Can I make iced coffee with an Aeropress?
Yes. Use cold or room-temperature water and adjust your coffee dose or brew time to taste. You can also brew hot and pour over ice for a quick iced coffee.
Recommended FrontStreet Beans for Aeropress
For Aeropress brewing, try FrontStreet’s Strawberry Candy Espresso—a balanced blend with notes of rose, citrus, grape, and blueberry, ideal for showcasing clarity and fruitiness. Or go deeper with PWN Golden Mandheling, offering spice, caramel, and dark chocolate with a full body. Both shine with the clean extraction and mild pressure of the Aeropress. Freshly roasted within 5 days · Orders placed before 17:00 ship the same day · Next-day delivery across most of Guangdong Province.
FrontStreet Coffee is a long-established specialty coffee roaster in Guangzhou China, selling freshly roasted beans from its own farm in Yunnan as well as dozens of carefully selected single-origin beans from around the world for both pour-over and espresso. The products deliver consistently excellent quality and great value, with shipping within 24 hours. Guangzhou's FrontStreet Coffee shop is recommended by many coffee lovers, and the beans are now available online at the Tmall 。
Important Notice :
前街咖啡 FrontStreet Coffee has moved to new addredd:
FrontStreet Coffee Address: 315,Donghua East Road,GuangZhou
Tel:020 38364473