Cultivation techniques of Baoshan small-grain Coffee
I. the environmental conditions required by small grains of coffee
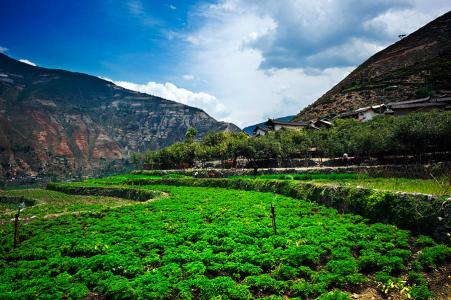
Coffee is native to Ethiopia in north-central Africa. It is located in the lower layer of tropical rain forest with latitude 6 ℃ 9 °N, longitude 34 mi 40 °E, elevation 1300 mi 1900m, precipitation 1600-1900mm and average annual temperature 20 min. In the long-term evolution process, due to the joint action of biology and climate, coffee has specific requirements for environmental conditions, such as calm wind, cool, shady or semi-shaded environment. Adapt to the planting environment conditions: the annual average temperature is 18 ℃ 21 min, the whole year is frost-free, the annual rainfall is more than 1250mm, the distribution is uniform, and the areas with certain rainfall in flowering and young fruit stage are the most suitable for coffee growth and development, and the rainfall can also grow and develop in 700-2000mm coffee. The soil PH5.5-6.5.The soil is weakly acidic, loose and fertile, the thickness of the soil layer is more than 60cm, the groundwater level is less than 1m, and the slope of the mountain is less than 25 °. The planting altitude varies depending on the microclimate, and the general altitude is 700-1500m.
2. Coffee seedling raising technology
(1) seed selection techniques
Improved varieties are the basis of cultivating strong seedlings and increasing yield per unit area, and seeds must be carefully selected. Seeds must be selected on a good mother tree. The standard of excellent mother tree is: the tree age is more than three years, high and stable yield, good plant type, no diseases and insect pests, strong resistance. When selecting seeds, we must choose the fruit that is fully mature, normal in shape, full in shape, basically the same in size and with two seeds.
(2) seed production techniques
After choosing the fruit that is good for seed production, the seed can be produced. First of all, it is necessary to peel the coffee fruit. If there are not many seeds to be made, it is best to use manual peeling, because mechanical peeling is easy to cause mechanical damage to the seeds. After peeling, it is necessary to ferment to remove pectin. Fermentation time is generally 24ml 36 hours, it is appropriate to knead seeds by hand to feel rough and non-slippery, too long time will make seeds black and rot. After fermentation, rinse the seeds and pick up the empty and damaged coffee beans floating on the surface of the water. Spread the washed seeds in a cool place to dry. The seed water content is 12% 14%. The selected improved varieties should not be exposed to the sun, because the coffee beans crack after the sun, thus affecting the emergence rate. After drying, use gunny bags or bamboo baskets to store in a cool and ventilated place. The storage time of coffee seeds should not be too long (the germination rate of coffee seeds decreased obviously after 4 months of storage). There are 5000 seeds of small coffee per kg, and 2500 effective seedlings can be produced. Generally, a coffee garden of 9.99mu can be planted after raising seedlings per kilogram of seeds.
(3) Seedling raising techniques
1. Main technical processes
Selected → whole seedling bed → seed treatment → seed sowing → cover grass → seedling bed management → uncovered grass → irrigated → seedling fresh-keeping → cone false hole → seedling compaction → watering root water → seedling management
2. Nursery selection
The coffee nursery should be located in the land with convenient transportation, close to the water source, leeward to the sun, fertile soil, flat terrain, no pollution in atmosphere and water, and the content of heavy metals in soil and pesticide residues do not exceed the standard.
3. Nursery construction
After selecting a good piece of land, to level the land, first turn 20-30mm deeply, after a week, hoe fine and remove stones, root weeds, etc., according to the terrain planning into 1.1mi 1.2m wide, about 10m or more long, together into a concave, concave height and high level of nutrition bags, the soil moisture fine soil together to add rotten fine farm manure (cattle, sheep, pig manure) to mix well. Where possible, add mountain base soil and mix well according to the proportion of 10:3:1 (10 parts of soil plus 3 parts of farm manure and 1 part of mountain base soil) to prepare for bagging. Nutrition bag specification 15cm ⅹ 20cm, cut holes at the bottom of the bag for drainage, and then use tools such as bamboo tubes or beverage bottles to put nutrient soil into nutrition bags. Each row of 15 bags can be placed neatly and vertically, each row can hold 60-70 000 plants, soil moisture width 1.1-1.2 m, soil moisture and interval soil moisture 40-50cm, convenient for nursery management, length varies from 10 m, shade pillars are planted according to 4m pile distance of 5m, column height is 1.8-2m, and soil is 35-50cm. Then the pillars are crisscrossed with bamboo sticks or thin wooden sticks or iron wire, and the shading net can be laid with 1 inch iron wire, and the density of the plastic shading net is 75% 85%. Finally, the shading net is tightly fixed on the wire, surrounded by a shade net, and the nursery is built. Water pipes can be erected where conditions permit.
4. Seedbed finishing
The nursery land that has been hoed and fertilized is spaced 40-50cm, soil moisture width 1.2m-1.3m, height 15-20cm, soil moisture spread flat, and then spread with methamphetamine powder to control pests, and then spread a layer of 5-10cm thick river sand. Pay attention to changing the sprouting seedbed once a year, and avoid continuous cropping
5. Seed treatment
The prepared seeds, pick up broken beans, defective beans, elephant beans, you can prepare for sowing. Soak the seeds in clean water or 40Mel 45 ℃ warm water for 24 hours before sowing, then take them out and mix them with carbendazim and other fungicides, then sow the seeds.
6. Sowing technology
The best sowing time is from February to March, sowing seeds evenly on the sand bed so as not to accumulate, sowing density 0.5kg/, and then covering about 2cm thick river sand after sowing.
7. Cover grass
Cover a layer of straw or mountain straw with a thickness of 5-10cm, so that there is no sand. After covering the grass, you can also cover the film to increase temperature and moisturize according to the conditions.
8. Drench water
Drench the water evenly and wet the soil layer with 15-20cm. Seeds germinate 40 days after sowing, and seeds are unearthed 85 days after sowing. Check and replenish water regularly before unearthing to prevent drought.
9. Uncover the grass
The grass can be unearthed when the seedlings are unearthed for about 85 days. When uncovering the grass, you should handle it carefully so as not to pull up or hurt the seedlings.
10. Seedling management
It is mainly fertilization, watering, weeding and pest control, and carbendazim and methyl thiophanate are used to control seedling blight. When the cotyledons of the seedlings are fully unfolded and the stems are erect and stable, they can be bagged.
11. Selection of seedlings and false planting
Before selecting and planting seedlings, it is necessary to pour through the bottom water in order to raise the seedlings, and the main root is as long as 10-16cm. In order to facilitate seedling extraction and reduce root injury, it must be watered thoroughly 24 hours before seedling emergence. Seedlings should be selected with erect stems, sound cotyledons and strong seedlings. If the cotyledons are not stable and the seed coat has not fallen off, it is not easy to get the seedlings, so that it is qualified to take a batch. Soak seedlings to keep fresh with clean oil-free buckets, boxes and other containers to hold water, water depth 10cm. After adding the right amount of carbendazim, the seedlings are neatly put into the container for fresh-keeping and disinfection, and the seedlings can be ready to be planted. The nutrition bag seedbed was drenched with water 4 hours before the cone false implant hole. A hole with a depth of 10cm and a diameter of 1.5-2cm is tapered in the nutrition bag.
The selected main root, trunk bending and other diseased and weak seedlings are not used; if the main root is too long, it should be cut off and 5-7cm can be retained. Put the seedling into the planting hole, the main root should not be bent. Insert the stick into the hole and shake around and then put the seedlings into the soil to make sure that the roots of the pseudo-planted seedlings are extended and the seedlings are straight. Evenly watering after planting, be sure to pour through the fixed root water, pouring through the fixed root water is the key to the survival of the seedling.
12. Seedling management
Pay attention to regular watering, pull out weeds and control diseases and insect pests. After the Beginning of Autumn, he should pay attention to the prevention and control of brown spot, and control it with carbendazim and thiophanate methyl, etc., and apply 2 Mel three times to rot the feces and urine of acquaintances, and then pour them at the rate of 1:3. The plant height of the seedlings planted in the same year was 15cm, and 5 pairs of true leaves could come out of the nursery; the plant height of large seedlings (planted in the second year) was 25cm, at most not more than 30cm, and 7 pairs of true leaves could be planted in the nursery.
III. Planting techniques of coffee seedlings
(1) main technological processes
Select seedling → seedling treatment → seedling transport → dig planting hole → application base fertilizer → mixed fertilizer → coffee seedling foot leaf → tear nutrition bag → cut off seedling curved root → fixed seedling → cultivation soil → fixed root water → check seedling defect → establishment file
(2) planting period
Areas with irrigation conditions are planted from mid-February to March, and coffee plantations without irrigation conditions should be planted before the rainy season at the end of June.
(3) selection of seedlings for colonization
Through the seedling refining in the nursery for more than one month, the variety is pure, the seedling is strong, the leaf color is thick green, the plant height 25cm, the shortest is not less than 15cm, the highest is not more than 30cm, the true leaf is 6 Mel 8 pairs, the non-branching seedling is better, and the seedlings used to check the seedling defect can have 1 Mel and 2 pairs of branches. Spraying insecticides and fungicides one week before seedling emergence to prevent diseases and insect pests from spreading into the field can reduce the cost of control; for convenience of transportation, watering is not allowed within a week before seedling emergence, and impure and inferior seedlings are removed before seedling emergence to prevent poor quality seedlings from mixing and planting in the field.
(4) Seedling handling
Whether in-situ seedling raising or non-local seedling transfer, there is a distance from the nursery to the planting site, so careful handling should be taken to reduce seedling damage and waste. Carry the seedlings on the spot and finish planting on the same day. Long-distance seedling transport, seedling transportation and placement should be handled gently, and appropriate shade objects and appropriate amount of water should be added.
(6) digging fixed planting holes
The planting plant spacing is determined according to the requirements of each coffee base or farmers, generally, the plant spacing is 100cm, the row spacing is 200cm, the depth of the planting point is 30cm, and the hole mouth width is 40cm.
(7) apply sufficient base fertilizer
The hole soil will be hoed fine, and after the planting hole is dug up and checked, the base fertilizer should be applied, and the fertilizer should be rotten and finely crushed. Oil withered 0.8-1.5kg or farm manure dry manure 1kg (wet manure 1.5kg) were applied, and phosphate fertilizer 0.1kg was added to each planting site. The fertilizer was mixed with topsoil to prevent the insufficient maturity of fertilizer and burn the roots of seedlings.
(8) colonization
Generally, on the flat or flat land with a slope of less than 5 °, the plant row spacing is 0.8m × 2m, planting 416 plants per mu; on the slope land above 5 °, the contour ring mountain is required to reclaim and plant; on the slope land of 5 °- 15 °, it is appropriate to transform the small terrace with a row spacing of 0.8m m × 2m, planting 333 trees per mu; on the slope land above 15 °, the row spacing is 0.8m×2.5-3.0m, planting 333278 plants per mu.
The cotyledons and small and thin real leaves at the base of the stem of the selected seedlings were erased to reduce nutrient consumption and water evaporation, which was beneficial to the survival of seedlings. Generally keep the length under the leaves 7-10cm, mature leaves not less than 3 pairs as the principle. When planting seedlings, the nutrition bags must be completely discarded and centralized treatment. The curved main root must be cut off so that the seedlings can grow normally.
After planting, the evenly crushed fertile soil and topsoil will be backfilled around the nutrition block, and gently compacted with hand and hoe. Ensure that the depth of nutrition pile is 15cm, the height under the leaf is 2-3cm, the big seedling can reach 17cm, the height under the leaf is 3cm, and take the seedling trunk as the center, sort out a small flat-bottomed pit with a diameter of 30-40cm and a deep 5cm for watering.
(9) watering fixed planting water
Pour water evenly in the small pond at the root of the seedling, each time not less than 5kg, and gently step on the soil around the nutrient dunes with your feet after the water is absorbed dry, so that the soil and nutrient dumps are tightly combined, and then pour a small amount of water or cover a layer of fine dry soil to reduce evaporation to ensure survival. In coffee gardens with conditional conditions, mulch can also be used to cover around the seedlings, which can preserve water, keep heat and restrain weeds. The covering materials are plant straw or plastic film, and those covered with plant straw can also increase soil organic matter. it's good for coffee growth.
(10) check seedlings to fill gaps
Strengthen the management, check row by row after planting for a week, and timely replant the dead seedlings with strong seedlings of the same age with soil, so that the seedlings in the whole garden are complete.
FrontStreet Coffee is a long-established specialty coffee roaster in Guangzhou China, selling freshly roasted beans from its own farm in Yunnan as well as dozens of carefully selected single-origin beans from around the world for both pour-over and espresso. The products deliver consistently excellent quality and great value, with shipping within 24 hours. Guangzhou’s FrontStreet Coffee shop is recommended by many coffee lovers, and the beans are now available online at the Tmall 。
Important Notice :
前街咖啡 FrontStreet Coffee has moved to new addredd:
FrontStreet Coffee Address: 315,Donghua East Road,GuangZhou
Tel:020 38364473

- Prev
Coffee Story| A coffee "technology control" unknown life (1)
Camel coffee shop although small, layout is very reasonable to love coffee is equal to choose a full of temperature and aroma of life style, if unfortunately become a coffee technology control? Congratulations, you have successfully embarked on a hard and happy road of burning money. It's a warm, fragrant scene, a floor-to-ceiling window with bright yellow lights, and someone sipping coffee.
- Next
Yunnan coffee production accounts for 99% of the country's lack of processing standards.
A cup of coffee costing tens of yuan is common in metropolises. However, in Yunnan Province, the main coffee producing area in China, the purchase price of coffee beans is about 15 yuan per kilogram. According to the figures released by the Yunnan Coffee Association, during the 2015-2016 harvest season, the average price of a kilogram of coffee beans purchased by enterprises from curry farmers is between 13 yuan and 14 yuan, and the market trade price is maintained at around 16 yuan. Coffee production in Yunnan
Related
- Beginners will see the "Coffee pull flower" guide!
- What is the difference between ice blog purified milk and ordinary milk coffee?
- Why is the Philippines the largest producer of crops in Liberia?
- For coffee extraction, should the fine powder be retained?
- How does extracted espresso fill pressed powder? How much strength does it take to press the powder?
- How to make jasmine cold extract coffee? Is the jasmine + latte good?
- Will this little toy really make the coffee taste better? How does Lily Drip affect coffee extraction?
- Will the action of slapping the filter cup also affect coffee extraction?
- What's the difference between powder-to-water ratio and powder-to-liquid ratio?
- What is the Ethiopian local species? What does it have to do with Heirloom native species?