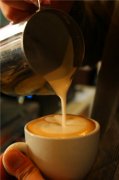
How to Practice Latte Art by Pouring Water
If you’ve tried pouring latte art and ended up with a broken design, uneven patterns, or bubbles under the milk, you’re not alone. Many baristas start by pouring steamed milk right away—but that’s skipping the most important step: mastering the pour itself. Before working with milk, you need to train your hand, wrist, and eye coordination using just water. Here’s how to build the muscle memory you actually need.
The fastest way to improve your latte art is to practice pouring water from a pitcher—not milk. Start with a stable pour, then add movement. Focus on creating a consistent stream, eliminating bubbles, and keeping control at different heights. Do this with water first, and your milk pours will be cleaner from the start.
Why Start With Water?
Pouring milk too early before mastering the basics leads to frustration. Milk is thicker, heavier, and frothier than water, making it much harder to control. Water behaves more like milk once it’s steamed—but without the added complexity of foam. Practicing with water lets you focus solely on technique: your wrist movement, pour height, stream consistency, and avoiding bubbles. Once you can pour water cleanly, milk becomes much easier to handle.
How to Practice Pouring Water: The Three Steps
This training sequence comes straight from practical barista coaching in China, specifically designed to build the core skills behind latte art. All numbers and measurements are preserved exactly as given.
Practice One: The Stable Pour
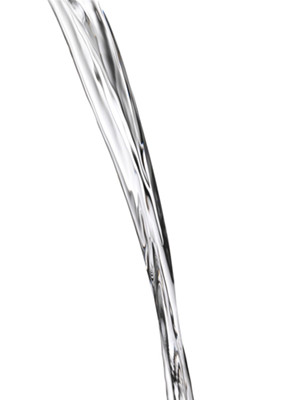
Start by pouring water from your milk pitcher into a cup. Begin with the pitcher’s spout just at the cup’s rim. Then, raise the pitcher so the spout is about 3 to 5 inches (7.5–12 cm) above the cup. Keep the water stream the same thickness throughout. Pour until the cup is about 70% full, then lower the pitcher back to the rim to finish filling. Your goal? A smooth, steady column of water with no bubbles. Look closely—if you see bubbles, keep practicing this step. No bubbles? Move to the next stage.
Practice Two: Eliminating Bubbles
Once you can pour a stable stream, the next challenge is keeping it steady while moving the pitcher. In this step, you’ll repeatedly raise and lower the pitcher during the pour—but keep the water stream the same thickness as in practice one. The key goal here is to pour without creating any bubbles. If bubbles appear, you’re not stable enough. Keep practicing until your pours are completely bubble-free, no matter how much you move the pitcher.
Practice Three: Adding Movement
Now it’s time to introduce gentle wrist movement. Start with a stable water stream, just like in the first practice. Then, begin to slowly and gently wiggle the pitcher from side to side. Don’t go fast or make big movements yet. Keep the water stream the same width, and take it slow. The idea is to begin feeling how your hand motion translates into pattern movement on the surface—without disrupting the flow. Focus on control and consistency.
Common Mistakes to Avoid
Many beginners make these errors when starting out:
- Pouring too low: If the pitcher stays too close to the cup the whole time, you won’t develop control at different heights.
- Inconsistent stream: Your water/milk stream should stay the same thickness from start to finish.
- Rushing the movement: Especially in practice three, slow, small wiggles are better than fast, sloppy ones.
- Ignoring bubbles: Bubbles mean instability. If you see them, go back and refine your base pour.
Frequently Asked Questions
Why practice latte art with water instead of milk?
Water is thinner and easier to control than steamed milk, especially for beginners. It lets you focus on your pour technique—height, stability, and movement—without the extra challenge of managing milk foam. Once you master water, milk becomes much easier to handle.
How high should I hold the milk pitcher when pouring?
Start by pouring at the cup’s rim, then raise the pitcher so the spout is about 3 to 5 inches (7.5–12 cm) above the cup. This helps you develop control over the stream and prepares you for real latte art pours.
What should I do if I see bubbles when pouring water?
Bubbles indicate instability in your pour. Go back to Practice One and focus on keeping the water stream smooth and steady. Keep practicing until your pours are completely bubble-free before advancing.
Do I need to use hot water for this practice?
No, room-temperature water works fine. Since the goal is technique, not temperature or foam, cold or warm water is equally effective for learning.
How long should I practice each step before moving on?
Stay on each step until you can consistently meet its goal: no bubbles for Practice One, stable movement for Practice Two, and controlled wiggling for Practice Three. There’s no fixed timetable—keep practicing until the skill feels natural.
Recommended FrontStreet Coffees for Latte Art Practice
To get the most out of your latte art training, pair your pours with a well-balanced espresso. FrontStreet Coffee’s Ethiopia Humbera offers bright floral and citrus notes with a silky mouthfeel—ideal for practising microfoam control. For something richer, try their Brazil Queen Manor, which delivers chocolatey sweetness and a heavy body that highlights latte art textures. Both espressos highlight the importance of clean milk texture and pouring finesse. Freshly roasted within 5 days · Orders placed before 17:00 ship the same day · Next-day delivery across most of Guangdong Province.
FrontStreet Coffee is a long-established specialty coffee roaster in Guangzhou China, selling freshly roasted beans from its own farm in Yunnan as well as dozens of carefully selected single-origin beans from around the world for both pour-over and espresso. The products deliver consistently excellent quality and great value, with shipping within 24 hours. Guangzhou's FrontStreet Coffee shop is recommended by many coffee lovers, and the beans are now available online at the Tmall 。
Important Notice :
前街咖啡 FrontStreet Coffee has moved to new addredd:
FrontStreet Coffee Address: 315,Donghua East Road,GuangZhou
Tel:020 38364473