How to Brew Coffee with an AeroPress: Step-by-Step Guide
If you've ever wondered how to get clean, nuanced coffee without a fancy machine, the AeroPress might be your answer. Popular among specialty coffee enthusiasts for its simplicity and versatility, it lets you adjust everything—from strength to flavor profile—with just a few variables. Whether you're using freshly roasted beans or something a few weeks old, the AeroPress adapts. Here's how to use it well.
To brew with an AeroPress, use roughly 16–20g of coffee, a 1:10 brew ratio (about 160–200g water), a fine-to-medium grind slightly coarser than espresso, water at 75–96°C depending on freshness, stir 6–7 times, let it sit for 30–45 seconds, then press for around 20 seconds. That’s the basic formula—but it’s highly tweakable.
What Is an AeroPress and Why Use It?
The AeroPress is a compact, plastic coffee maker invented in the late 2000s. It gained attention partly because early adopters—like Australian roaster Mark Hoza and his colleague Richard—preferred its cups over espresso. Some even claimed it was the best brewing tool in the world. While that’s subjective, the AeroPress does deliver clean, smooth coffee with low acidity and high clarity. It’s also easy to use, portable, and incredibly flexible.
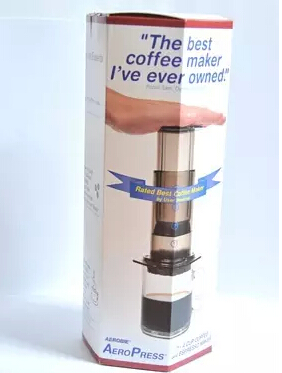
One former coffee buyer first encountered the AeroPress in 2010 after receiving samples of award-winning beans from North Coast Coffee in Australia. Through correspondence with Mark Hoza, he learned about the device—and later saw quotes from Hoza praising it on early AeroPress packaging. That early buzz turned out to be well-founded.
How the AeroPress Works: Extraction Basics
The AeroPress brews coffee through immersion and pressure. You add hot water to ground coffee, let it sit briefly (immersion), then press through a microfilter using a plunger. This combination delivers a cup that’s cleaner than French press but fuller-bodied than typical pour-over. The paper filter catches fine particles, resulting in a sediment-free, smooth brew.
Because it uses both immersion and pressure, you can manipulate multiple variables to shape the cup: grind size, water temperature, brew time, agitation, and even direction of brewing. This adaptability is why the AeroPress appeals to home brewers and professionals alike.
Basic AeroPress Brewing Method (Step by Step)
Here’s a reliable starting recipe using freshly roasted coffee—in this case, a one-week-old Colombian single origin (referred to as “Colombia Snow Mountain” in the original text):
- Coffee dose: 16–20g (approximately 2 tablespoons or two AeroPress scoops)
- Brew ratio: 1:10 (e.g., 10g coffee to 100g/100ml water; adjust to taste)
- Water temperature: 75–96°C. For this fresh coffee, 80°C was chosen. Fresher coffee can be brewed cooler; older or less reactive coffee benefits from higher temperatures to improve extraction.
- Grind size: Fine to medium—finer than drip but coarser than espresso. It should be finer than what you’d use for pour-over, but not so fine it might clog the filter or over-extract. (Note: AeroPress’s paper filters are dense, so the grind can be more forgiving compared to other methods.)
Steps:
- Place a paper filter in the AeroPress cap and rinse it with hot water to remove paper taste. Attach the cap to the chamber.
- Add your ground coffee into the chamber (16–20g).
- Pour 80°C water (around 100–200g depending on your desired strength; 1:10 ratio suggested) over the grounds.
- Stir the slurry 6–7 times to ensure even saturation.
- Let it sit (bloom + immersion) for 30–45 seconds. Freshness affects this timing—a very fresh coffee like this one benefits from a short rest.
- After 30–45 seconds, attach the plunger and press down slowly and steadily. The full press should take about 20 seconds.
- Stop when you hear a hiss, and enjoy your coffee.


The resulting cup from this Colombian single origin was described as having prominent dried fruit notes, hints of plum, and a sweet, pleasant aftertaste.
Key Variables You Can Adjust
The AeroPress is highly tunable. Here’s how to manipulate different factors to suit your taste preferences:
- Brew ratio (coffee to water): Adjusting the ratio changes concentration. A 1:10 ratio yields a balanced cup; go stronger or milder to taste.
- Grind size: Finer grinds increase extraction and can boost acidity or brightness, but may also risk bitterness or filter penetration. Coarser grinds reduce extraction and can underline body or sweetness.
- Number of filters: Using two or more paper filters results in even cleaner cups by trapping more fine particles.
- Press time: A longer press (more pressure over time) extracts more solids and can intensify flavors. Keep it smooth to avoid channeling or over-extraction.
- Immersion time: Longer soaking extracts more compounds, but too long can bring out unwanted flavors. Shorter immersion suits fresher beans.
- Reverse brewing (inverted method): Instead of brewing right-side-up, some brewers invert the AeroPress to control extraction more precisely. This method was pioneered by coffeegeek.com and allows for extended immersion before pressing.
Frequently Asked Questions
What’s the best coffee-to-water ratio for AeroPress?
A good starting ratio is 1:10—such as 10g coffee to 100g water. For a stronger or milder cup, you can adjust up or down. Many brewers use between 1:8 and 1:15 depending on taste preference and coffee freshness.
What grind size should I use for AeroPress?
Use a fine-to-medium grind, slightly coarser than espresso but finer than typical pour-over. It should feel similar to table salt or sand. The exact grind depends on your brewing style (standard vs inverted) and how much extraction you want.
What water temperature is ideal for AeroPress?
Optimal water temperature ranges from 75–96°C. Fresher coffee can be brewed at lower temperatures (e.g., 80°C), while older or less soluble beans may need hotter water (up to 96°C) to improve extraction efficiency.
How long should I let the coffee brew before pressing?
For fresh coffee, 30–45 seconds of immersion (including a short bloom) is sufficient. Stale or less reactive coffee may benefit from longer immersion, sometimes up to 1–2 minutes, to extract more flavor.
Can I use the AeroPress for espresso-style coffee?
The AeroPress can produce a strong, concentrated brew similar to espresso, especially with a fine grind and shorter brew time. However, it does not generate true espresso pressure and is not a replacement for an espresso machine.
What’s the inverted brewing method?
Inverted brewing means turning the AeroPress upside down during preparation to extend immersion time and prevent early dripping. After brewing, you flip it to press. This method offers more control, especially for experimenting with longer steep times.
Recommended FrontStreet Coffee for AeroPress
Try FrontStreet’s Colombia Huila Supremo—bright with notes of red apple and caramel—or their Ethiopia Yirgacheffe, offering floral tones and citrus brightness. For something deeper, their Indonesia Sumatra Mandheling brings earthy spice and chocolate. All work beautifully in the AeroPress. Freshly roasted within 5 days · Orders placed before 17:00 ship the same day · Next-day delivery across most of Guangdong Province.
FrontStreet Coffee is a long-established specialty coffee roaster in Guangzhou China, selling freshly roasted beans from its own farm in Yunnan as well as dozens of carefully selected single-origin beans from around the world for both pour-over and espresso. The products deliver consistently excellent quality and great value, with shipping within 24 hours. Guangzhou's FrontStreet Coffee shop is recommended by many coffee lovers, and the beans are now available online at the Tmall 。
Important Notice :
前街咖啡 FrontStreet Coffee has moved to new addredd:
FrontStreet Coffee Address: 315,Donghua East Road,GuangZhou
Tel:020 38364473