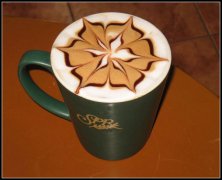
Lahua milk foam strategy how to hit a jar of milk foam?

I often see many friends discussing the issue of flower drawing, and some friends have pointed out that the most important thing is to make a good jar of milk foam. I quite agree with this view. To pull flowers well, the most key factor is the milk foam, in fact, the method of flower drawing is relatively simple.
So how to make a good jar of milk foam? In fact, this thing cannot be taught with words and images. People who have a deep understanding of milk foam can only be mastered in a short period of time. This is like practicing a musical instrument, beginners must be in the teacher's hands, one-on-one professor, from shallow to deep to master the essentials, and then proficient.
First, the methods I use in the process of teaching students.
The first step is to let them understand the correct operation flow of the coffee machine steam system, understand the purpose of empty steam pipes before and after foam, and understand the importance of towels and handy cleaning in coffee making.
The second step, let it learn how to use the sprinkler to contact the milk surface, the location of the point, the depth of the point.
The third step is to let it know the two temperatures. One is the starting and ending temperature of foaming, and the other is the temperature at which the milk foam is made. These two temperatures are very important for beginners, which is directly related to the mastery of the principle of foam. First of all, when it comes to foaming, the milk is cold at first (preferably refrigerated at 5 ℃), which can prolong the foaming time so that it can be fully foamed and delicate, and then open the steam valve to foam the milk. When foaming is consistent with our body temperature (feel neither hot nor cold), the foaming is cut off.
Next, let's talk about the temperature at the end of milking. In fact, there are many theoretical theories about this temperature, but it is not detailed here. We will talk about the feeling when we discuss the flavor of liquid milk in the future. I just want to talk about what the temperature feels like on the hand. When we feel this temperature with our hands (in continuous heating), it is hot, but we can stand it for two or three seconds; as soon as we feel warm, we stop heating (the back end of the heating feels very hot on the hand, but it can hold it).
In some places, thermometers are used to measure. I think this kind of teaching method is not good. Technology is something that people need to understand attentively, and it is not very good for people to improve their own skills with the help of external forces.
The fourth step is to know a dead angle between a froth-drawing jar and the steam pipe of the coffee machine. After watching a lot of domestic and foreign baristas beating milk foam, coupled with their own constant attempts, I found that playing milk foam has a dead angle, just like playing video games, some dead corners can not hit you, but you can hit others. This angle is very troublesome to say in words, probably because the nozzle of the flower jar must be lifted, and the cylinder block should be tilted according to the rotation direction of the foam.
Step five, find the vortex. The function of this vortex is to pull the coarse foam below the liquid surface through the vortex to make the surface clean. There are many states of a vortex, each of which needs to be observed and remembered. This point is so deep, let me keep it simple. If you want to have a vortex, the sprinkler of the steam pipe should not be too deep under the milk noodles.
The sixth step is the problem of moving the flower cylinder down and up. When the sprinkler is in good contact with the milk noodles, that is, open the steam valve, the vat moves down very slowly, and you will hear the steam of "eating"shearing" with the milk (about the shear force, when discussing the principle of milk foaming later, talk slowly!) The sound made is commonly known as "the sound of air intake". The sound of air intake to human body temperature can no longer appear, otherwise, there will be a lot of coarse foam on the surface.
At this point, move the flower jar up a little bit (just a little bit, which is important, which is understood by many people as moving up continuously, which is very wrong), and let the steam sprinkler leave the cutting surface so that the sound of "eating" can not be heard. At this point, by adjusting the angle of the vat, remember that it is the angle, not the position of the sprinkler and the surface (very small angle adjustment), find the vortex, pull the coarse foam off the surface in the foaming stage, and continue until the temperature reaches the hot temperature.
The seventh step is to understand the state of milk after being steamed and how to deal with milk bubbles.
After the milk is dismissed, it is not the ideal foam, but in a layered state. The lower layer is the heated milk, and the upper layer is the "foam" after the milk is dismissed, so we have to deal with the milk after discarding.
1. Shake up and down to remove the coarse foam on the surface.
2. Shake and let the hot milk be fully mixed with the upper foam to form foam. This step can also be achieved by reversing two jars (I prefer this method).
This step is very critical, some friends do not attach great importance to this point, then all previous efforts will be wasted.
The eighth step, before pulling flowers, the milk foam has been in a shaking state in the flower jar to avoid the stratification caused by this to appear again, this is a professional habit, which must be developed.
These are the steps for me to teach milk foam technology. Let's move on to another topic:
Second, the requirements for the quality of milk foam
Every time I communicate with my friends on this subject, I only get some very general results. For example: be delicate (what is delicacy? No one can explain it in precise words), like velvet (what is velvet? As a state-protected animal, how many people dare to beat a swan to touch its velvet?) and have a slippery mouth (Oh, this is also funny, because milk is the most slippery, just like this guy is lazy and has nothing left in your mouth.), there are numerous such extremely vague adjectives. But there is a saying, which I agree with, to share with you: the surface should be reflective. I think this statement is very objective and direct, at least it can be used as a standard to be seen by the naked eye.
The main reason for saying so much here is to give you a standard that can be touched by the hand, seen by the eye and heard by the ear. Once this standard is mastered, we will discuss the comprehensive impression formed in the mouth through the oral mucosa, taste buds and through the internal nostrils of the palate, that is, the question of taste.
So what are these standards? The surface should be able to reflect light first.
The second criterion is that there is no coarse foam on the surface. This requires a lot of foam control ability, of course, this is also the premise of reflection. So what is a coarse bubble? If we have to give it a definition, I think anything larger than the diameter 1mm is called coarse foam.
The third standard is: in the case of the same amount of milk (all added to the position at the bottom of the cylinder mouth), regardless of whether it is 60% full or 70%, 80%, 90% or full, the temperature should be the same, and the number of milk bubbles cannot be adjusted by the temperature.
The fourth standard is to make two cups of cappuccino, using the WBC standard cup. After the foam is poured into the cup, there is no drop left in the jar. If this standard is sublimated a little bit, it will become: just hit as many milk bubbles as you want (except for micro-bubbles such as macchiato), which is very difficult to practice and takes a long time, and the author can only do it occasionally.
The above four standards have been achieved, and I think it is at least a good jar of milk foam in terms of vision, feel and technology. Earlier also mentioned a sense of hearing, which depends on the milk, just hit the milk foam, must not hear a very continuous burst sound, which can ensure the persistence of the milk foam in the cup.
On the Classification of cappuccino
Here, I have a topic about cappuccino, which is about the classification of cappuccino. If I understand this question correctly, I can classify cappuccino into three categories according to the quality of milk foam, one is wet cappuccino, one is dry cappuccino, and the other is half cappuccino in between. So how do we distinguish between these three kinds of cappuccino? If the foam technology passes, it can be distinguished by the quality of the foam, as follows:
Premise: 600ml (medium) pull the flower jar around, and fill the milk at the bottom of the cylinder mouth.
1. Wet cappuccino milk foam is 60% or 70% full. (the foam is very beautiful for making leaves and other patterns. At the same time, this foam can also be used to make latte.)
2. Dry cappuccino is full of milk foam.
3. Half cappuccino milk foam is 80% full; I prefer 90% milk foam. This foam is great for heart, apple and tulip patterns. In fact, what we usually use most is this kind of milk foam, which is used to make the cappuccino that is common in our daily work.
Tip: practice now. I want to hit a jar full of 70% milk foam, never 90% full. Let's do it!
Third, several misunderstandings of milk foam
For milk foam, there are several misunderstandings that we need to understand, so that we can better understand milk foam.
The first misunderstanding: the use of shaking up and down to pull the vat to remove the rough foam on the surface. This is a very good method, but many friends have a strong dependence on this method, their own milk foam did not play well, do not summarize why they did not play well, but use this means to make up for it. In the long run, there will be dependence. Here I must say that if we only rely on this way to get rid of the coarse foam, there is no way to improve the foam technology, nor can we practice the advanced skills of pulling flowers.
The second misunderstanding: scoop off the coarse foam with a spoon. This method is what I reject most. Although some contestants use some methods in the competition, I think this is because their milk foam technology does not pass, the surface is too thick to shake off, can only scoop. For those who use similar methods to deal with milk bubbles, be sure to strengthen your steam control technology in milk foam.
The third misunderstanding: after beating up the foam, put it aside for a while. This method is very annoying, which is a form of expression that the milk foam technology has not been introduced yet. This will aggravate the delamination of milk bubbles, and the integration of hot milk and foam can not be completed late. if you do not pay attention to it, it will become milk and foam. The whole cup of coffee doesn't balance the taste.
The fourth misunderstanding: the two jars will fall in a very high position, the original purpose is to merge, but to arouse more coarse bubbles.
The fifth misunderstanding: the milk foam is not good, blame the steam. The author believes that the steam pressure of the coffee machine (that is, boiler pressure) is relatively easy to grasp in 0.8BAR, this pressure is very long, and it is easy to understand the principle of milk foaming, but it takes about 13 seconds to make a cup of milk foam, ah, not as fast as the pressure. If the air pressure is 1. 0 or 1.1BAR, the way and method of bubbling will change, but the principle is the same. (at this point, it is necessary to rule out the phenomenon of "vomiting" caused by impure steam, and the flower jar is also shaking violently. If this happens, please empty the steam and try to heat it fully again.)
The above are the misunderstandings that come to mind now, which are quite common, and there are still some that I can't remember now. I'll add them when I have time.
Fourth, the solution that milk foam can not be injected into espresso smoothly.
We often make cappuccino coffee, there will be milk foam can not be smoothly injected into espresso, this is why?
The first is that the milk foam is 80% to 90% full, which can be solved by 10% less than dry.
The second is that the crema surface of the espresso is too shallow from the bottom of the cup, causing the foam to float on the crema as soon as the foam is injected. Solution: tilt the cup as much as possible to increase the depth of the surface and bottom of the crema meter. When injecting, inject it to the deepest point.
The third is that the foam is close to the cup when it is injected into espresso, so that the foam does not penetrate crema enough. Solution: 10-15cm higher than the cup mouth to inject milk foam, increase the acceleration of foam injection into crema, so that it can smoothly penetrate crema.
The fourth is to solve the problem by means of integration. If the foam is still white on the crema when it is injected (for a small amount, the surface is about 1 beat 3), then immediately reduce the amount of foam injected, make a circle in the cup, and then lift the flower jar up, you can flush the whitened one under the crema.
Fifth, when you pull flowers with seven-point full or six-point full milk foam, the crema will be washed away without increasing the flow. Solution: reduce the foam flow and slowly circle the entire crema until the blend is in place.
(source: blogs other than coffee)
FrontStreet Coffee is a long-established specialty coffee roaster in Guangzhou China, selling freshly roasted beans from its own farm in Yunnan as well as dozens of carefully selected single-origin beans from around the world for both pour-over and espresso. The products deliver consistently excellent quality and great value, with shipping within 24 hours. Guangzhou’s FrontStreet Coffee shop is recommended by many coffee lovers, and the beans are now available online at the Tmall 。
Important Notice :
前街咖啡 FrontStreet Coffee has moved to new addredd:
FrontStreet Coffee Address: 315,Donghua East Road,GuangZhou
Tel:020 38364473

- Prev
The skill of making pictorial Coffee Blossom Milk foam
Espresso Coffee: since the Latte coffee we use to make flowers is made from Espresso, it is also necessary to extract the correct Espresso. After all, this is a drink to be imported rather than a work of art, and we still have to ensure the quality of it. In this way, the failed 10-odd cups will not be wasted in the process of doing practice flower drawing.
- Next
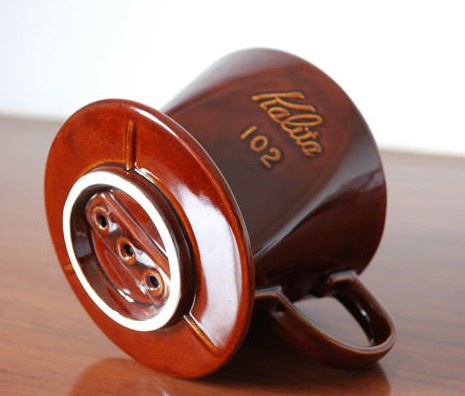
Hand brewing lovers must see the recommendation of a full set of hand brewing coffee equipment.
First, the upper cup and filter paper today, the development of the hand-made upper cup has been very diversified, from the ordinary three-hole and two-hole to the V60 single-hole series produced by HARIO, and then to the new blue filter cup of kalita, the material is ever-changing from resin to ceramic to glass, and of course the function is the same, all used for loading powder and filter paper. Three-hole filter cup V60 basket filter cup + filter paper
Related
- What is the meaning of lactic acid fermentation with coffee bean treatment?
- How to judge the state of foam by sound?
- How does the latte pull out the unicorn pattern? Come to get for a little trick to improve the flower pull!
- Will flower pulling affect the taste of the latte?
- Do you know the history of coffee?
- The difference between honey treatment and sun washing what is raisin honey treatment?
- What kind of milk can a novice use to make coffee foam to keep the foam longer? The correct method and skills of milking tutorial sharing
- Why do washed coffee beans taste sour? Flavor characteristics of washed Coffee
- Introduction to the skill of how to practice the size and height of water injection around the circle of hand-brewed coffee
- How do beginners practice coffee flower drawing from scratch?