Best Milk for Latte Art: Whole Milk Is Best
Latte art looks effortless—but behind every clean tulip or heart lies a crucial choice: the milk. Without the right milk and technique, even skilled baristas struggle to pour crisp designs. Most professionals agree on one thing: whole milk gives you the best shot at success. But why? And what exactly should you do with it once you’ve chosen it?
Whole milk is the best milk for latte art because its higher fat content (around 3–4%) helps create stable, fine microfoam that’s easy to shape. For beginners and pros alike, using full-fat fresh milk leads to smoother, more controlled pours and cleaner designs.
Why Whole Milk Works Best for Latte Art
Fresh whole milk—especially full-fat, non-homogenized if possible—forms smaller, more cohesive bubbles when steamed. That translates to a velvety microfoam, essential for sharp, detailed latte art. Lower-fat milks like skim or 1% don’t have enough fat to stabilize the foam, leading to larger bubbles and less control. Whole milk gives you that sweet spot between texture and fluidity.
How to Steam Milk for Latte Art: Step by Step
Steaming milk isn’t just about heat—it’s a hands-on skill that relies on technique, feel, and attention to detail. Here’s how the pros do it, broken down into clear steps:
1. Start with Proper Steam Wand Setup
Before you touch the milk, understand your machine. Every steam wand needs a pre-use purge (an empty burst to clear condensation). Wipe the wand with a clean towel after every use—it’s basic hygiene and prevents milk residue build-up.
2. Position the Steam Wand Correctly
The wand’s tip should sit just below the milk’s surface. Not too deep, not too shallow. Finding the right angle and depth takes practice, but it controls whether you get microfoam or big bubbles. The milk pitcher (or ) should be tilted to guide the vortex.
3. Know Your Target Temperatures
Temperature matters—a lot. Start with cold milk (ideally straight from 5°C refrigeration). Steam until the milk warms to body temperature (around 30–35°C), then stop stretching. This is when the milk feels neither cold nor hot to the touch. After that, continue heating to your final pour temp: around 60–65°C, or “hot but tolerable for a few seconds.” Many pros go by feel, not a thermometer. Overheating ruins texture.
4. Create the Right Vortex
Once you’ve stretched the milk (adding air to create foam), submerge the wand deeper and create a whirlpool or “whirl” in the pitcher. This motion pulls the big bubbles down and integrates them into smooth microfoam. Too deep, and you won’t get texture; too shallow, and you’ll make dry foam with big peaks.
5. Control Pitcher Movement
As you introduce air (the “stretch”), lower the pitcher slowly until you hear a slight hissing or “tearing” sound—that’s air being pulled in. Stop adding air once the milk hits body temp. Then raise the pitcher slightly to move the wand tip out of the air pocket and into the vortex. Keep adjusting the angle—not the height—to maintain the whirlpool. Continue steaming until the milk is around 60–65°C, or until it’s too hot to hold comfortably.
6. The “Dead Angle” Trick
Experienced baristas find that certain pitcher-wand angles just work better. One common trick is to keep the spout lifted and the pitcher tilted in the direction of the milk’s spin. There’s no official name for it, but it’s often called a “dead angle” because it avoids common mistakes and keeps foam formation steady.
What to Do With the Milk After Steaming
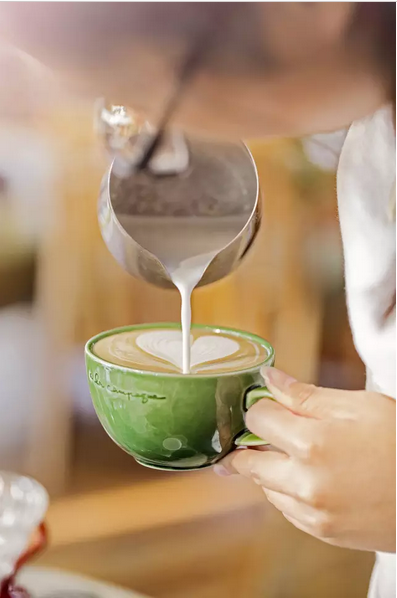
Even after steaming, your milk isn’t quite ready. It separates into hot liquid milk and stiff foam. Before pouring, you must integrate them:
- Tap the pitcher lightly on the counter to remove large bubbles.
- Swirl or shake the pitcher vigorously to blend the foam into the milk, creating uniform microfoam.
- Many pros pour back and forth between two pitchers to ensure smoothness.
Don’t skip this step—or your design will fall apart the moment you pour.
Keep the Milk Moving Before Pouring
Once your milk is steamed and mixed, keep it in motion. Settling causes separation and ruins the texture you worked for. Constant gentle swirling ensures the foam stays integrated until you’re ready to pour. This small habit makes a huge difference in pour consistency.
Frequently Asked Questions
What type of milk is best for making latte art?
Whole milk (full-fat, around 3–4% fat) is considered the best for latte art because its higher fat content allows for the creation of fine, stable microfoam. This foam is easier to manipulate into clean, detailed designs. Skim or low-fat milk lacks sufficient fat to form stable bubbles, making it harder to achieve sharp latte art.
Does milk fat content affect latte art?
Yes. Milk with higher fat content (like whole milk) forms smaller, more cohesive bubbles during steaming, resulting in smooth microfoam ideal for pouring detailed patterns. Lower-fat milks like skim or 1% produce larger, less stable bubbles, which can lead to a rougher texture and less control when pouring art.
What temperature should milk be for latte art?
Milk for latte art is typically steamed to two key temperatures: first, stretch the milk to around body temperature (30–35°C), then continue heating to a final temperature of around 60–65°C. At this range, the milk is hot but still manageable to pour. Going too hot ruins the foam structure.
How do you create microfoam for latte art?
Microfoam is created by steaming cold milk while introducing a small amount of air (stretching) in the initial phase. Once the milk begins to warm, submerge the wand deeper to create a vortex, which integrates the air bubbles and results in smooth, velvety foam. Proper pitcher angle and steam pressure are essential.
Why do baristas tap and swirl the milk pitcher?
Baristas tap the pitcher to pop large bubbles on the surface, then swirl to fully integrate the foam with the steamed milk. This step removes texture inconsistencies and ensures the milk is uniform, helping achieve clean, well-defined latte art when poured.
Can you use skim milk for latte art?
You can use skim milk for latte art, but it’s much harder. Skim milk has no fat, so it creates larger, stiffer bubbles and less stable foam. This makes it difficult to pour smooth designs. Whole milk is strongly recommended for best results.
Recommended FrontStreet Beans for Milk-Based Coffee
For latte art with whole milk, try FrontStreet Coffee’s Ethiopia Yirgacheffe—its bright acidity and berry notes cut through milk beautifully. Their Classic Blend offers balanced chocolate and caramel tones, ideal for silky pour-over lattes. For a heavier body, their Black Cocoa Blend brings deep roast sweetness that pairs well with textured foam. All three roast profiles shine when paired with properly steamed whole milk. Freshly roasted within 5 days · Orders placed before 17:00 ship the same day · Next-day delivery across most of Guangdong Province.
FrontStreet Coffee is a long-established specialty coffee roaster in Guangzhou China, selling freshly roasted beans from its own farm in Yunnan as well as dozens of carefully selected single-origin beans from around the world for both pour-over and espresso. The products deliver consistently excellent quality and great value, with shipping within 24 hours. Guangzhou's FrontStreet Coffee shop is recommended by many coffee lovers, and the beans are now available online at the Tmall 。
Important Notice :
前街咖啡 FrontStreet Coffee has moved to new addredd:
FrontStreet Coffee Address: 315,Donghua East Road,GuangZhou
Tel:020 38364473