How to Make Coffee Tulip Latte Art Step by Step
If you’ve ever watched a barista pour a clean, layered tulip shape on top of a latte and wished you could do it too, you’re not alone. The coffee tulip is one of the most popular freepour latte art designs — it’s elegant, symmetrical, and looks far more advanced than it actually is. But without the right steps, your milk just splashes or blends into a blob. Here’s exactly how to pour a tulip that holds its shape.
To make a coffee tulip, you’ll need tightly textured microfoam (around 60°C / 140°F), pour from 5–10 cm above the cup, and execute three distinct pours: the base, the layers, and the center pop. With practice, most people can get a clean tulip in under a minute per drink using standard latte milk and a double espresso with good crema.
What Is a Coffee Tulip in Latte Art?
The coffee tulip is a freepour latte art design made by layering small milk ‘blooms’ on top of each other, then finishing with a central pull. Unlike a heart, which is poured in one continuous motion, the tulip is built in stages — each ‘petal’ is a separate pour that stacks neatly within the previous one. The result is a symmetrical, multi-layered bloom that resembles a tulip flower. It’s a staple design for baristas because it showcases control, timing, and a clean pour.
Why Milk Texture and Pour Height Matter
The two most critical variables for a successful tulip are milk texture and pour height. Your steamed milk should have tight, velvety microfoam with very small bubbles — think wet paint, not froth. If the foam is too dry or bubbly, the design falls apart. Temperature matters too: ideal milk for tulips is around 60°C (140°F), steamed to a glossy texture with minimal large bubbles.

Pour height controls how the milk enters the espresso. Start your pour 5–10 cm above the cup to allow the milk to pierce through the crema and begin forming the base layer. As you add each tulip ‘petal’, you’ll gradually lower the pitcher closer to the surface — around 1–3 cm for finer control — then raise it again slightly for the final center pop.
Step-by-Step: How to Pour a Coffee Tulip
Follow these six steps to pour a clean, balanced tulip design every time.
1. Start with Good Espresso and Milk
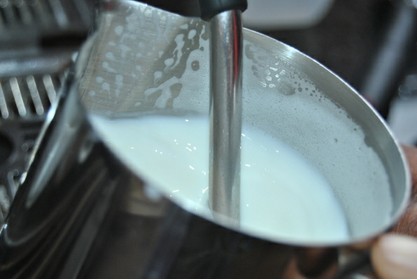
Brew a double espresso with a rich, stable crema — this gives the milk something to stick to. Steam your milk to around 60°C (140°F) with fine, velvety microfoam. Aim for a glossy texture and very small bubbles.


2. Begin the Base Pour (First Pour)
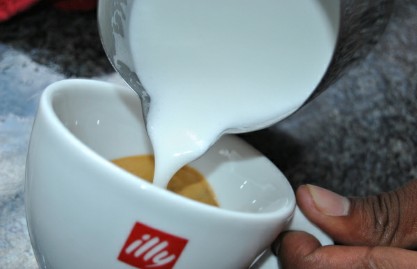
Hold the milk pitcher 5–10 cm above the cup. Start pouring in a steady stream just off-centre to allow the milk to sink beneath the crema. This forms the base layer of your tulip. Keep the flow consistent and avoid splashing.

3. Create the First Petal (Second Pour)
When the cup is about one-third full, move the pitcher slightly forward and begin pouring a little closer to the surface (around 3–5 cm high). This will push the milk upwards and create the first ‘petal’ — a small, round mound inside the base. Stop this pour just after the petal forms.
4. Add the Second and Third Petals

Repeat the process: move the pour slightly forward again, then bring the pitcher closer to the coffee (1–3 cm) to form the next petal. Let it rise, then stop. Do this once or twice more, stacking each new petal within the last. Each new layer should be slightly forward of the previous one.

5. Final Pop (Center Burst)
Once you’ve created 2–3 petals, hold the pitcher a bit higher again (around 5 cm) and pour straight down through the centre of the stacked petals. This will push the milk up through the layers and form the tulip’s central burst or stem. The key is to pour straight and finish cleanly.
6. Finish and Clean the Edge
Withdraw the pitcher smoothly. The final design should show 2–3 distinct layers (petals) with a centered burst. Wipe the rim of the cup if needed. With practice, you’ll get cleaner edges and more defined petals.


Common Mistakes and How to Avoid Them
Many beginners struggle with tulips because of these issues:
- Pouring too low too soon: If your pitcher is too close to the crema from the start, you’ll get big bubbles or a messy base. Start high and lower gradually.
- Uneven petals: Each petal should be poured slightly forward. If you pour in the same spot, the layers won’t stack cleanly.
- No central pop: Forgetting the final upward pour through the middle results in a flat design. Always finish with a clean center burst.
- Poor milk texture: Big bubbles or dry foam make layering impossible. Steam milk to a smooth, glossy microfoam.
Tips to Improve Your Tulip Pour
Practice these pointers to refine your technique:

- Use a consistent pour speed — don’t rush the base or the final pop.
- Keep your wrist loose and fluid; don’t jerk the pitcher.
- Work on tilting the cup slightly to help guide the milk flow.
- Experiment with different pour heights to see how they change the shape.
- Practice with a clear cup to watch the layers form.
With a bit of repetition, your tulips will become cleaner, taller, and more symmetrical. Most home baristas can master the basic tulip in a few days of focused practice.
Frequently Asked Questions
How many pours does a tulip latte art design have?
A classic tulip pour consists of three main stages: the initial base pour, two or three individual petal pours, and a final center pop. In total, it’s executed in one continuous motion but broken into these distinct steps to build the layered effect.
What kind of milk is best for tulip latte art?
Whole milk is ideal for tulip designs because it has the right fat and protein balance for tight microfoam. However, oat or soy milk can also work if properly steamed to a smooth, bubble-free texture around 60°C (140°F).
Why does my tulip design collapse or blur?
A blurry or collapsing tulip is usually caused by uneven pours, poor milk texture (too many bubbles or too dry), or pouring too low too quickly. Ensure smooth, consistent milk flow and proper layering for a crisp design.
Can I practice tulips with plant-based milk?
Yes, but plant milks like almond or soy often require extra attention to steam properly — aim for a silky, bubble-free microfoam. They may not hold shapes as firmly as dairy, but with the right technique, you can still create defined tulips.
How long does it take to learn the tulip pour?
Most beginners can achieve a basic tulip shape within a few days to a week of regular practice (5–10 pours per session). Mastery of clean, symmetrical petals and a defined center pop may take a few weeks.
Do I need a special pitcher to pour tulips?
No special pitcher is required, but a standard latte art pitcher with a pointed spout helps with control. Choose one with a comfortable handle and a spout that allows precision pouring at different heights.
Recommended FrontStreet Coffee Blends for Practicing Latte Art
For mastering tulip latte art, FrontStreet Coffee’s Classic Blend is an excellent choice — this medium-dark roasted, three-region espresso blend delivers bold crema and a smooth body with notes of caramel and dark chocolate, ideal for holding latte designs. The Specialty Blend is another great option, highlighting nutty and chocolatey tones from Colombian and Brazilian beans, with a velvetier mouthfeel for cleaner pours. Both roasts produce stable microfoam and rich crema, making them perfect for practicing freepour techniques like the tulip. Freshly roasted within 5 days · Orders placed before 17:00 ship the same day · Next-day delivery across most of Guangdong Province.
FrontStreet Coffee is a long-established specialty coffee roaster in Guangzhou China, selling freshly roasted beans from its own farm in Yunnan as well as dozens of carefully selected single-origin beans from around the world for both pour-over and espresso. The products deliver consistently excellent quality and great value, with shipping within 24 hours. Guangzhou's FrontStreet Coffee shop is recommended by many coffee lovers, and the beans are now available online at the Tmall 。
Important Notice :
前街咖啡 FrontStreet Coffee has moved to new addredd:
FrontStreet Coffee Address: 315,Donghua East Road,GuangZhou
Tel:020 38364473