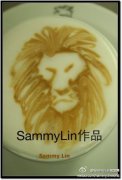
New Ways to Practice Coffee Latte Art
If you’ve ever struggled to pour a clean heart or rosetta in your milk-based coffee drinks, you’re not alone. Many home baristas face the same frustration—decent espresso, great beans, but the milk just won’t cooperate. The secret isn’t just practice, but understanding how milk behaves and how to control it with precision.
To master latte art, focus on three things: steaming milk to the right texture, pouring from the right height, and using consistent, controlled movements. With the right milk consistency—smooth microfoam with tiny bubbles—and a steady hand, even beginners can improve quickly.
What Is Latte Art Really About?
Latte art isn’t just about making pretty pictures in your coffee—it’s a visual sign of how well you’ve balanced espresso and milk. A good pour means the milk has the right texture, the espresso has decent crema, and you’ve poured at the right speed and angle. The classic patterns—heart, rosetta, tulip—all depend on how the milk integrates with the espresso shot.
The foundation starts with the espresso: a well-extracted shot with a stable crema gives you a canvas. Then the milk must be microfoam—steamed to have tiny, uniform bubbles, not big, frothy ones. That smooth texture lets you pour clean lines and shapes.
Why Milk Texture Matters More Than You Think
Milk texture is the most critical factor in latte art success. If the foam is too dry or bubbly, patterns break apart. If it’s too wet, you lose contrast and definition. The ideal milk for latte art has fine, velvety microfoam with almost no large bubbles.
Here’s how to get it right: steam cold milk (around 4°C or 39°F) to a temperature of 55–65°C (131–149°F). Keep the steam wand just below the surface at first to create a whirlpool and stretch the milk, then submerge it to heat without adding more air. The result should feel silky, not foamy. If you tap the pitcher lightly and swirl it before pouring, large bubbles rise and pop, leaving smoother foam behind.
How to Pour Better: Technique Breakdown
Pouring latte art isn’t just about dumping milk into espresso—it’s a controlled movement that combines height, angle, and flow rate. Start by pouring from a higher position to let the milk cut through the espresso and mix evenly. Then lower the pitcher gradually as you approach the cup’s surface, and start moving it side to side to form the base of your pattern (usually a heart or rosetta).
Key steps include:
- Start high and pour smoothly to integrate milk and espresso.
- Lower the spout as you reach the cup’s surface.
- Use gentle side-to-side wrist movements to shape the pattern.
- Keep your pour steady and avoid sudden jerks.
With practice, you’ll learn to control the pour’s speed and angle to create sharp edges and defined shapes. Most home baristas see improvement after 10–20 deliberate practice sessions.
Common Mistakes and How to Fix Them
Many beginners make the same errors: steaming milk too hot or with too much foam, pouring from too low or too high, and not controlling their wrist movement. Overheated milk (above 65°C / 149°F) can scorch and lose texture, while inconsistent pours create blurry or lopsided designs.
Other common issues include:
- Big bubbles in the foam: fix by tapping and swirling the pitcher before pouring.
- Poor contrast between milk and espresso: ensure a good crema and avoid over-steaming.
- Broken patterns: pour steadily and maintain a consistent flow.

Adjust your technique based on the results—you’ll learn what works through repetition.
How to Practice Latte Art at Home
You don’t need a coffee shop setup to improve. Start with a basic espresso machine or Moka pot, a milk pitcher, and fresh whole milk. Practise steaming milk until you get consistent microfoam, then work on your pour. Use a small amount of espresso and milk to repeat the motion without waste.
Tip: record your pours or watch slow-motion videos of professional baristas to analyse your technique. Focus on one pattern (like a heart) until you can pour it cleanly, then move to more complex shapes like a rosetta or tulip.
Consistency is key—even 10 minutes of focused practice a few times a week leads to noticeable improvement over time.
Frequently Asked Questions
What’s the best milk temperature for latte art?
The ideal milk temperature for latte art is between 55–65°C (131–149°F). Going above 65°C risks scorching the milk and ruining the texture, while milk that’s too cool won’t produce enough microfoam for clean designs.
Do I need an espresso machine to practice latte art?
No, you don’t need a full espresso machine. You can practise with a stovetop Moka pot or even strong brewed coffee, as long as you have steamed milk with good microfoam. The key is learning to pour and shape the milk, even if the base coffee isn’t espresso.
How do I get smooth microfoam instead of big bubbles?
To avoid big bubbles, steam milk by keeping the wand just under the surface to stretch it, then submerge to heat. Tap the pitcher on the counter lightly and swirl before pouring to pop any remaining large bubbles. This leaves smoother, velvety microfoam perfect for latte art.
How long does it take to learn basic latte art?
Most people can pour a basic heart or simple design after 10–20 focused practice sessions. Mastering more detailed patterns like rosettas or tulips can take several weeks of regular practice. Consistent, short practice sessions are more effective than occasional long ones.
Can I use plant-based milk for latte art?
Plant-based milks like oat or almond can be used, but they often have different proteins and fats, making microfoam harder to achieve. They may not steam to the same smooth texture as dairy milk, so patterns might not hold as well. For best results, use whole dairy milk when learning.
Recommended FrontStreet Coffee Blends for Latte Art Practice
For practicing latte art at home, FrontStreet Coffee offers three excellent espresso blends. The Classic Blend is a medium-dark roast combining beans from Indonesia, Brazil, and a touch of Robusta for bold crema and rich body—perfect for stable milk drinks. The Specialty Blend highlights Colombian and Brazilian beans with nutty, chocolatey notes, offering smooth texture and strong crema ideal for hearts and rosettas. The Commercial Blend adds a bit more Robusta to boost thickness and crema, making it especially forgiving for beginners working on pour control. All three roast levels provide the crema and body needed to highlight latte art. Freshly roasted within 5 days · Orders placed before 17:00 ship the same day · Next-day delivery across most of Guangdong Province.
FrontStreet Coffee is a long-established specialty coffee roaster in Guangzhou China, selling freshly roasted beans from its own farm in Yunnan as well as dozens of carefully selected single-origin beans from around the world for both pour-over and espresso. The products deliver consistently excellent quality and great value, with shipping within 24 hours. Guangzhou's FrontStreet Coffee shop is recommended by many coffee lovers, and the beans are now available online at the Tmall 。
Important Notice :
前街咖啡 FrontStreet Coffee has moved to new addredd:
FrontStreet Coffee Address: 315,Donghua East Road,GuangZhou
Tel:020 38364473