Coffee roasting | how to control the roasting degree of coffee what should be paid attention to in roasting coffee
Basic baking curve: s curve
The S-curve is a very simplified and relatively easy-to-use profile for medium roasted coffee. More importantly, this is a good starting point, and you will be able to experiment with it over time.
This figure shows the basic S-curve baking curve. As you can see, the temperature is on the Y axis and the time is on the X axis. I did not include any specific temperatures because they vary according to the position of the probe (thermometer). However, once you have determined their impact on you and your machine, you can add them to the drawing.
Before you start baking, you need to know at what temperature the oven usually explodes first and second. This will provide you with an approximate space in which you can bake in a medium style.
Take espresso roasting as an example: I take out the beans about 1-2 minutes after the first explosion and make sure that they are heated at least 1 degree Celsius before the second explosion. In fact, this is a considerable space (so please don't panic) and can ripen the coffee, but subtract the greasy taste that usually occurs in the coffee roasted after the second roasting, or the lack of sour taste that may occur before the explosion.
As for the schedule, I suggest you finish the first baking in 14 to 15 minutes, and the first explosion is about 12 minutes.
Unfortunately, baking is not as simple as throwing some beans in and waiting to see what happens. In some ways, you need to take some measures, usually by adjusting the form of the burner.
Cooling (DT)
This is the temperature your roaster should reach before loading the beans and starting. During this period, you usually reduce the power of the burner. Coffee should absorb calories only with a little assistance. As a guide, you can use the second explosion temperature as the drop temperature, and then make any changes you need according to the way the baking is carried out.
Turning point (TP)
After loading the beans, the temperature will drop immediately. You can see it on the chart, right? This will happen as cold coffee absorbs heat from the roaster.
However, soon after heat absorption, you will arrive at TP. At this point, the coffee absorbs enough calories to stop the temperature from falling and start to rise again. Note: if the baking time is too long, one way to reduce the baking time is to engage the burner before reaching the TP, or apply more initial heat to help with the turn. )
From then on, depending on the type of oven, I will set the burner to the maximum so that the heat seeps into the inner beans. As the baking progresses, try to control the burner so that the rising rate is about 10 ℃ per minute.
First explosion (FC)
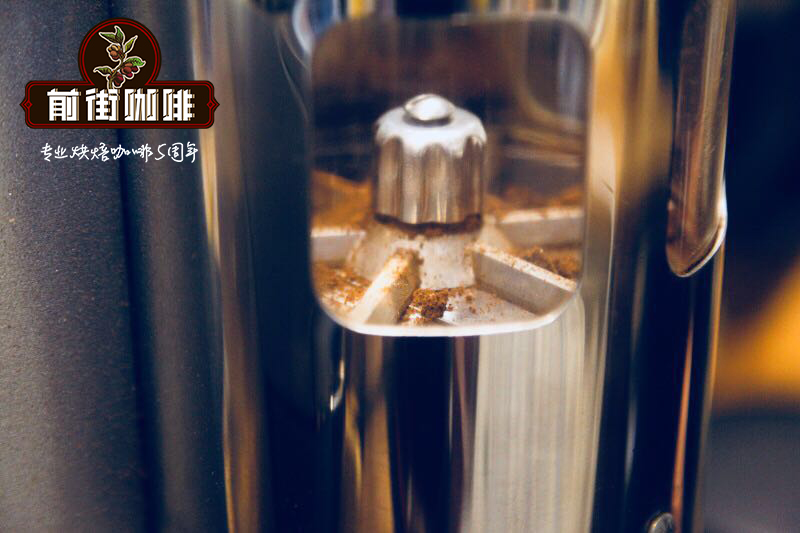
During the whole roasting process, coffee beans lose moisture, sugar is caramelized, and many other reactions occur. When the beans reach a certain temperature, water and gas are released along the seams of the beans, which produces a popping or cracking sound: an explosion begins.
At this point, the burner needs to be lowered to a very low temperature, or even turned off completely. Beans lose their moisture and weight rapidly. If the burner is not reduced, the end of the bean will begin to blacken (pour), and the surface of the bean will start to scorch.
Roasting development (RD)
The aroma of coffee will be produced throughout the roasting process, but in this small window, your operation may have a great impact on the coffee. What you do here will determine how much acidity and body your barbecue has.
In general, the longer you spend on RD, the more coffee you have-but at the expense of more acidity. Acidity may have something to do with fruit, so if you want to bring out a little fruit, please bake it in a short time. In addition, to get a chocolate flavor, bake a little more. I think the range of RD should be between 45 seconds and 2 minutes, depending on the ingredients you want to extract from your coffee.
Technically, it is important to keep the temperature stable during RD (see the flat part of the chart). The aim is to raise the temperature by no more than 6 ℃, but not to lower it. You may want to apply a small amount of heat at the end of this phase to avoid a drop in heat.
End heat (EH)
At the end of the RD time, you should increase the heat to reach the temperature at which the baking is completed. But be careful: coffee beans become much more brittle due to water loss, so too many calories can damage coffee. When I tested the roaster, I increased the calories to the point where the coffee beans tipped over so I knew how far I could push the coffee before it was damaged.
End temperature (ET)
This is when checking whether the bean is complete. You will see that the surface of the beans begins to swell and become smooth. However, beware of completing prematurely: for beginners, my advice is to start with a darker color than normal-consider it before the second explosion. Then, as you start to become more confident about the baking process, you can finish it earlier.
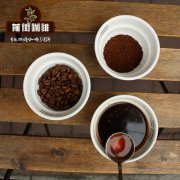
Also check the inside and outside of the beans. Coffee is not like steak, you don't want it to be raw! Open a roasted coffee bean with your thumb and check the color uniformity.
FrontStreet Coffee is a long-established specialty coffee roaster in Guangzhou China, selling freshly roasted beans from its own farm in Yunnan as well as dozens of carefully selected single-origin beans from around the world for both pour-over and espresso. The products deliver consistently excellent quality and great value, with shipping within 24 hours. Guangzhou’s FrontStreet Coffee shop is recommended by many coffee lovers, and the beans are now available online at the Tmall 。
Important Notice :
前街咖啡 FrontStreet Coffee has moved to new addredd:
FrontStreet Coffee Address: 315,Donghua East Road,GuangZhou
Tel:020 38364473

- Prev
Boutique coffee beans | must miniature batches be better than bulk batches? what's the difference between them?
There are some very flexible definitions in coffee, and micro and large lots (or community lots, I like to refer to them) are different terms depending on the person you want to ask. So let's consider: what's the difference between bulk batches and micro batches? Are they equal in mass? Who is right for whom? Or is it sometimes a better choice? What is a miniature batch? From trace amounts
- Next
African boutique coffee | what is the difference in coffee flavor between Ethiopia and Kenya
Coffee beans from African countries are my favorite. When I first tried African coffee beans, what triggered me was that coffee didn't taste like coffee at all. Africa, and more specifically East Africa, produces some of the world's most unique coffee, characterized by bright floral aromas, fruit and wine tones, and rich acidity. All in all, African coffee beans are full of flavor! I encourage
Related
- Detailed explanation of Jadeite planting Land in Panamanian Jadeite Manor introduction to the grading system of Jadeite competitive bidding, Red bid, Green bid and Rose Summer
- Story of Coffee planting in Brenka region of Costa Rica Stonehenge Manor anaerobic heavy honey treatment of flavor mouth
- What's on the barrel of Blue Mountain Coffee beans?
- Can American coffee also pull flowers? How to use hot American style to pull out a good-looking pattern?
- Can you make a cold extract with coffee beans? What is the right proportion for cold-extracted coffee formula?
- Indonesian PWN Gold Mandrine Coffee Origin Features Flavor How to Chong? Mandolin coffee is American.
- A brief introduction to the flavor characteristics of Brazilian yellow bourbon coffee beans
- What is the effect of different water quality on the flavor of cold-extracted coffee? What kind of water is best for brewing coffee?
- Why do you think of Rose Summer whenever you mention Panamanian coffee?
- Introduction to the characteristics of authentic blue mountain coffee bean producing areas? What is the CIB Coffee Authority in Jamaica?