How to Make Coffee Milk Foam and Latte Art at Home
Ever poured steamed milk into your espresso only to watch it separate into a sad layer of foam and liquid? Or tried to pour latte art but ended up with a white blob instead of a heart? The difference between a flat, bubbly mess and a velvety microfoam that holds a tulip shape comes down to how you treat the milk before it hits the cup.
To make proper coffee milk foam, fill your pitcher no more than halfway, heat the milk to around 60°C (never over 70°C), and introduce air with just 30 gentle paddle strokes—no need to go deeper than the milk’s surface.
Step-by-Step: How to Steam Milk for Coffee Foam
Milk foam starts with the right amount of milk and careful temperature control. Begin by pouring cold milk into your steam pitcher, filling it to no more than half its capacity—otherwise, it’ll overflow as the milk expands during foaming. For hot foam, heat the milk to approximately 60°C; exceeding 70°C will break down the milk proteins and ruin the texture. (For iced foam, chill the milk to below 5°C, but don’t let it freeze.)
Next, position the steam wand just below the surface to introduce air. With the lid and filter screen on (but never directly over heat), gently pulse the wand to draw in air—not by pushing it to the bottom, but by skimming the surface. Do this lightly around 30 times. Once you’ve incorporated enough air, sink the wand deeper into the milk to create a whirlpool and heat it evenly. When done, remove the lid and filter, and use a spoon to skim off any large bubbles, leaving behind smooth, velvety microfoam.
The Science Behind Milk Foam Texture

Good milk foam isn’t just about volume—it’s about tiny, stable bubbles that integrate smoothly with espresso. Heating milk to around 60°C denatures proteins just enough to stabilize the foam without destroying its structure. Go beyond 70°C, and those proteins break down, turning your foam into a soggy mess. Avoid overheating or direct contact with the pitcher’s lid and filter, which can scorch or melt. The result should be a glossy, pourable microfoam with very fine bubbles—nothing like the dry, large-bubbled foam you get from a shaker.
Three Ways to Pour Latte Art
Once you’ve mastered milk foam, it’s time to pour it into art. There are three main techniques: free pour (direct pour), hand-drawn, and stencil (sieve) methods. Each offers a different creative path, from flowing shapes to precise patterns.
1. Direct Pour (Free Pour) Technique
The direct pour method is considered the most challenging—and rewarding—way to create latte art. It involves pouring steamed milk directly into espresso while both are still fresh, using wrist movements to control the flow and separate the milk and foam. The goal is to balance the milk and espresso until they merge, then use subtle pouring patterns to shape hearts, leaves, or other flowing designs. This method demands precise control over the pour height, angle, and speed, and works best when the milk and espresso haven’t yet separated. It’s difficult because the window to create the design is short, requiring fluid hand motions and well-textured milk. But with practice, it’s how baristas produce those elegant café-style designs.

2. Hand-Drawn (Etched) Technique
In the hand-drawn method, you create latte art after the espresso and milk are already combined. Using a toothpick or needle, you draw patterns on the coffee’s surface with cocoa powder, chocolate syrup, or similar toppings. Designs typically fall into two categories: geometric shapes (like lines and grids) or figurative images (like animals or faces). This technique is more forgiving than free pouring and allows for detailed, artistic touches once the drink is already in front of you.
3. Stencil (Sieve) Technique
The sieve method is the easiest way to add visual interest to your coffee. After steaming the milk, let it sit for about 30 seconds to let foam rise. Then, hold a spoon to block excess foam while pouring milk into the espresso. Once the base is in, use a stencil or sieve—placed about 1cm above the cup—to dust cocoa powder or cinnamon through the pattern, creating shapes or words. Alternatively, you can pour milk directly onto the espresso without letting foam rise too much, then sieve your design on top. This method is great for beginners or for adding fun finishing touches to any coffee.
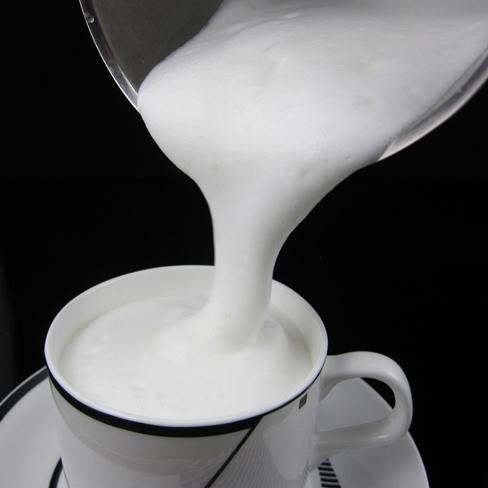


Whether you’re aiming for a classic leaf design or just want your milk to blend smoothly into espresso, mastering these steps and techniques will take your home coffee game to the next level.

Frequently Asked Questions
What’s the best temperature for steaming milk for coffee foam?
The ideal temperature is around 60°C. Going over 70°C can break down milk proteins, damaging the foam’s texture and structure.
How much milk should I put in the steaming pitcher?
Never fill the pitcher more than halfway. Overfilling causes the milk to overflow as it expands during steaming.

Do I need to use the lid and filter when steaming milk?
Yes, you should use them—but don’t expose the lid or filter directly to heat, as they can warp or melt.
How many times should I paddle the milk to create foam?
About 30 gentle strokes on the milk’s surface are enough to incorporate air. Don’t push the wand to the bottom; stay near the surface.
What’s the difference between free pour and hand-drawn latte art?
Free pour (direct pour) means pouring steamed milk directly into espresso and using movement to create shapes. Hand-drawn art is done after pouring, using tools to sketch designs on the surface with cocoa or syrup.
Can I make latte art with cold or iced milk?
Yes, for iced foam, cool the milk to below 5°C (but don’t let it freeze). The process is similar, though you won’t get microfoam as easily as with heated milk.
Recommended FrontStreet Beans for Milk-Based Coffees
For milk drinks featuring your homemade foam, try FrontStreet Coffee’s Ethiopia Yirgacheffe for floral and citrus notes that shine through steamed milk, or the Colombia Huila Supremo for balanced caramel and nut tones. Both develop lovely textures when paired with properly steamed microfoam. Freshly roasted within 5 days · Orders placed before 17:00 ship the same day · Next-day delivery across most of Guangdong Province.
FrontStreet Coffee is a long-established specialty coffee roaster in Guangzhou China, selling freshly roasted beans from its own farm in Yunnan as well as dozens of carefully selected single-origin beans from around the world for both pour-over and espresso. The products deliver consistently excellent quality and great value, with shipping within 24 hours. Guangzhou's FrontStreet Coffee shop is recommended by many coffee lovers, and the beans are now available online at the Tmall 。
Important Notice :
前街咖啡 FrontStreet Coffee has moved to new addredd:
FrontStreet Coffee Address: 315,Donghua East Road,GuangZhou
Tel:020 38364473