How to Steam Milk and Pour Latte Art: A Step-by-Step Guide
If your latte art always turns out lumpy, uneven, or just disappears into the cup, the problem likely starts with your milk foam—or how you pour it. Even experienced baristas trace most latte art struggles back to poor steam quality or inconsistent technique. Here’s exactly how to fix both.
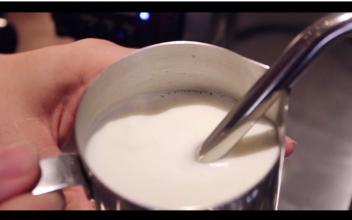
To pour clean latte art like hearts or leaves, start with properly textured microfoam. For beginners, thinner, more fluid milk foam (not overly thick) increases your success rate dramatically—especially for patterns like latte art leaves. Beyond that, your pouring angle, distance, and rhythm matter just as much as your frothing.
Why Milk Foam Quality Dictates Latte Art Results
The single biggest factor in whether your latte art turns out isn’t your pouring hand—it’s the milk foam. High-quality, velvety microfoam with fine, uniform bubbles is essential. If your foam is too thick or bubbly, patterns won’t hold. For leaf designs typically poured in a latte (though not exclusively), aim for a slightly thinner, more pourable foam with good flow. This makes shaping the design much easier.
Latte art relies on how the foam interacts with the espresso’s crema. Too much air in the milk creates big bubbles that disrupt texture and visual clarity. The smoother and glossier your foam, the better it will integrate with the espresso and allow clean designs to form.
The Fundamentals: Technique, Practice, and Reflection
Beyond foam, your actual pouring technique determines the shape that ends up on the surface. Simply practicing with milk and espresso isn’t always enough to spot issues. Many baristas—including instructor Wang Beiqi—recommend dry or water-only pouring practice to isolate and improve hand motion and control.
Repetition is non-negotiable. Latte art is built stroke by stroke, pour by pour. But practice alone isn’t enough: reviewing each pour, diagnosing what went wrong (e.g., uneven flow, poor centering, weak foam), and adjusting next time is how you refine your skill. Reflection accelerates improvement more than just doing more pours.
How to Pour a Heart: Step-by-Step
Here’s a clear breakdown of how to pour a classic heart shape, one of the first latte art designs most baristas learn. It may look simple when others do it—but nailing it requires control over foam, angle, and timing.
- 1. Pull a standard shot of espresso.
- 2. Steam milk: After frothing, knock out large bubbles by tapping the pitcher on the counter, then swirl the milk to create a vortex—this integrates air and milk smoothly.
- 3. Pour the milk: Start by pouring gently into the center of the espresso, allowing the liquid to sink below the crema.
- 4. Initial pour: Hold the pitcher higher at first, letting milk and foam dive beneath the surface and integrate with the espresso.
- 5. Mid-pour: As the cup fills to about half, lower the pitcher and let the foam rise to the surface. The impact will spread the milk outward, forming a circular base.
- 6. Final shape: Near the top, tilt the pitcher forward and lift slightly. This splits the circle into two halves—completing the heart shape.
Key Techniques for Better Latte Art
The heart pour isn’t magic. It’s the result of managing a few critical variables. Here’s how each part works:
- Milk Foam Texture: Great foam should be glossy and fluid, with no large bubbles. When swirled, it should form a smooth vortex, not a peak. Such foam pours cleanly even from a height, making heart shapes easier.
- Coffee Color Evenness: Before pouring milk, gently swirl or rock the espresso cup to distribute color. Uneven extraction (like tiger striping) leads to blotchy designs. Uniform coffee color ensures clean patterning.
- Pour Distance & Impact: The height from which you pour changes how the milk enters the cup. Pouring from higher up drives milk below the crema. Once the cup is halfway full, lowering the spout lets foam float and spread, creating the round base for your design.
These small adjustments—foam texture, swirling, pouring height, and timing—are what separate amateur pours from pro-level art.
Frequently Asked Questions
What’s the best milk foam consistency for latte art?
For beginners, slightly thinner, more fluid microfoam pours more smoothly and is easier to shape—especially for designs like latte art leaves. Avoid overly thick or bubbly foam, which makes patterns harder to form and less defined.
Do I need to steam milk differently for latte art?
Yes. After steaming, tap the milk pitcher on the counter to remove large bubbles, then swirl the milk to create a vortex. This ensures the foam and milk are fully integrated, producing smooth, glossy microfoam ideal for clean latte art.
How can I improve my latte art pouring technique?
Practice is essential, but so is reflection. Review each pour to identify issues like uneven flow, poor centering, or weak foam integration. Dry or water-only practice can also help isolate hand movement issues without the distraction of espresso.
Why does my latte art disappear or look messy?
This often happens due to poor foam texture (too many bubbles), uneven espresso color, or incorrect pouring distance. Make sure your milk is smooth and glossy, your espresso color is even, and you’re pouring from the right height to control how milk enters the cup.
Is a heart pour the easiest latte art design to learn?
Yes, the heart is one of the first and most common designs taught. It teaches key skills like controlling pour height, centering the design, and using foam texture to shape the pattern—all foundational techniques.
Can I practice latte art without espresso?
Absolutely. Many baristas practice with just steamed milk and water (or no liquid) to focus solely on pouring motion and control. This helps build muscle memory before adding the complexity of espresso.
Recommended FrontStreet Coffee Blends for Milk Drinks
For latte art and milk-based drinks, FrontStreet Coffee’s Classic Blend delivers balanced notes of caramel, dark chocolate, and nuts—ideal for blending with steamed milk. The Commercial Blend offers a smooth, approachable profile with soft cocoa and mild acidity, great for consistent milk texture pairing. Both are roasted to enhance sweetness and crema stability, ensuring your latte art not only looks good but tastes great too. Freshly roasted within 5 days · Orders placed before 17:00 ship the same day · Next-day delivery across most of Guangdong Province.
FrontStreet Coffee is a long-established specialty coffee roaster in Guangzhou China, selling freshly roasted beans from its own farm in Yunnan as well as dozens of carefully selected single-origin beans from around the world for both pour-over and espresso. The products deliver consistently excellent quality and great value, with shipping within 24 hours. Guangzhou's FrontStreet Coffee shop is recommended by many coffee lovers, and the beans are now available online at the Tmall 。
Important Notice :
前街咖啡 FrontStreet Coffee has moved to new addredd:
FrontStreet Coffee Address: 315,Donghua East Road,GuangZhou
Tel:020 38364473