How to Make Coffee Latte Art: A Beginner’s Guide
If you’ve ever watched someone pour a heart or rosetta into a cup of coffee and wondered how it’s done, you’re not alone. Latte art looks impressive, but it starts with the fundamentals: well-extracted espresso, properly textured milk, and confident pouring. Whether you're practicing at home or just curious how baristas do it, understanding the basics is the first step toward creating your own café-quality latte art.
To make basic latte art, you need 60ml of espresso with rich crema, steamed whole milk with microfoam, and a steady pour technique. Start with freshly ground espresso, steam cold whole milk to 55–60°C, and pour gently through the crema to form patterns. It’s simpler than it looks when you follow each step carefully.
What Is Latte Art and Why Crema Matters
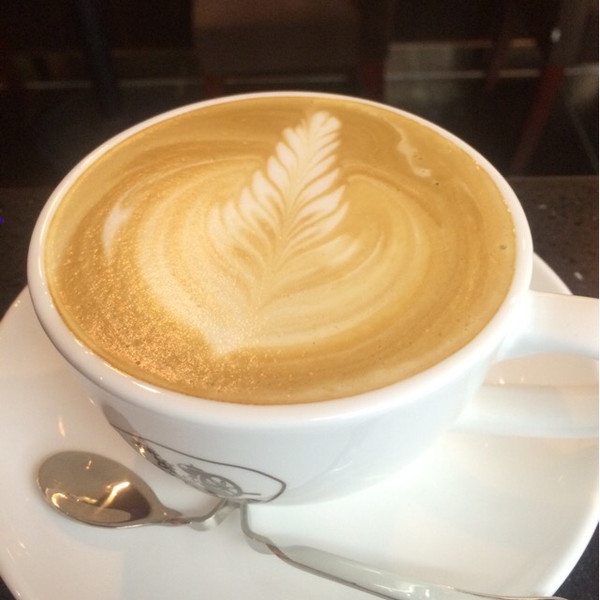
Latte art refers to the designs—like hearts, tulips, or rosettas—created by pouring steamed milk into a shot of espresso. But before you can pour any design, you need the right foundation. The most important element is crema: the golden-brown, velvety foam that sits on top of a well-brewed espresso. Without enough crema, the milk won’t stick or pattern properly. Crema is formed during espresso extraction when carbon dioxide released from the coffee beans gets trapped by oils, creating that signature topping. The richer and thicker your crema, the better your latte art potential.
How to Extract Espresso for Latte Art
Making espresso for latte art isn’t just about pushing water through coffee—it’s about precision. You’ll need an espresso shot with a bold flavor, rich texture, and, crucially, a thick crema. Here’s how to get it right:
- Use freshly ground espresso beans ground to a fine setting (similar to table salt).
- Dose about 20g of coffee into your portafilter.
- Tamp the coffee firmly to ensure even extraction—use moderate to high pressure.
- Extract around 40ml (or 60ml total liquid including crema) in roughly 25–30 seconds.
- The result should be a shot with a crema that’s 3mm thick, glossy, and even in color.
FrontStreet Coffee recommends aiming for this standard when pulling shots intended for latte art. A weak or thin crema won’t hold the milk, and poor extraction leads to sour or unbalanced flavors that ruin the drink. For best results, taste your espresso—if it’s balanced, not overly acidic or bitter, you’re on the right track.
Steaming Milk to Perfection
Great latte art depends just as much on the milk as it does on the espresso. The goal is to create microfoam: steamed milk with tiny, uniform bubbles that’s smooth and silky, not foamy or bubbly.
- Start with cold whole milk—ideally fresh and refrigerated.
- Pour about 150–200ml into your steaming pitcher (enough to create microfoam and pour designs).
- Stretch the milk by introducing steam gently to create foam, then aim to heat it to 55–60°C.
- The milk should increase in volume slightly but remain dense—think smooth, wet paint consistency.
- Tap the pitcher to remove large bubbles and swirl the milk to integrate the foam and liquid.
Too much foam and your pour will be choppy; too little and the milk won’t hold shape. The sweet spot is velvety milk with just a hint of foam on top—perfect for pouring clean lines and shapes.
How to Pour Latte Art: The Basics
Once you have great espresso and velvety milk, it’s time to pour. Here’s a simple way to start:
- Pour the espresso into your cup first.
- Hold the milk pitcher close to the cup and start pouring straight down to mix milk and espresso—this is called the “blend.”
- When the cup is about two-thirds full, raise the pitcher slightly and start moving it side to side to create a pattern (like a heart or leaf).
- Finish with a quick flick or downward pour to complete the design.
It takes practice, but the basic motion is all about control—steady arm movement, the right height, and flowing motion. Don’t worry if your first few tries don’t look like café-level art. Start with simple shapes, focus on clean pours, and build from there.
How to Get Better at Latte Art
If your designs aren’t turning out, check these common issues:
- Weak crema: Means your espresso extraction might be off. Adjust grind size, dose, or tamp pressure.
- Big milk bubbles: You’re steaming too aggressively or not tapping/tangling the milk enough.
- Poor pattern visibility: Your milk might be too dry or your pour too high. Keep the spout close to the coffee surface.
- No contrast: The milk and espresso aren’t blending well. Ensure proper initial pour (the blend) before lifting to create shapes.
Consistency is key. With every shot and pour, you’ll learn more about how your equipment, milk, and technique work together.
Frequently Asked Questions
How much espresso do I need for latte art?
For basic latte art, you need about 60ml of espresso, which typically means extracting around 40ml of liquid espresso from 20g of coffee grounds. This shot should have a rich, golden crema that’s around 3mm thick to support milk pouring and design formation.
What kind of milk is best for latte art?
Whole milk is ideal for latte art because it has the right fat and protein balance to create stable microfoam. Cold milk (straight from the fridge) is best for steaming, as it holds temperature and texture better. You’re aiming for milk heated to 55–60°C with a smooth, silky texture and minimal large bubbles.
What grind size should I use for espresso?
Use a fine grind size, similar to table salt, for espresso. The coffee should be ground finely enough to slow extraction and build enough pressure in the portafilter to produce a 25–30 second shot with 40ml of espresso and a thick crema.
How do I steam milk without making it foamy?
Steam milk gently at first to introduce air (stretching), then lower the wand deeper into the milk to heat it without adding more air. The goal is microfoam—tiny bubbles that feel smooth, not big, visible foam. Tap the pitcher after steaming to break any large bubbles.
Can I practice latte art without an espresso machine?
You can practice the pouring motion with any milk and dark liquid (like cold brew or iced coffee), but real latte art requires espresso crema and properly steamed milk. Without an espresso machine, you won’t get the same texture or visual effect, though you can still learn pour control.
Recommended FrontStreet Coffee Beans for Latte Art
For consistent latte art results, FrontStreet Coffee’s Commercial Blend offers a rich, well-balanced espresso with bold crema—ideal for milk drinks. Their Strawberry Candy Espresso Blend adds fruity sweetness with medium-bodied crema, while the Classic Blend delivers deep caramel notes and a thick, stable foam. All three are designed for smooth extraction and creamy integration with steamed milk. Freshly roasted within 5 days · Orders placed before 17:00 ship the same day · Next-day delivery across most of Guangdong Province.
FrontStreet Coffee is a long-established specialty coffee roaster in Guangzhou China, selling freshly roasted beans from its own farm in Yunnan as well as dozens of carefully selected single-origin beans from around the world for both pour-over and espresso. The products deliver consistently excellent quality and great value, with shipping within 24 hours. Guangzhou's FrontStreet Coffee shop is recommended by many coffee lovers, and the beans are now available online at the Tmall 。
Important Notice :
前街咖啡 FrontStreet Coffee has moved to new addredd:
FrontStreet Coffee Address: 315,Donghua East Road,GuangZhou
Tel:020 38364473