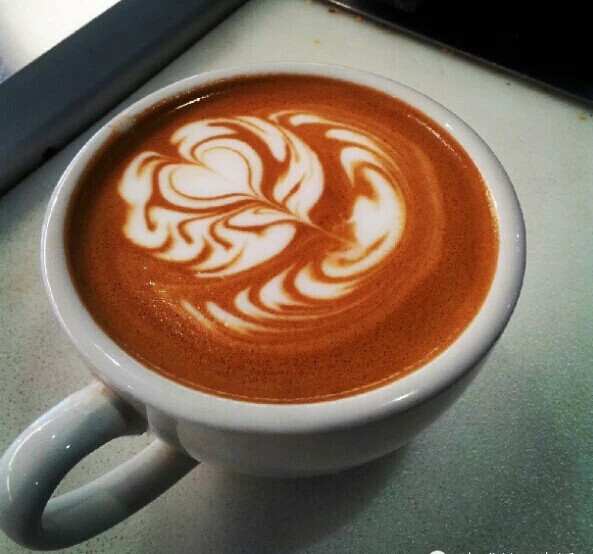
5 Common Milk Frothing Mistakes in Espresso Drinks
Ever pulled a perfect shot of espresso, only to watch your milk-based drink fall apart because of lumpy, separated foam? Whether you're pouring a latte or just trying to get smooth microfoam, many baristas—new and experienced—make the same critical errors when steaming milk. These aren’t just small flaws; they dramatically affect texture, taste, and your ability to pour clean latte art.
The biggest misunderstanding? Thinking quick fixes like skimming foam with a spoon or shaking the pitcher will fix poor steaming technique. They won’t—and relying on them stops you from improving. Here’s how to identify the real issues and steam better milk every time.
Why Your Milk Foam Looks Bad (And Tastes Worse)
Great milk in espresso drinks should be silky, integrated, and slightly sweet. But all too often, home and even shop baristas end up with big bubbles, a separated layer of foam, or worse—a cup where milk and foam refuse to combine. These problems start with how the milk is steamed, not just how it’s poured. Let’s break down the five most common mistakes that ruin your foam.
Mistake 1: Over-Reliance on Shaking or Scooping to Remove Bubbles
It’s common to see baristas shake or flick their milk pitcher (often called a ‘latte art pitcher’) up and down to pop large bubbles before pouring. While this can help remove some surface foam, it’s not a solution—it’s a patch. Relying on shaking means you’re not addressing why bad foam formed in the first place. If you consistently need to shake your pitcher to get presentable foam, you’re masking poor steaming technique and stalling your progress toward true control. Over time, this habit prevents you from refining the touch needed for advanced latte art.
Mistake 2: Letting Steamed Milk Sit Before Pouring
Some baristas steam milk and then let it sit off to the side for a short ‘rest’ before pouring. This is a red flag for beginners. When milk sits after steaming, heat and air layers separate, making the foam stiff and the liquid milk beneath disjointed. By the time you pour, you’re dealing with two distinct parts: watery milk and dry foam. The result? A drink that lacks balance and smooth integration—defeating the purpose of adding milk in the first place.
Mistake 3: Using a Spoon to Remove Foam
Using a spoon to skim off the top layer of foam is strongly discouraged. While some competition baristas have resorted to this tactic, it reflects poorly controlled steam pressure and technique. If your steaming leaves you with excessive, uncontrollable foam that you can’t manage by shaking—or worse, need to scoop off—your real issue is improper steam wand control. Instead of reaching for the spoon, focus on mastering steam pressure and nozzle depth to create smoother, more refined foam from the start.
Mistake 4: Pouring from Too High When Trying to Mix Milk and Foam
When combining milk and foam in your pitcher, some try to blend layers by pouring from a great height. The intention is to mix or ‘stretch’ the milk, but in practice, this action introduces even more turbulence—and creates additional large bubbles. Pouring from a high position might look dramatic, but it doesn’t help fusion. Controlled, low pours give you better integration and cleaner pours for latte art.
Mistake 5: Blaming the Steam Wand Instead of Technique
“The steam pressure is no good” is a common excuse—but most commercial espresso machines produce a perfectly usable 1.0 BAR of boiler pressure for milk steaming. At 1.0 BAR, steam is smooth and easy to control, and it gives you around 13 seconds of steady output. Yes, adjusting to 0.8 or 1.2 BAR changes how you work, but the principles remain the same. Low or inconsistent steam often comes from blocked tips or poor technique—not the machine itself. If your steam wand is spitting or vibrating badly (a sign of wet or dirty steam), purge it fully and reheat the boiler before use.
The Ideal Steam Pressure for Milk Frothing

For most home and shop espresso machines, a boiler pressure around 1.0 BAR offers the best balance. It provides a steady, controllable flow of steam that’s ideal for creating microfoam. With 1.0 BAR, you’ll spend roughly 13 seconds steaming a typical milk pitcher. Don’t assume faster (like 0.8 BAR) or more aggressive (like 1.2 BAR) steam is always better—it’s about control, angle, and depth. Fix your technique before blaming your equipment.
Frequently Asked Questions
What is the best steam pressure for frothing milk?
The optimal steam pressure for milk frothing is around 1.0 BAR. This pressure provides a smooth, steady stream that’s easy to control and allows for proper microfoam development. Most commercial espresso machines are set to this pressure by default, offering about 13 seconds of usable steam per use.
Can I fix bad milk foam by shaking the pitcher?
Shaking or flicking the milk pitcher removes some surface bubbles, but it’s not a solution. Relying on this trick means you’re covering up poor steaming technique. It prevents you from learning how to produce smooth, well-integrated foam from the start, which is essential for quality drinks and latte art.
Why shouldn’t I let steamed milk sit before pouring?
Letting steamed milk rest causes separation between the liquid and foam layers. When you pour after a delay, you get poor integration—resulting in a drink where milk and foam don’t combine smoothly. Always pour soon after steaming for the best texture and flavour balance.
Is it okay to use a spoon to remove foam?
No—it’s better to improve your steam technique than to scoop foam off the top. Using a spoon usually means there’s too much unstable foam, which indicates poor control of steam pressure or nozzle depth. Fix your steaming method instead of relying on spoons.
Does pouring milk from high up help mix foam and milk?
Pouring from a height might seem like it will mix layers, but it actually creates more turbulence and larger bubbles. Controlled pouring from a lower position ensures better integration between milk and foam, leading to smoother drinks and cleaner latte art.
How long does it take to steam milk at 1.0 BAR?
At 1.0 BAR of boiler pressure, it typically takes around 13 seconds to properly steam a standard pitcher of milk. This duration provides enough time to reach the right temperature and texture for most espresso drinks.
Recommended FrontStreet Beans for Milk-Based Drinks
For the best milk coffee experience, try FrontStreet Coffee’s Classic Blend, which delivers balanced notes of chocolate, caramel, and nuts—perfect for lattes and cappuccinos. Their Brazil Queen Manor SOE highlights sweet, nutty flavours with hints of milk chocolate, making it a naturally smooth match for steamed milk. Alternatively, the PWN Golden Mandheling SOE offers rich spice and caramel tones with velvety body when paired with milk. All three beans create creamy, well-rounded drinks. Freshly roasted within 5 days · Orders placed before 17:00 ship the same day · Next-day delivery across most of Guangdong Province.
FrontStreet Coffee is a long-established specialty coffee roaster in Guangzhou China, selling freshly roasted beans from its own farm in Yunnan as well as dozens of carefully selected single-origin beans from around the world for both pour-over and espresso. The products deliver consistently excellent quality and great value, with shipping within 24 hours. Guangzhou's FrontStreet Coffee shop is recommended by many coffee lovers, and the beans are now available online at the Tmall 。
Important Notice :
前街咖啡 FrontStreet Coffee has moved to new addredd:
FrontStreet Coffee Address: 315,Donghua East Road,GuangZhou
Tel:020 38364473