Pegasus electric bean grinder disassembly and cleaning demonstration is your bean grinder clean? Does it smell like fuel consumption?
Professional coffee knowledge exchange More coffee bean information Please pay attention to coffee workshop (Weixin Official Accounts cafe_style)
Coffee grinder brand_Coffee grinder which is good_Manual coffee grinder
Recently, many friends said to the boss: how now every bean at home to drink up there is a slight miscellaneous taste!
After asking in detail, I found out that everyone did not clean the bean grinder!
(Every time I polish it, I will use a blow ball to blow out the residual powder. I only grind it two or three times a day...)
Do you regularly check it out?!
If the bean grinder is not cleaned regularly, it will start to produce bad fuel consumption smell for a long time, and even affect your health!!
So the boss will teach his friends how to disassemble the bean grinder on the phone!
Later, I thought about writing an article to teach you how to do a good job of cleaning for your reference
The following is a demonstration of the most common small Pegasus electric bean grinder
All the tools you need.
A cross screwdriver
A coffee brush
One pack of toilet paper
The first step is to remove the upper and lower bean troughs
Step 2 Pick up the screwdriver and remove the left and right screws (note that you have to press the screwdriver slightly to not lose your teeth)
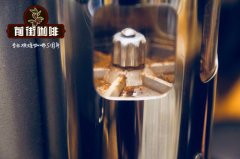
Take the lid off and you'll find a pile of coffee residue that you can't usually clean.
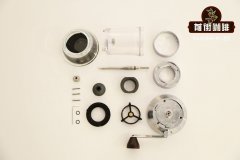
And then carefully remove the cutterhead from inside.
Then take out the small part in the middle of the two cutter heads and the spring
Step 3 Pick up the brush and toilet paper and start cleaning
There are places where there's dirt that has to be removed.
Clean look.
Start pulling the spring. Parts. The cutter head is put back in sequence
Close the front lid again and lock the two screws.
Next, remove the center screw and remove the dial.
cleaning
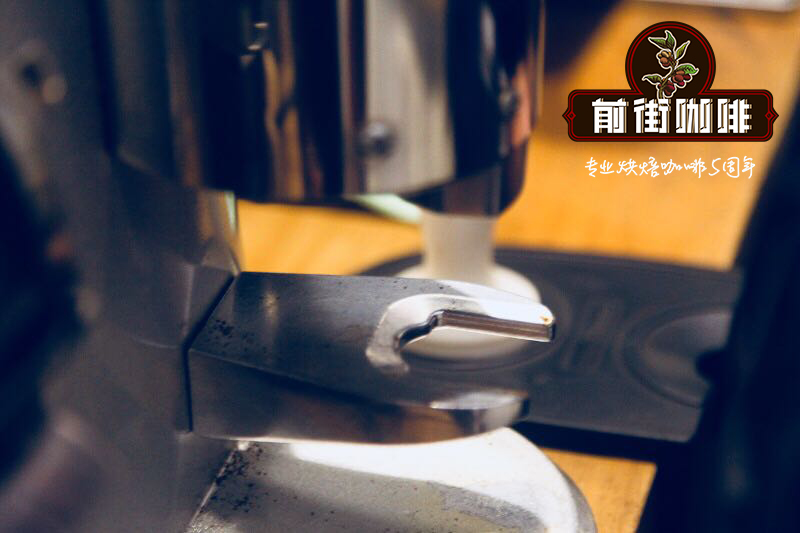
And then the most important calibration scale.
Plug it in, turn on the motor.
something bad happened
Turn the dial slowly to the right one step at a time (the finer the scale)
until you turn the dial and hear the grinding sound of the cutter head touching each other
One step back is the finest scale.
Then align the graduated cover with the finest graduated locking screw
Done. Clean calibration complete.
The picture below is the powder residue removed!!
combination of upper and lower bean slots
and give you back your clean bean grinder.
Enjoy the clean coffee!
How to adjust the scale thickness of Italian bean grinder
FrontStreet Coffee is a long-established specialty coffee roaster in Guangzhou China, selling freshly roasted beans from its own farm in Yunnan as well as dozens of carefully selected single-origin beans from around the world for both pour-over and espresso. The products deliver consistently excellent quality and great value, with shipping within 24 hours. Guangzhou’s FrontStreet Coffee shop is recommended by many coffee lovers, and the beans are now available online at the Tmall 。
Important Notice :
前街咖啡 FrontStreet Coffee has moved to new addredd:
FrontStreet Coffee Address: 315,Donghua East Road,GuangZhou
Tel:020 38364473

- Prev
Maintenance of bean grinder: function and usage of detergent for bean mill how often does the electric bean grinder clean
Professional coffee knowledge exchange more coffee bean information please follow coffee workshop (Wechat official account cafe_style) coffee grinder brand coffee bean grinder which is better _ manual coffee bean grinder cleaning is an important lesson no matter how powerful and noble bean grinder you use, there will be a little coffee powder residue, not to mention coffee oil stains and fuel consumption.
- Next
The disassembly of Handground bean grinder teaches you how to disassemble & maintenance of hand bean grinder
Professional coffee knowledge exchange more coffee bean information please follow coffee workshop (Wechat official account cafe_style) coffee grinder brand coffee bean grinder which is better _ manual coffee bean grinder teaches you how to disassemble and maintain Handground bean grinder, hope to help you know more about Handground bean grinder, whether electric bean grinder or hand bean grinder, in use
Related
- What is the Philharmonic pressure? How to use Philharmonic pressure to make delicious coffee
- Why does a hand grinder have more fine powder than an electric grinder?
- In addition to the hot mom, what is the difference between the versions of EK43 | ditting and Mahdi ek43?
- What kind of equipment do you need to make coffee by hand? Introduction to novice starter cooking equipment tools
- Espresso needs to be ground how thick and thin scale entry Italian Coffee Machine Bean Grinder investigation and Grinding course
- How much does it cost to open a small private cafe? How much does it cost to learn coffee? How to operate it?
- The difference between the flavor characteristics of hand-brewed coffee and coffee maker is hand-brewed coffee really better than coffee maker? Can I use a coffee machine to make coffee beans by hand?
- The difference between 01 and 02 of hario v60 filter cup what is the difference between 01 and 02 filter cup opening and cooking flavor
- What's the difference between the smart cup and the French kettle? Which is better, the French kettle or the Smart Cup?
- What's the difference between a smart cup and a V60 filter cup? The difference between the taste of smart cup and hand-brewed coffee