The disassembly of Handground bean grinder teaches you how to disassemble & maintenance of hand bean grinder
Professional coffee knowledge exchange more coffee bean information please follow the coffee workshop (Wechat official account cafe_style)
Coffee grinder brand _ coffee bean grinder which is better _ manual coffee bean grinder
Teach you how to disassemble and maintain Handground bean grinder. I hope it can help you know more about Handground bean grinder.
Whether it is an electric bean grinder or a manual bean grinder, the bean grinder must be cleaned regularly and thoroughly after using it for a period of time, so as to keep the grinding quality of the coffee beans in tune with the taste of the coffee powder and ensure that every mouthful is the ideal perfect flavor.
In order to help friends who use Handground to better understand the structure and correct cleaning method of the bean grinder, we have specially compiled the graphical maintenance and disassembly steps of the Handground bean grinder, hoping to solve your confusion when cleaning.
Step one
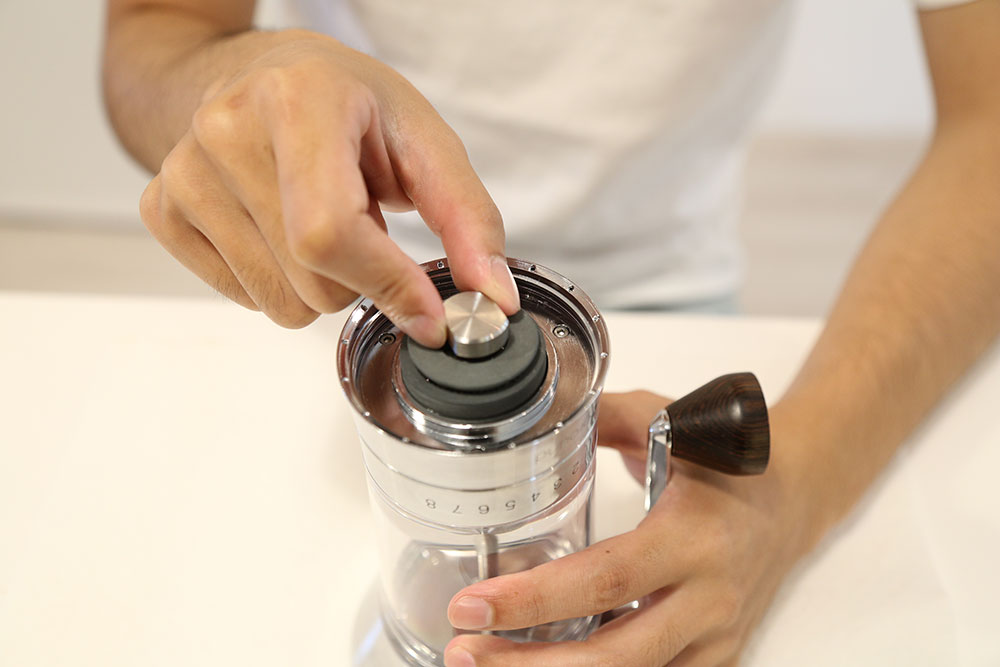
First of all, turn down the large screw nut under the grinding plate (the other hand can be fixed with the tiger mouth side handle, as shown below).
Step two
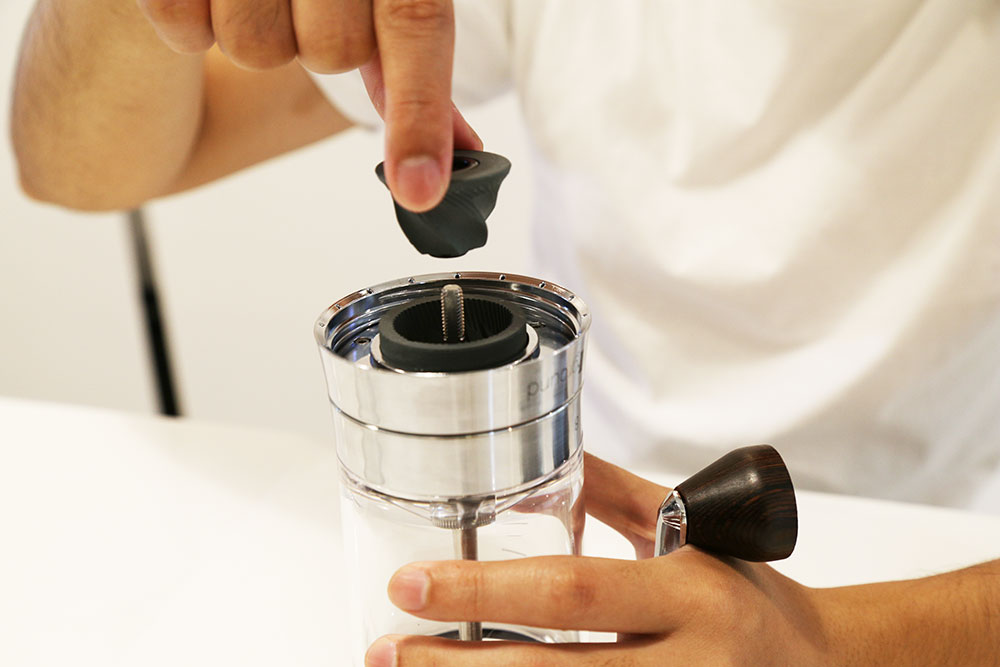
Then, after adjusting the scale to "eight", remove the lower grinding plate and start cleaning (as shown below) (you can check whether the plastic parts of the lower grinding plate are smooth, if uneven may lead to uneven grinding)
Step three
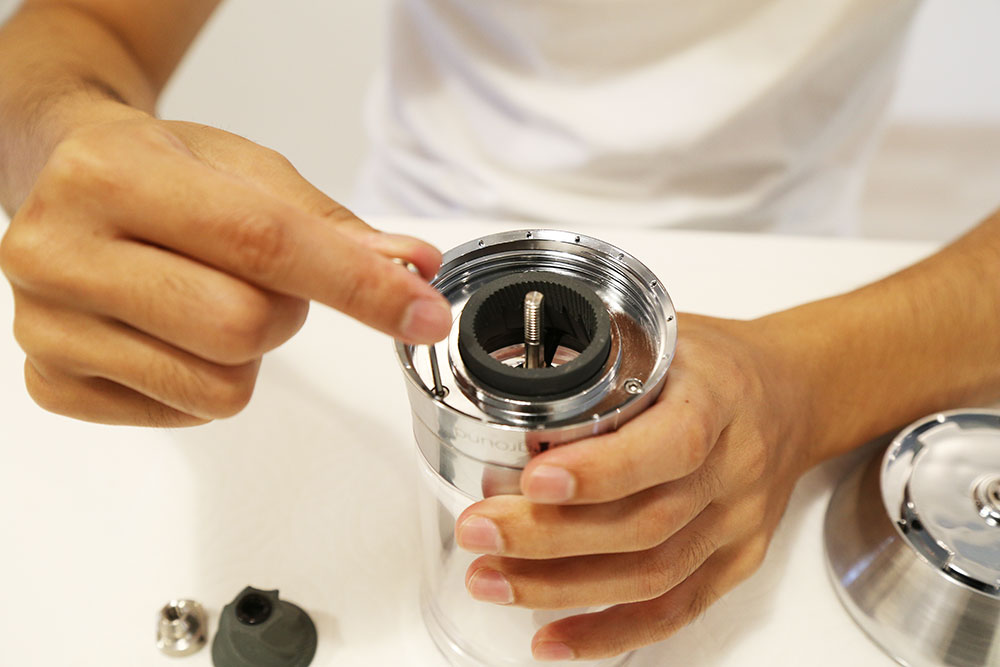
Using the included hexagonal wrench, remove the three screws in the following picture (please remember to put them away).
Step 4
Remove [upper grinding plate] and [adjusting ring] (as shown in the following figure).
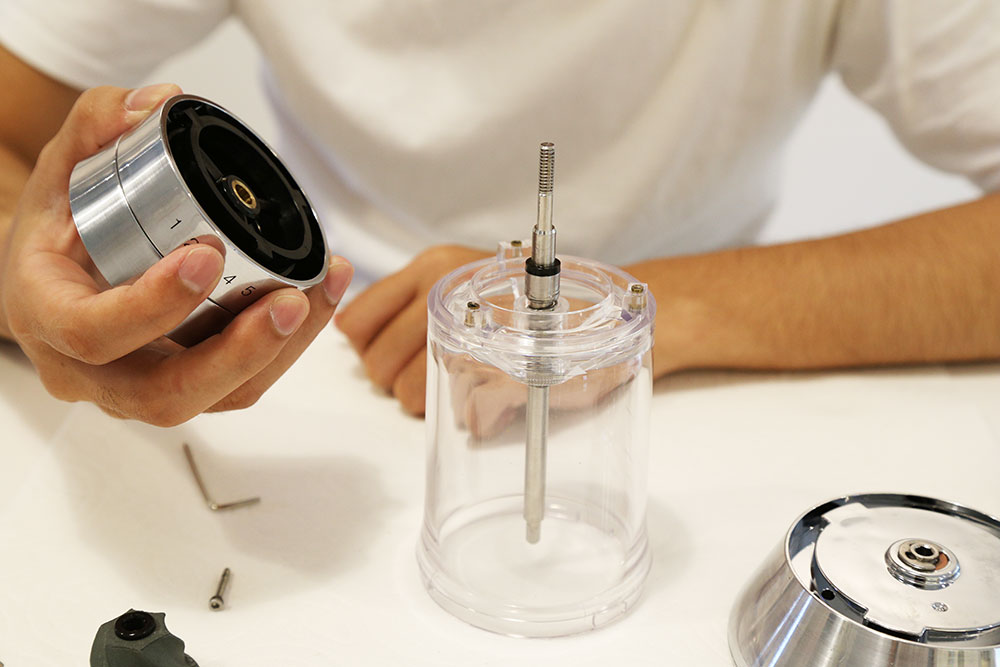
Step 5
As shown in the following picture: the [shaft] can be removed directly, and there will be residual lubricant on part of the machine [at the shaft spring], which can be removed with general dishwashing essence.
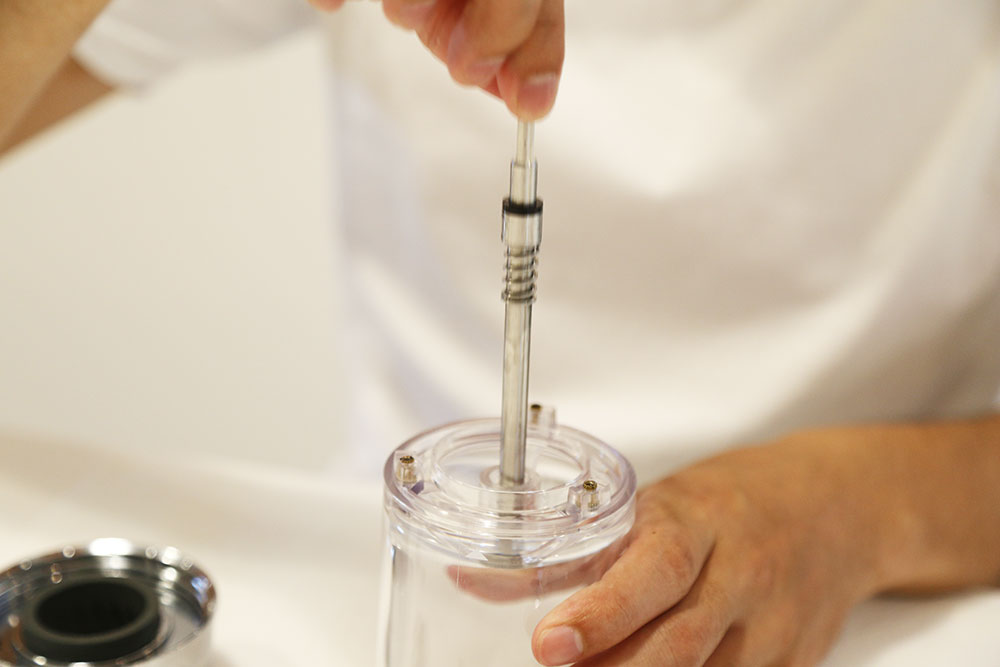
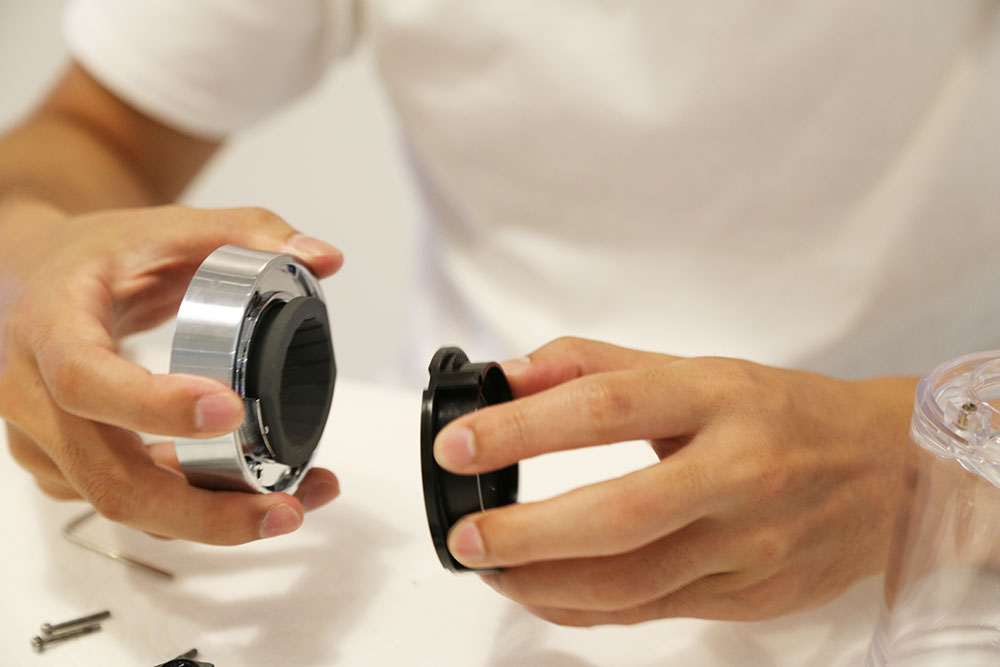
Step 6
After disassembling the [adjusting ring], you can remove the [upper grinding plate] to clean (as shown in the following picture).
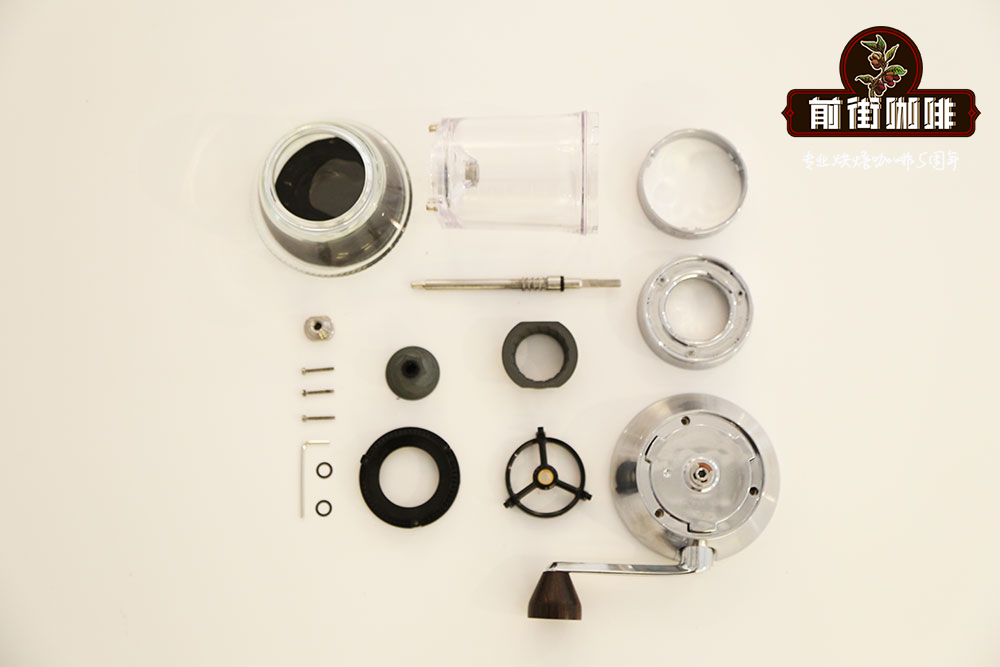
The following are the disassembled parts and the accompanying hexagonal hand and gasket (the two smallest round gaskets in the lower left corner).
Add the complimentary gasket to the position in the following picture to make the grinding degree of coffee powder finer.
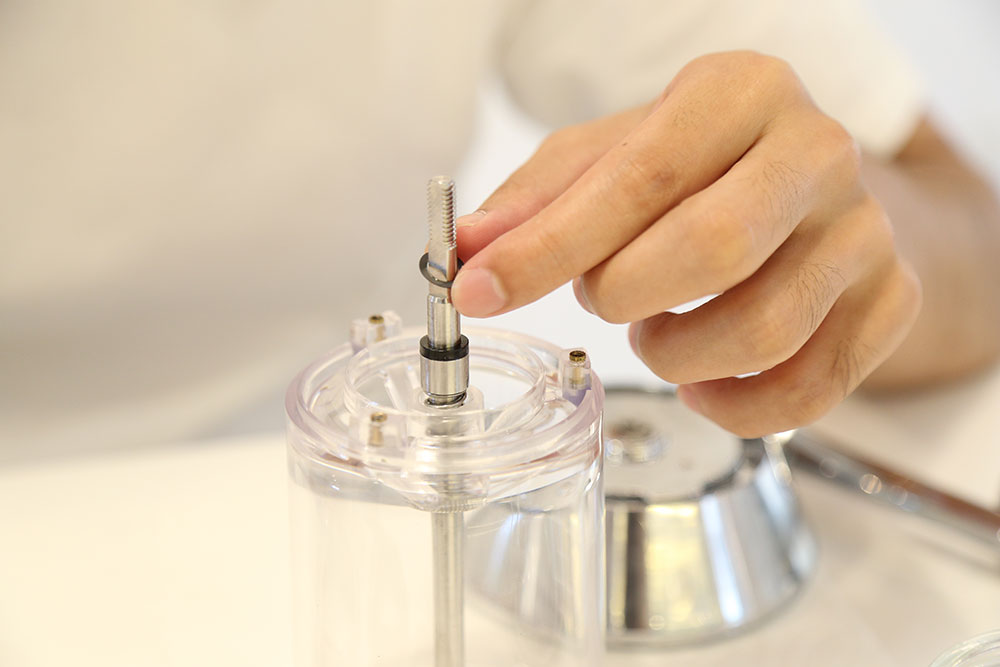
People who like to drink espresso can try it.
The [middle of the rotating ring] in the image below also has a lubricant, which can also be removed by the previous method. Finally, according to the order of disassembly, the parts can be assembled back one by one.
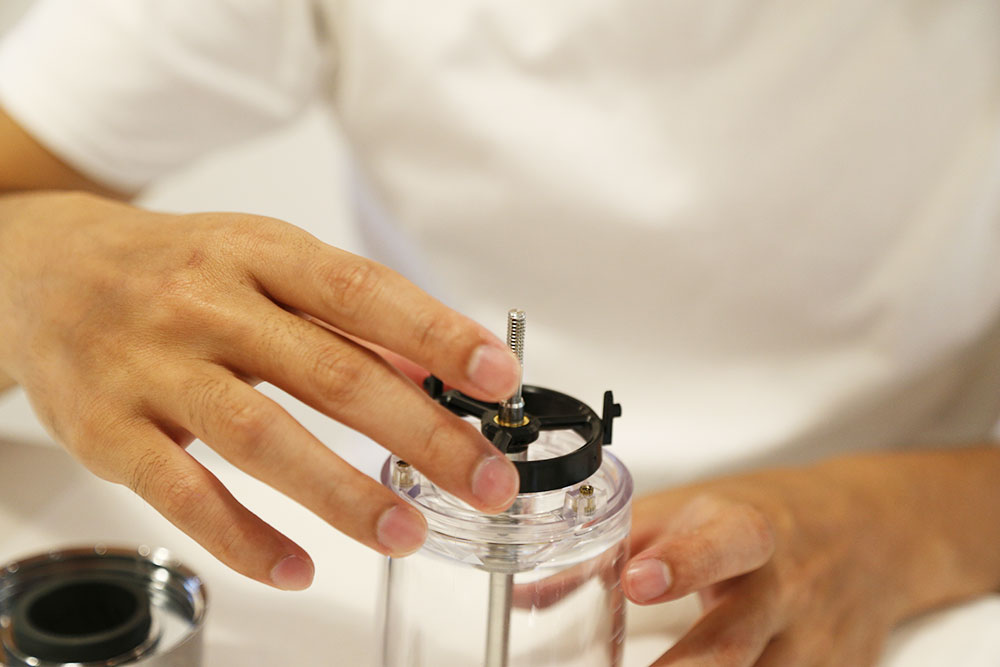
Although the maintenance and cleaning needs to disassemble the parts is a laborious task, a well-cleaned bean grinder is not only more durable, but also ensures the same quality of the ground coffee powder.
Graphic introduction of how to adjust the scale of Italian bean grinder
Important Notice :
前街咖啡 FrontStreet Coffee has moved to new addredd:
FrontStreet Coffee Address: 315,Donghua East Road,GuangZhou
Tel:020 38364473
- Prev
Pegasus electric bean grinder disassembly and cleaning demonstration is your bean grinder clean? Does it smell like fuel consumption?
Professional coffee knowledge exchange more coffee bean information please follow the coffee workshop (Wechat official account cafe_style) coffee grinder brand _ coffee bean grinder which is good _ manual coffee bean grinder recently many friends said to the boss: why every bean at home now has a slight smell! After asking in detail, I found that everyone did not clean the bean grinder! (
- Next
Common coffee beans roaster types and roaster brands introduced from home coffee roasters recommended
Professional coffee knowledge exchange More coffee bean information Please pay attention to coffee workshop (Weixin Official Accounts cafe_style) coffee bean roaster brand_coffee bean roaster price_coffee bean roaster shopping guide In the factors affecting the taste of a cup of coffee, raw beans account for 60%, roasting accounts for 30%, extraction accounts for 10%, good roasting can bring the personality of raw beans to the extreme and minimize defects
Related
- What is the Philharmonic pressure? How to use Philharmonic pressure to make delicious coffee
- Why does a hand grinder have more fine powder than an electric grinder?
- In addition to the hot mom, what is the difference between the versions of EK43 | ditting and Mahdi ek43?
- What kind of equipment do you need to make coffee by hand? Introduction to novice starter cooking equipment tools
- Espresso needs to be ground how thick and thin scale entry Italian Coffee Machine Bean Grinder investigation and Grinding course
- How much does it cost to open a small private cafe? How much does it cost to learn coffee? How to operate it?
- The difference between the flavor characteristics of hand-brewed coffee and coffee maker is hand-brewed coffee really better than coffee maker? Can I use a coffee machine to make coffee beans by hand?
- The difference between 01 and 02 of hario v60 filter cup what is the difference between 01 and 02 filter cup opening and cooking flavor
- What's the difference between the smart cup and the French kettle? Which is better, the French kettle or the Smart Cup?
- What's the difference between a smart cup and a V60 filter cup? The difference between the taste of smart cup and hand-brewed coffee

